By Russ Lockwood
Designer: Jon Compton, Lembit Tohver
Publisher: Turning Point Simulations
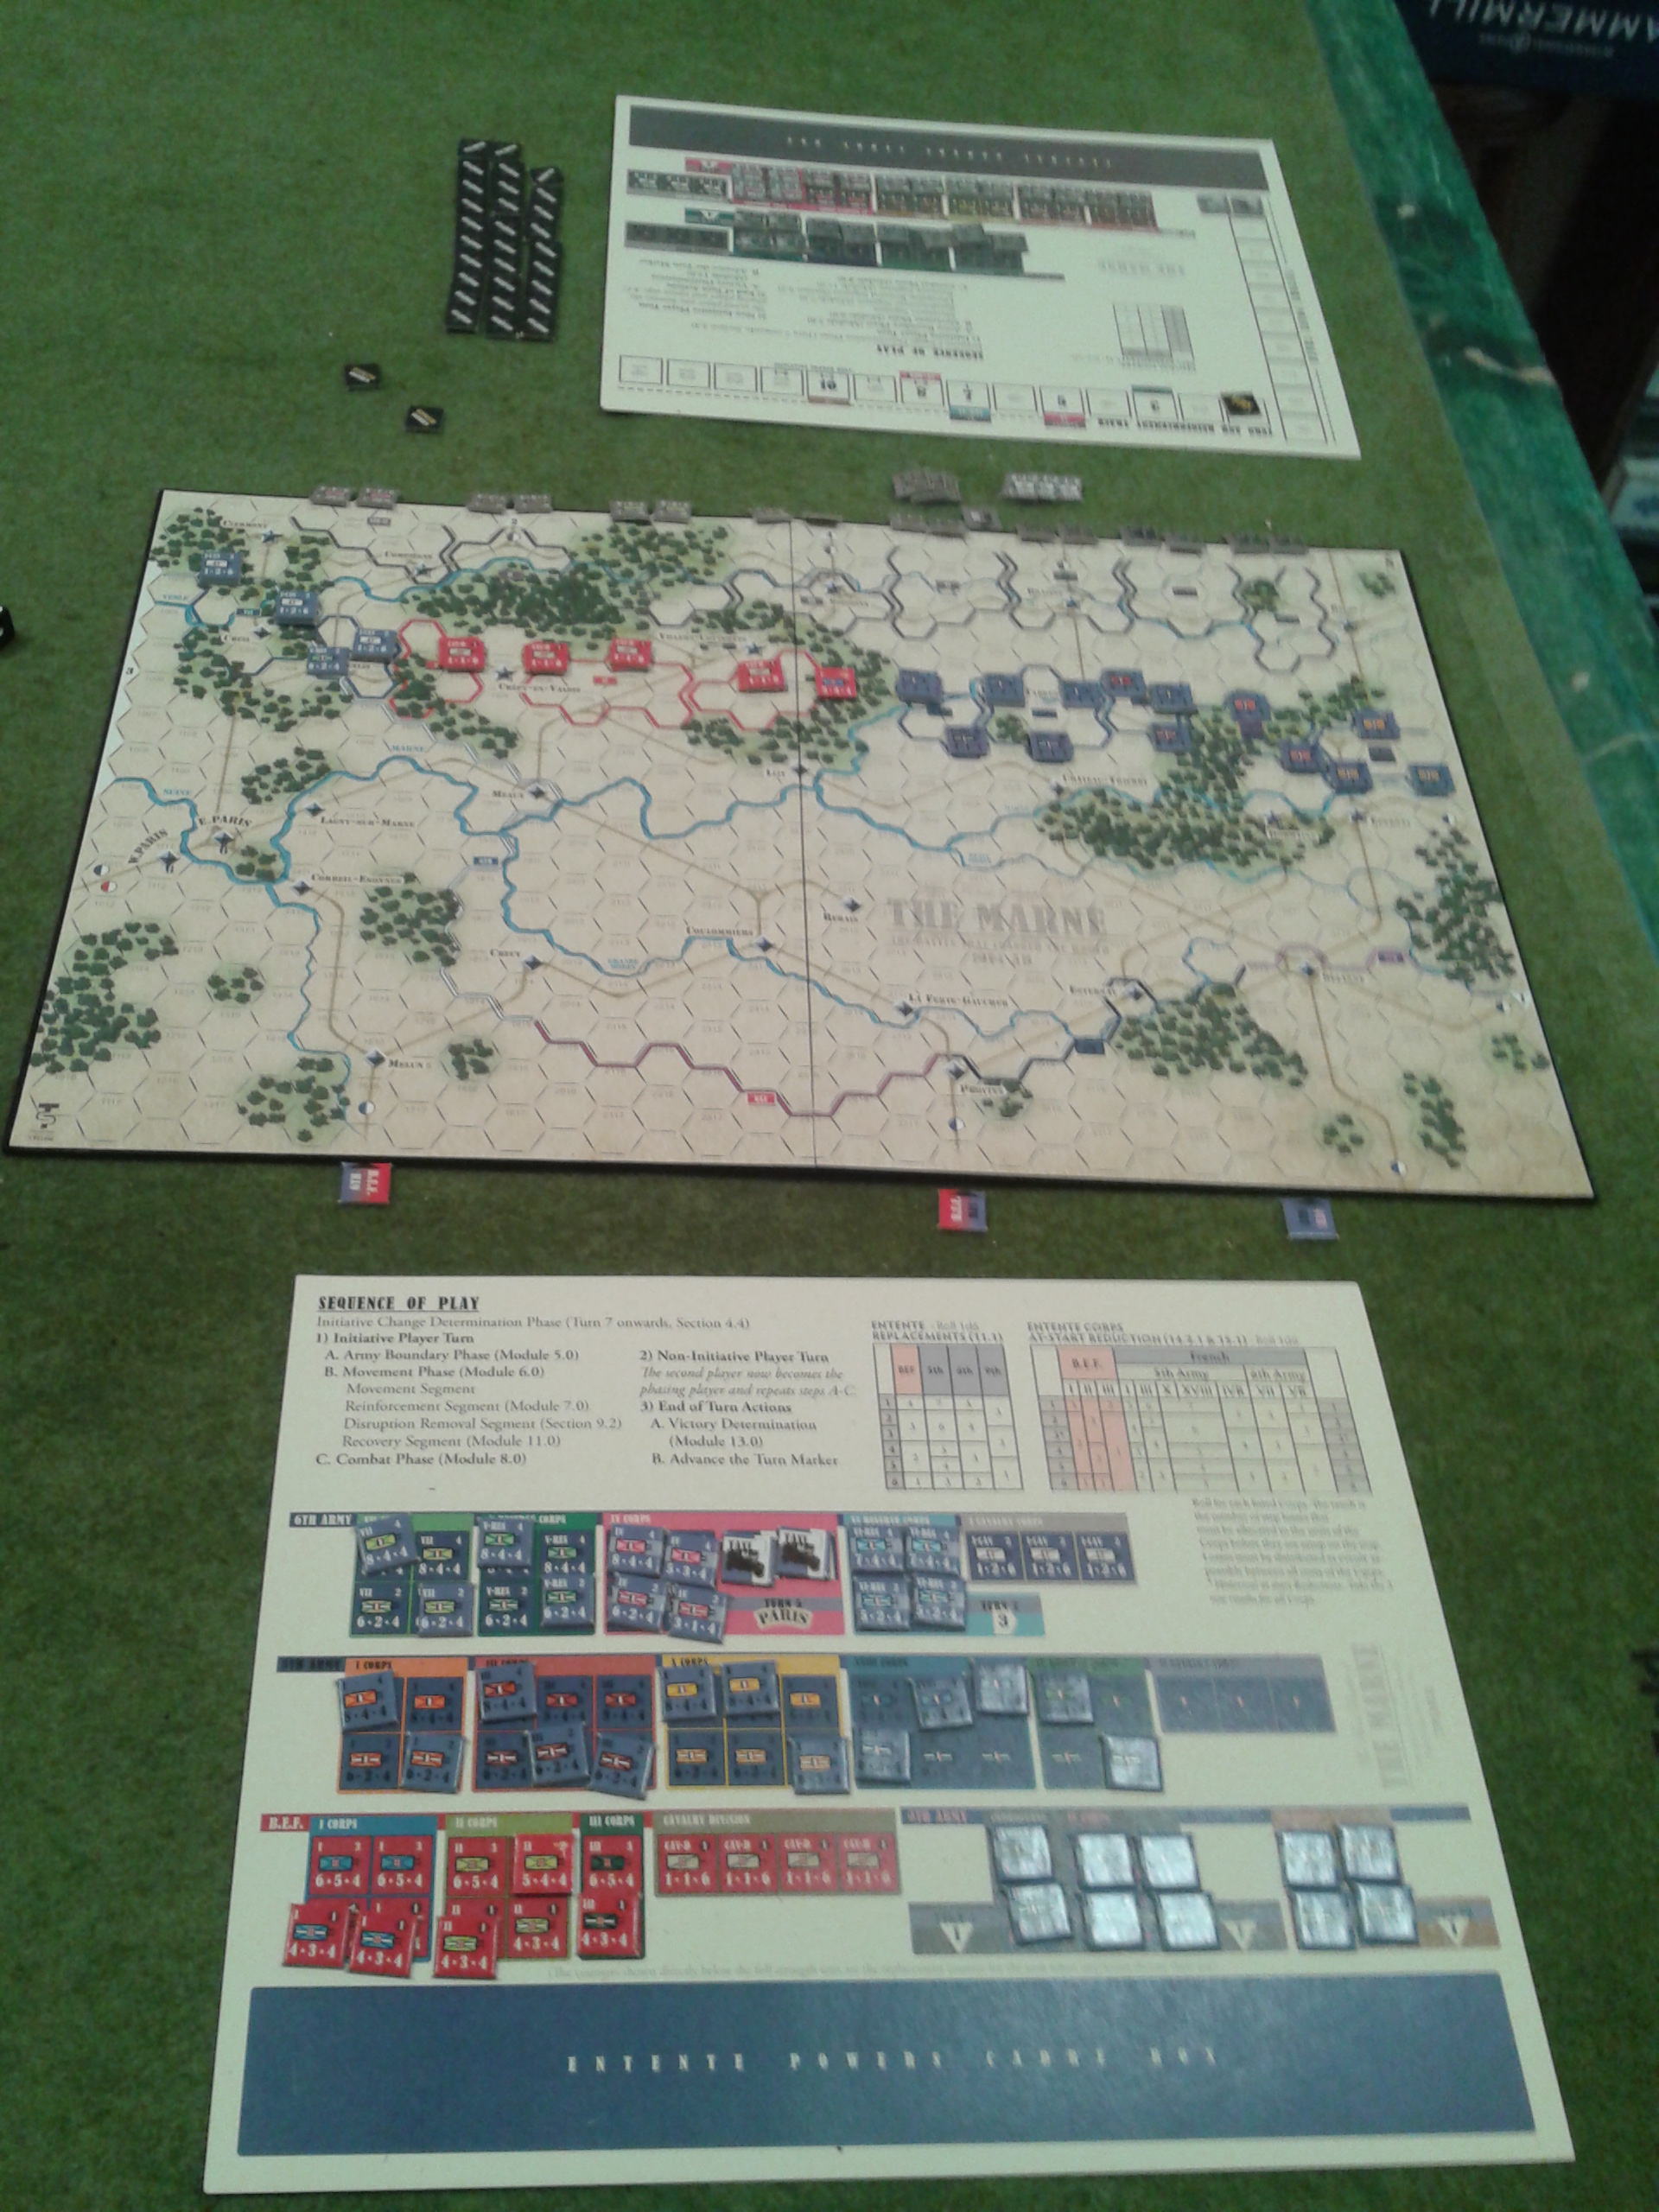
Talk about miracles. It’s a miracle any wargame company makes a mounted map ala the old Avalon Hill games of yesteryear. Yet, that’s exactly what’s in Turning Point Simulations’ Marne 1914 game — a mounted game map. Granted, it’s only half a map measuring 11 inches by 17 inches, but mounted it is and a nice change of pace from paper maps.
Mapboard, setup and player aid cards. BEF (red counters) in the center, with French VIth Army to let (west) and Vth Army to right (east). Apologies in advance for blurriness and glare.
No, Hasbro’s mass-marketed Axis and Allies games don’t count. I’m sure other ‘niche wargames’ (well, niche to the general public, but mainstream to me) examples exist, perhaps even the entire TPS line, but it’s been a while.
As for the map…oooo…shiny. I’m of two minds with printing the starting locations and the ‘rally line’ on the map — easy to set up, but a little jarring during play. Towns get marked with a diamond or star, which are important for victory-point calculations — practical if at odds with the rest of the graphics.
Map scale is 5 to 6 km per hex, or about 3.5 miles to the hex. The game covers September 1 to 14, 1914 and each turn equals one day. Marne 1914 carries a retail price of $35.
Marne 1914 even comes with a plastic, compartmentalized tray for the counters, similar to the old SPI games — indeed, with a clear plastic cover, it does have that SPI look and feel. No cardboard box, just the plastic cover and tray.
Units are infantry divisions (four-step units…i.e. two counters per division) and cavalry brigades (two-step units…i.e. one counter). You don’t get many units and indeed you don’t need many on a small map. The Germans ultimately get 20 infantry divisions (14 at start) and two cavalry corps (three units each, all at start) against ultimately 26 French infantry divisions (19 at start), 5 British infantry divisions (all five at start), two cavalry corps (three units each, all at start), and one British cavalry division (four units, treated as a ‘corp’, and all at start).
Seein’ is Believin’
Mark Mahaffrey is listed as the graphics guy and he did a smart job with the counters. Yes, British are red, the Frenchies are blue, the Germans are gray, what else can you do?
Well, Mark made the background on the NATO symbol a different color for each division and made the combat and movement factors for each army a different color. You can easily differentiate units at a glance, which is important because divisions within the same corp need to be within three hexes of each other (corp integrity) and units within an army cannot shift over the army boundary into another army’s area.
Masuria 1915 did something similar with the counters, but the colors didn’t pop as much.
Furthermore, even aging eyes like mine can read the factors on Marne 1914’s 1/2-inch counters without squinting. I almost spiked my reading glasses!
A nice play-aid card, one for each player, differentiates the units, reinforcements, replacements, and so on with the utmost in clarity.
If I am going to tweak his work, it’s that the map contained a woods/swamp hex combo that is not on the Terrain Effects Chart. Dennis and I treated it as woods, and indeed, we were correct in doing so, according to designer Lembit Tohver, who was quick to answer questions we posed (the website has an errata section, hopefully now including the questions we asked – if not, clarifications at the end of this Review/AAR).
One noticeable anomaly: the 200-counter counter sheet has 42 blank counters. Misprint? No. As Lember noted, the game needed 158 counters and the nearest standard production die was for 200. TPS advertises it as a 150-counter game, which is A-OK with me.
Rules of Engagement
The rules are only 12 pages long, with the front page (Page 1) a table of contents, the last page (Page 12) containing a variety of charts, the inside back page (Page 11) credits and a photo, and Pages 9 and 10 including two scenarios and optional rules.
That means the rules are only seven pages long and the mechanics are relatively easy to learn. TPS labels this a medium-complexity game. It has a couple twists, but that’s about right.
As for the clarity of the rules, well, as you know from my other AARs/Reviews, no rules are perfect. We always have questions. Admittedly, nitpicky questions at times, but questions that arise from playing multiple games. Lembit’s answers to the 17 questions we posed solved just about everything we encountered. By the end of game two, we were playing the situation, not wrestling with the rules.
Two scenarios: we played the Full Battle of September 1 to 14 (14 turns), but a shorter six-turn game from September 9 to 14 is also available.
GAME THE FIRST
We set up the longer scenario, using the historical strengths — the French Vth Army and BEF were beat up and start at less than full strength. The game also offers an optional variable (die roll) starting strength.
Game the First: End of Turn 1.
See Spot. See Spot Run.
Here Comes the Hun.
The German 1st and 2nd Armies are heading South, with the initiative, having curled in northeastward of Paris. The BEF and the French Vth and VIth Armies are trying to stop them.
However…
Like a Monty Python moment, the French Army and BEF run away, run away, and run away some more. Indeed, half the game is spent running away and there is not a damn thing you can do about it. Literally, the rules say that if an Entente unit is within two hexes of a German, its first move MUST be one hex south, southeast, or southwest. After that, the rules remain mum…and needed clarification from Lembit.
We didn’t know whether Entente units could back up that one hex and stop, or be forced to back up outside two-hex range, or even double back and attack the Germans.
Lembit noted that after the first hex move, an Entente unit may stop, but doesn’t have to, even if it is adjacent to a German unit or within two hexes of a German unit. It NEVER advances north, even if no German unit is around, and NEVER attacks any German unit unless it happens to stop adjacent to one due to Zone of Control issues.
The idea is that the French and BEF are beat-up, bedraggled, and with morale almost broken. This requirement to run away ceases if a unit reaches a Rally Line (printed on the map) or the Entente grabs initiative from the Germans.
Our game lasted three turns, but we ended it due to many questions about the rules and this nagging feeling that we were missing something. We were…
Combat Mechanic
 It gets worse for the Entente. How? The whole bloody army is unsupplied, so attack at half strength.
Stacking is one infantry unit per hex, although you can stack cavalry units with the infantry unit.
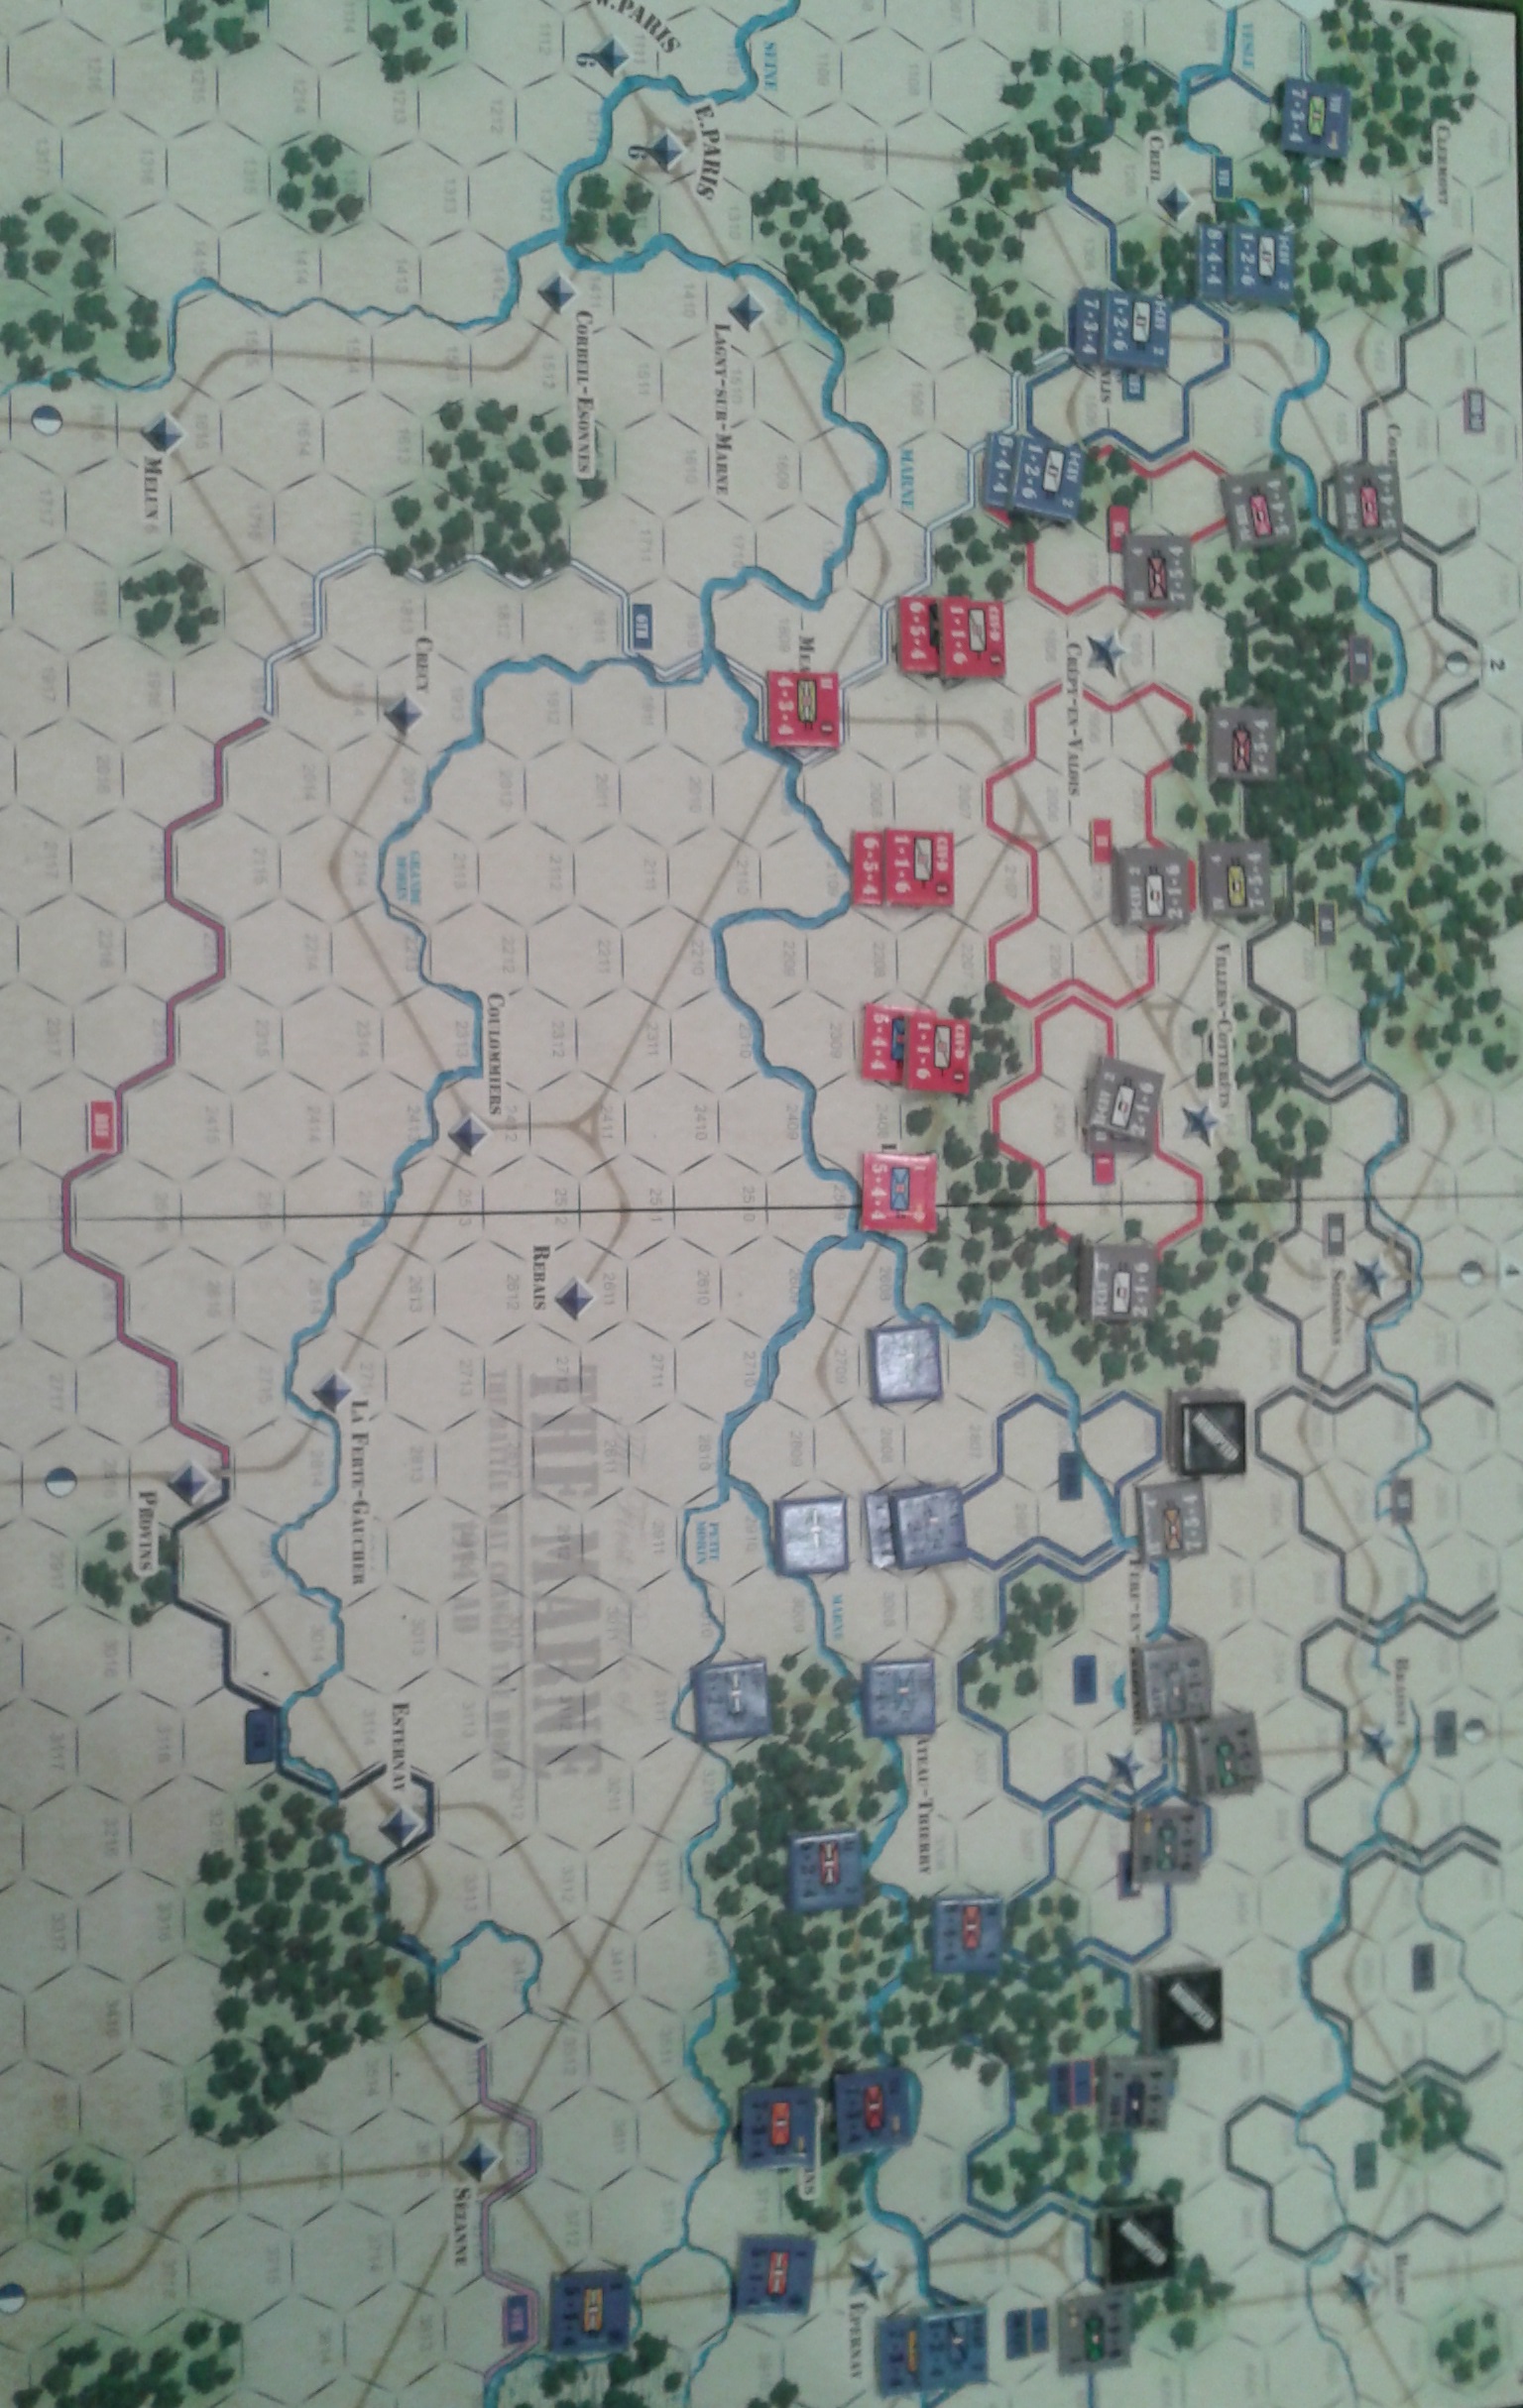
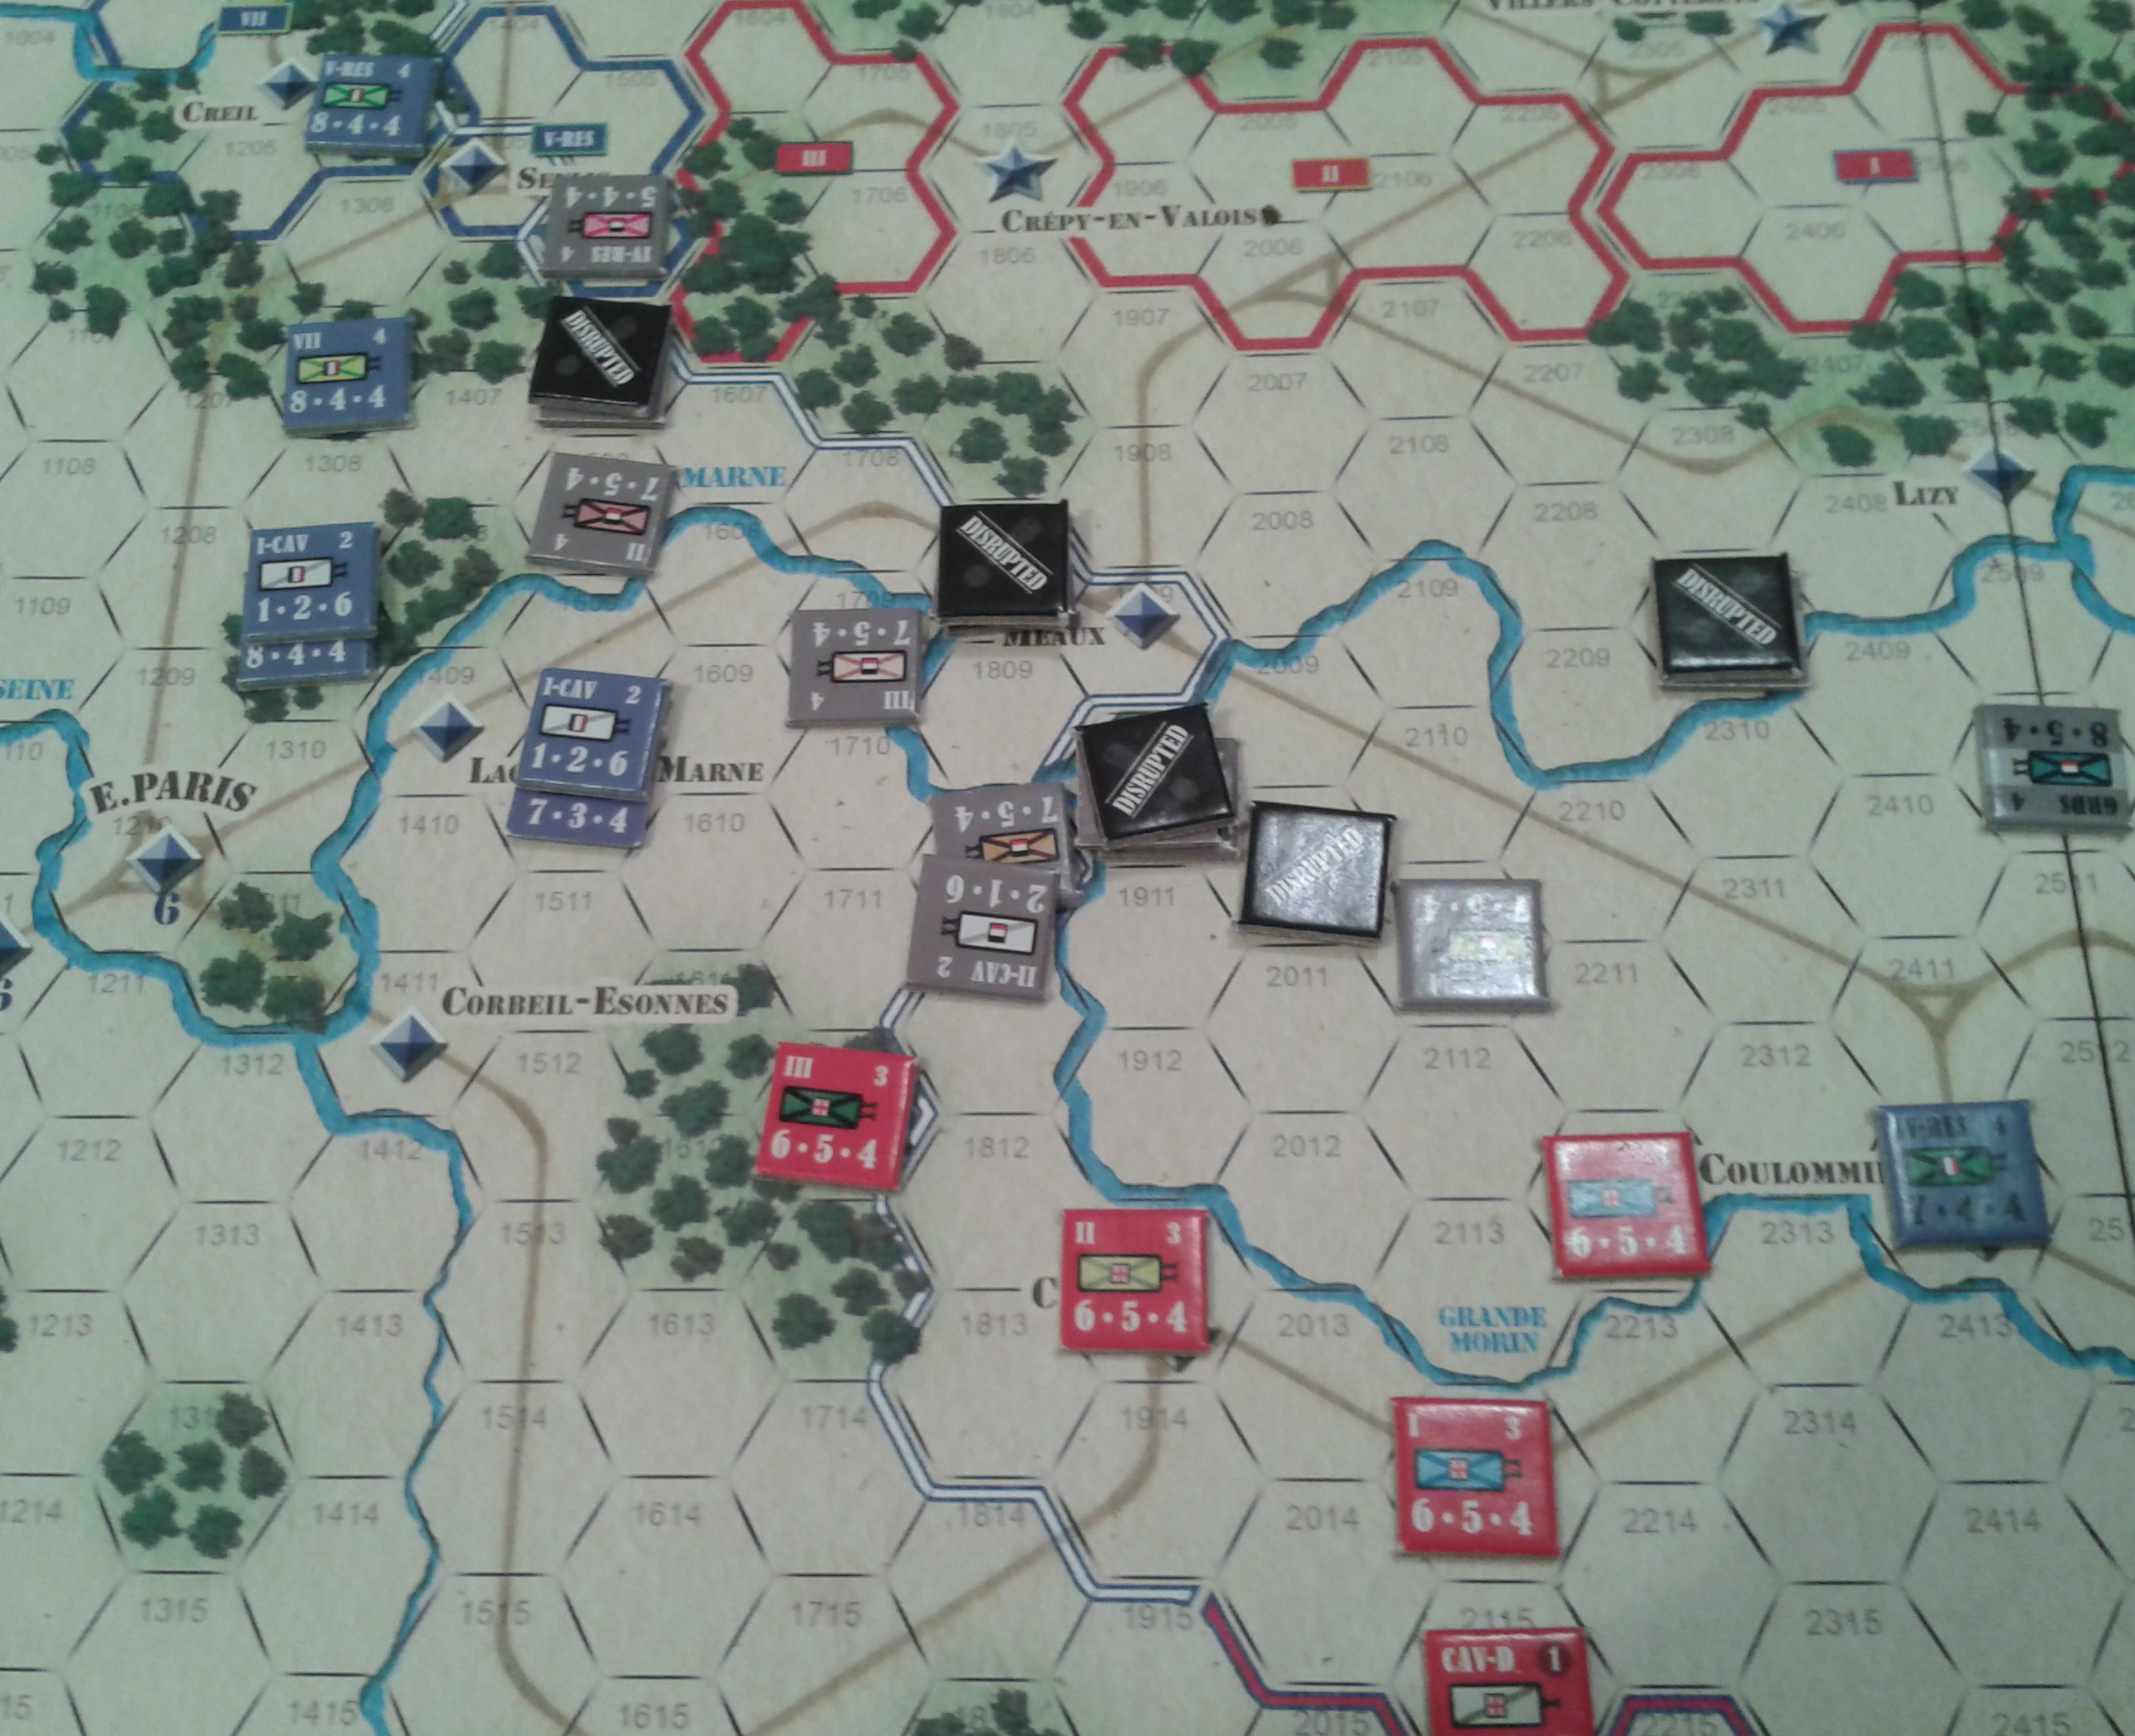
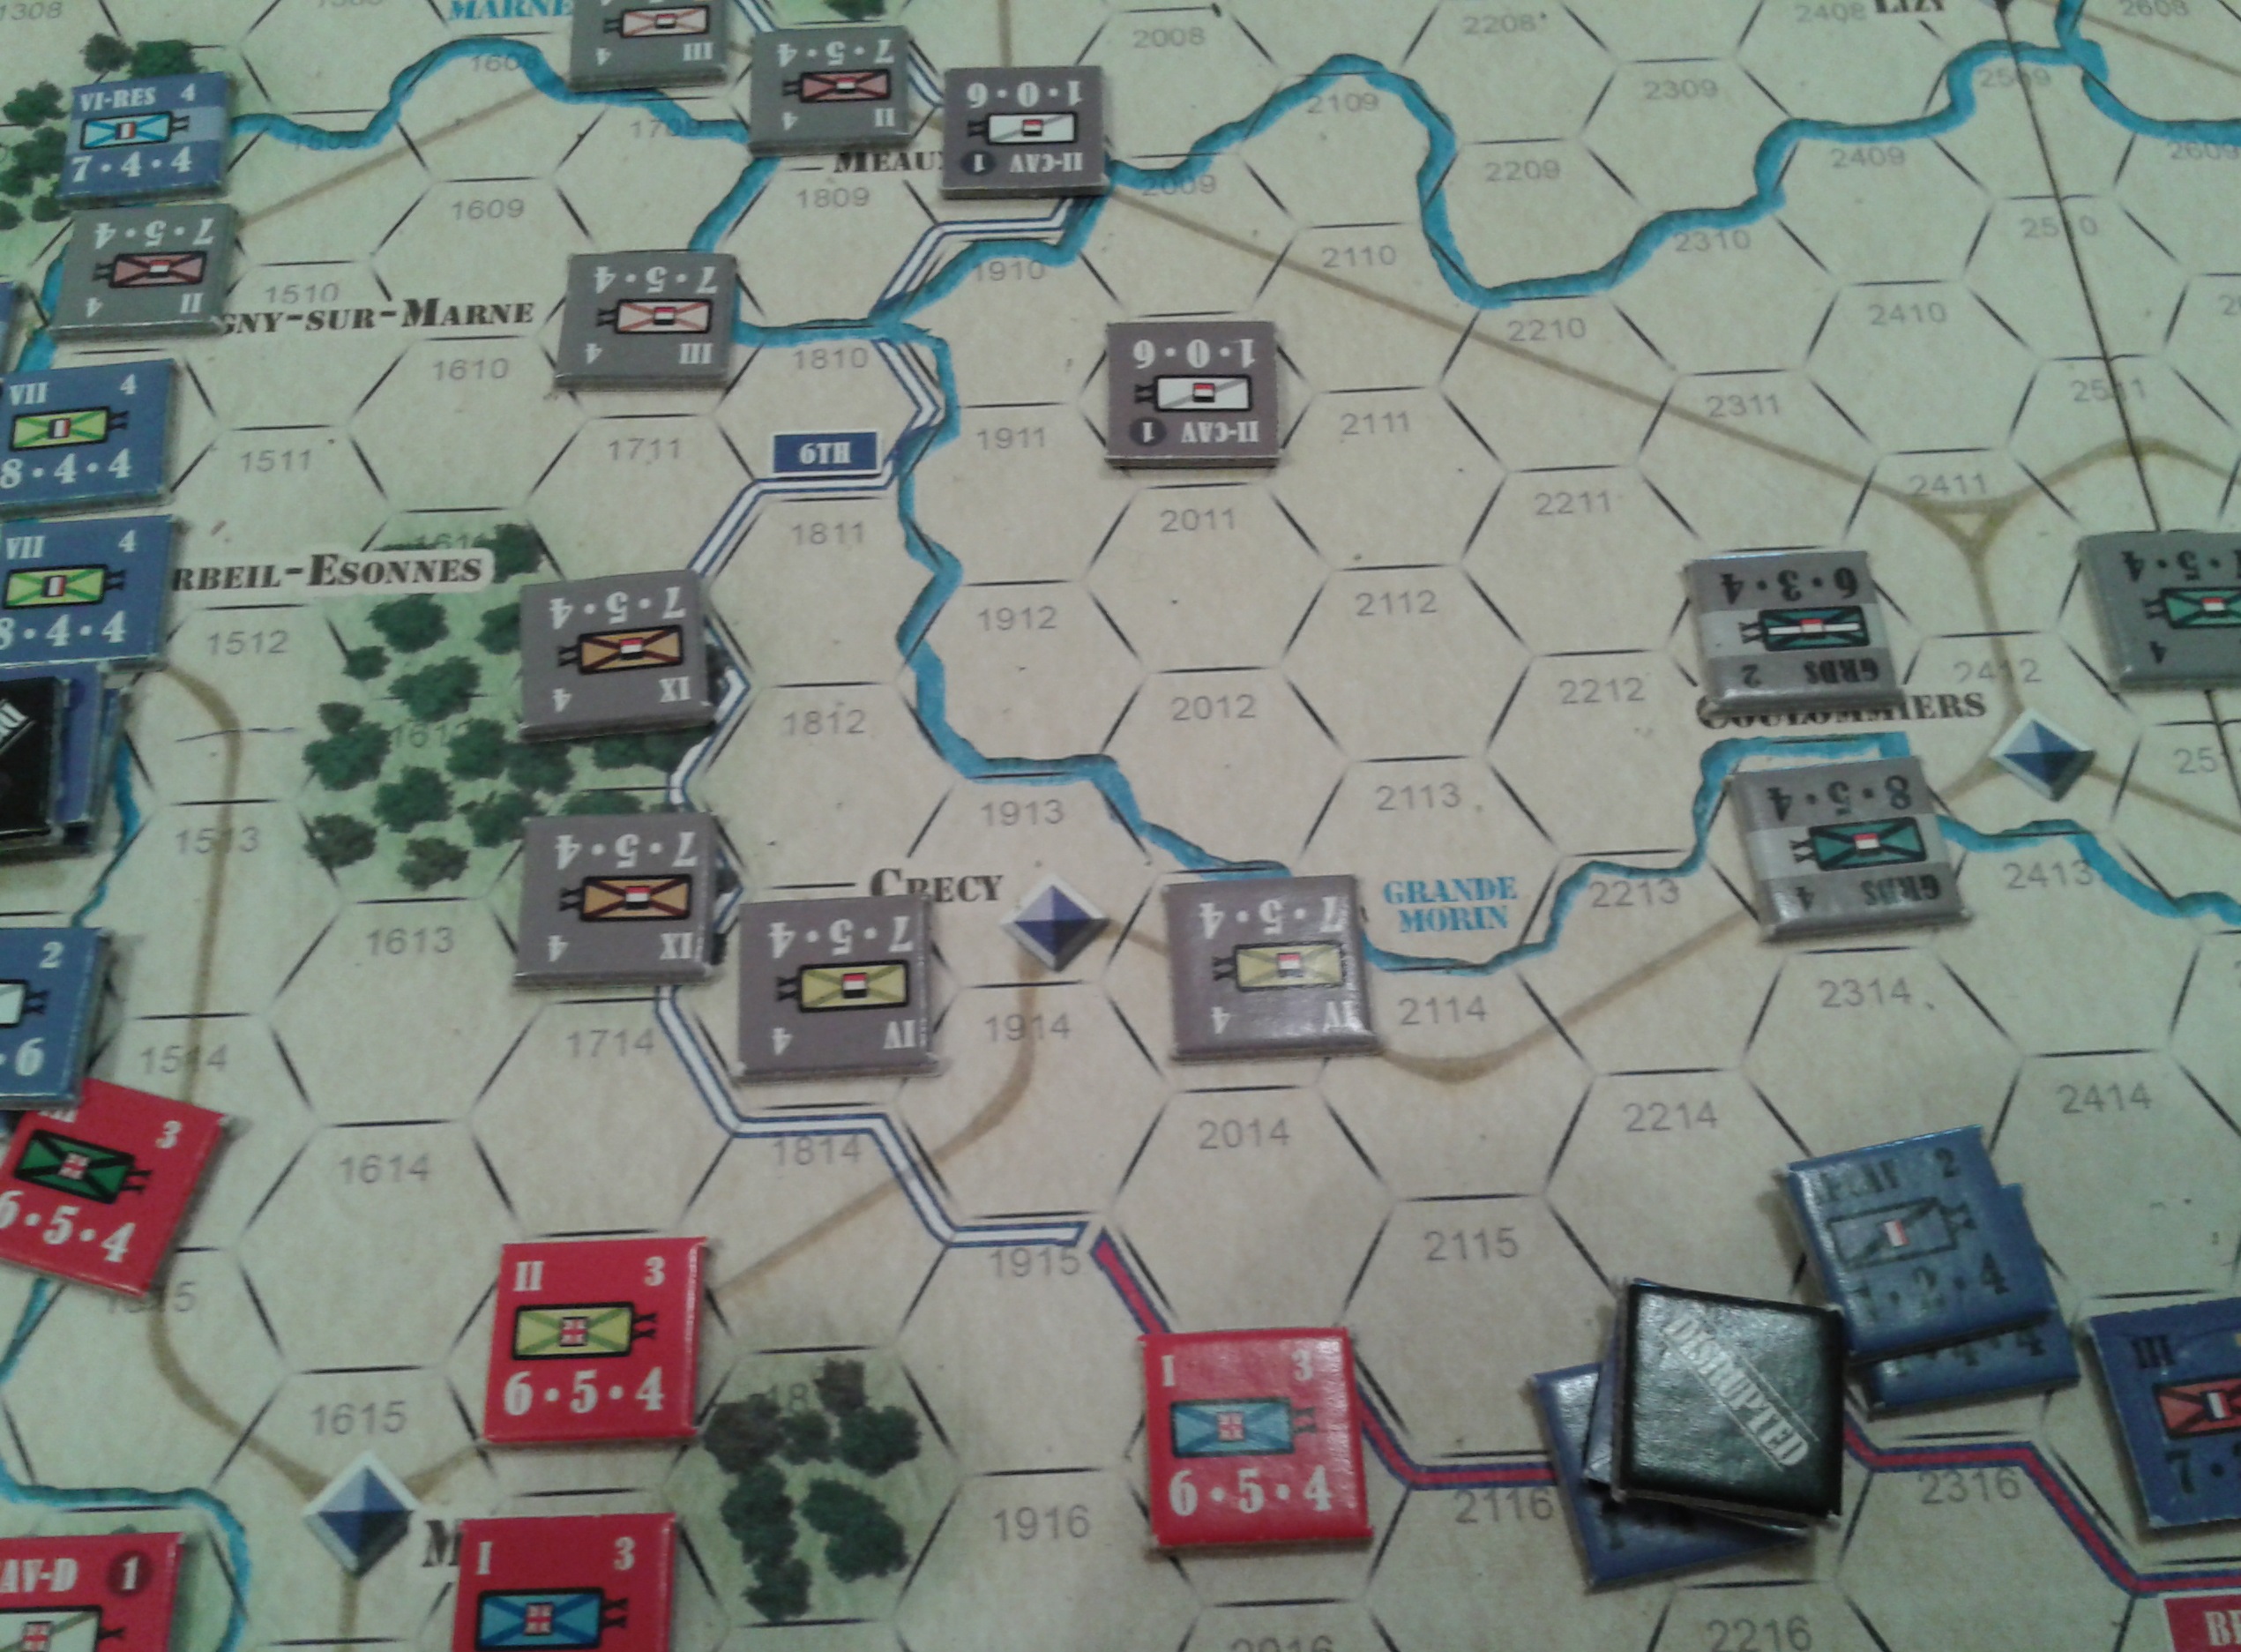
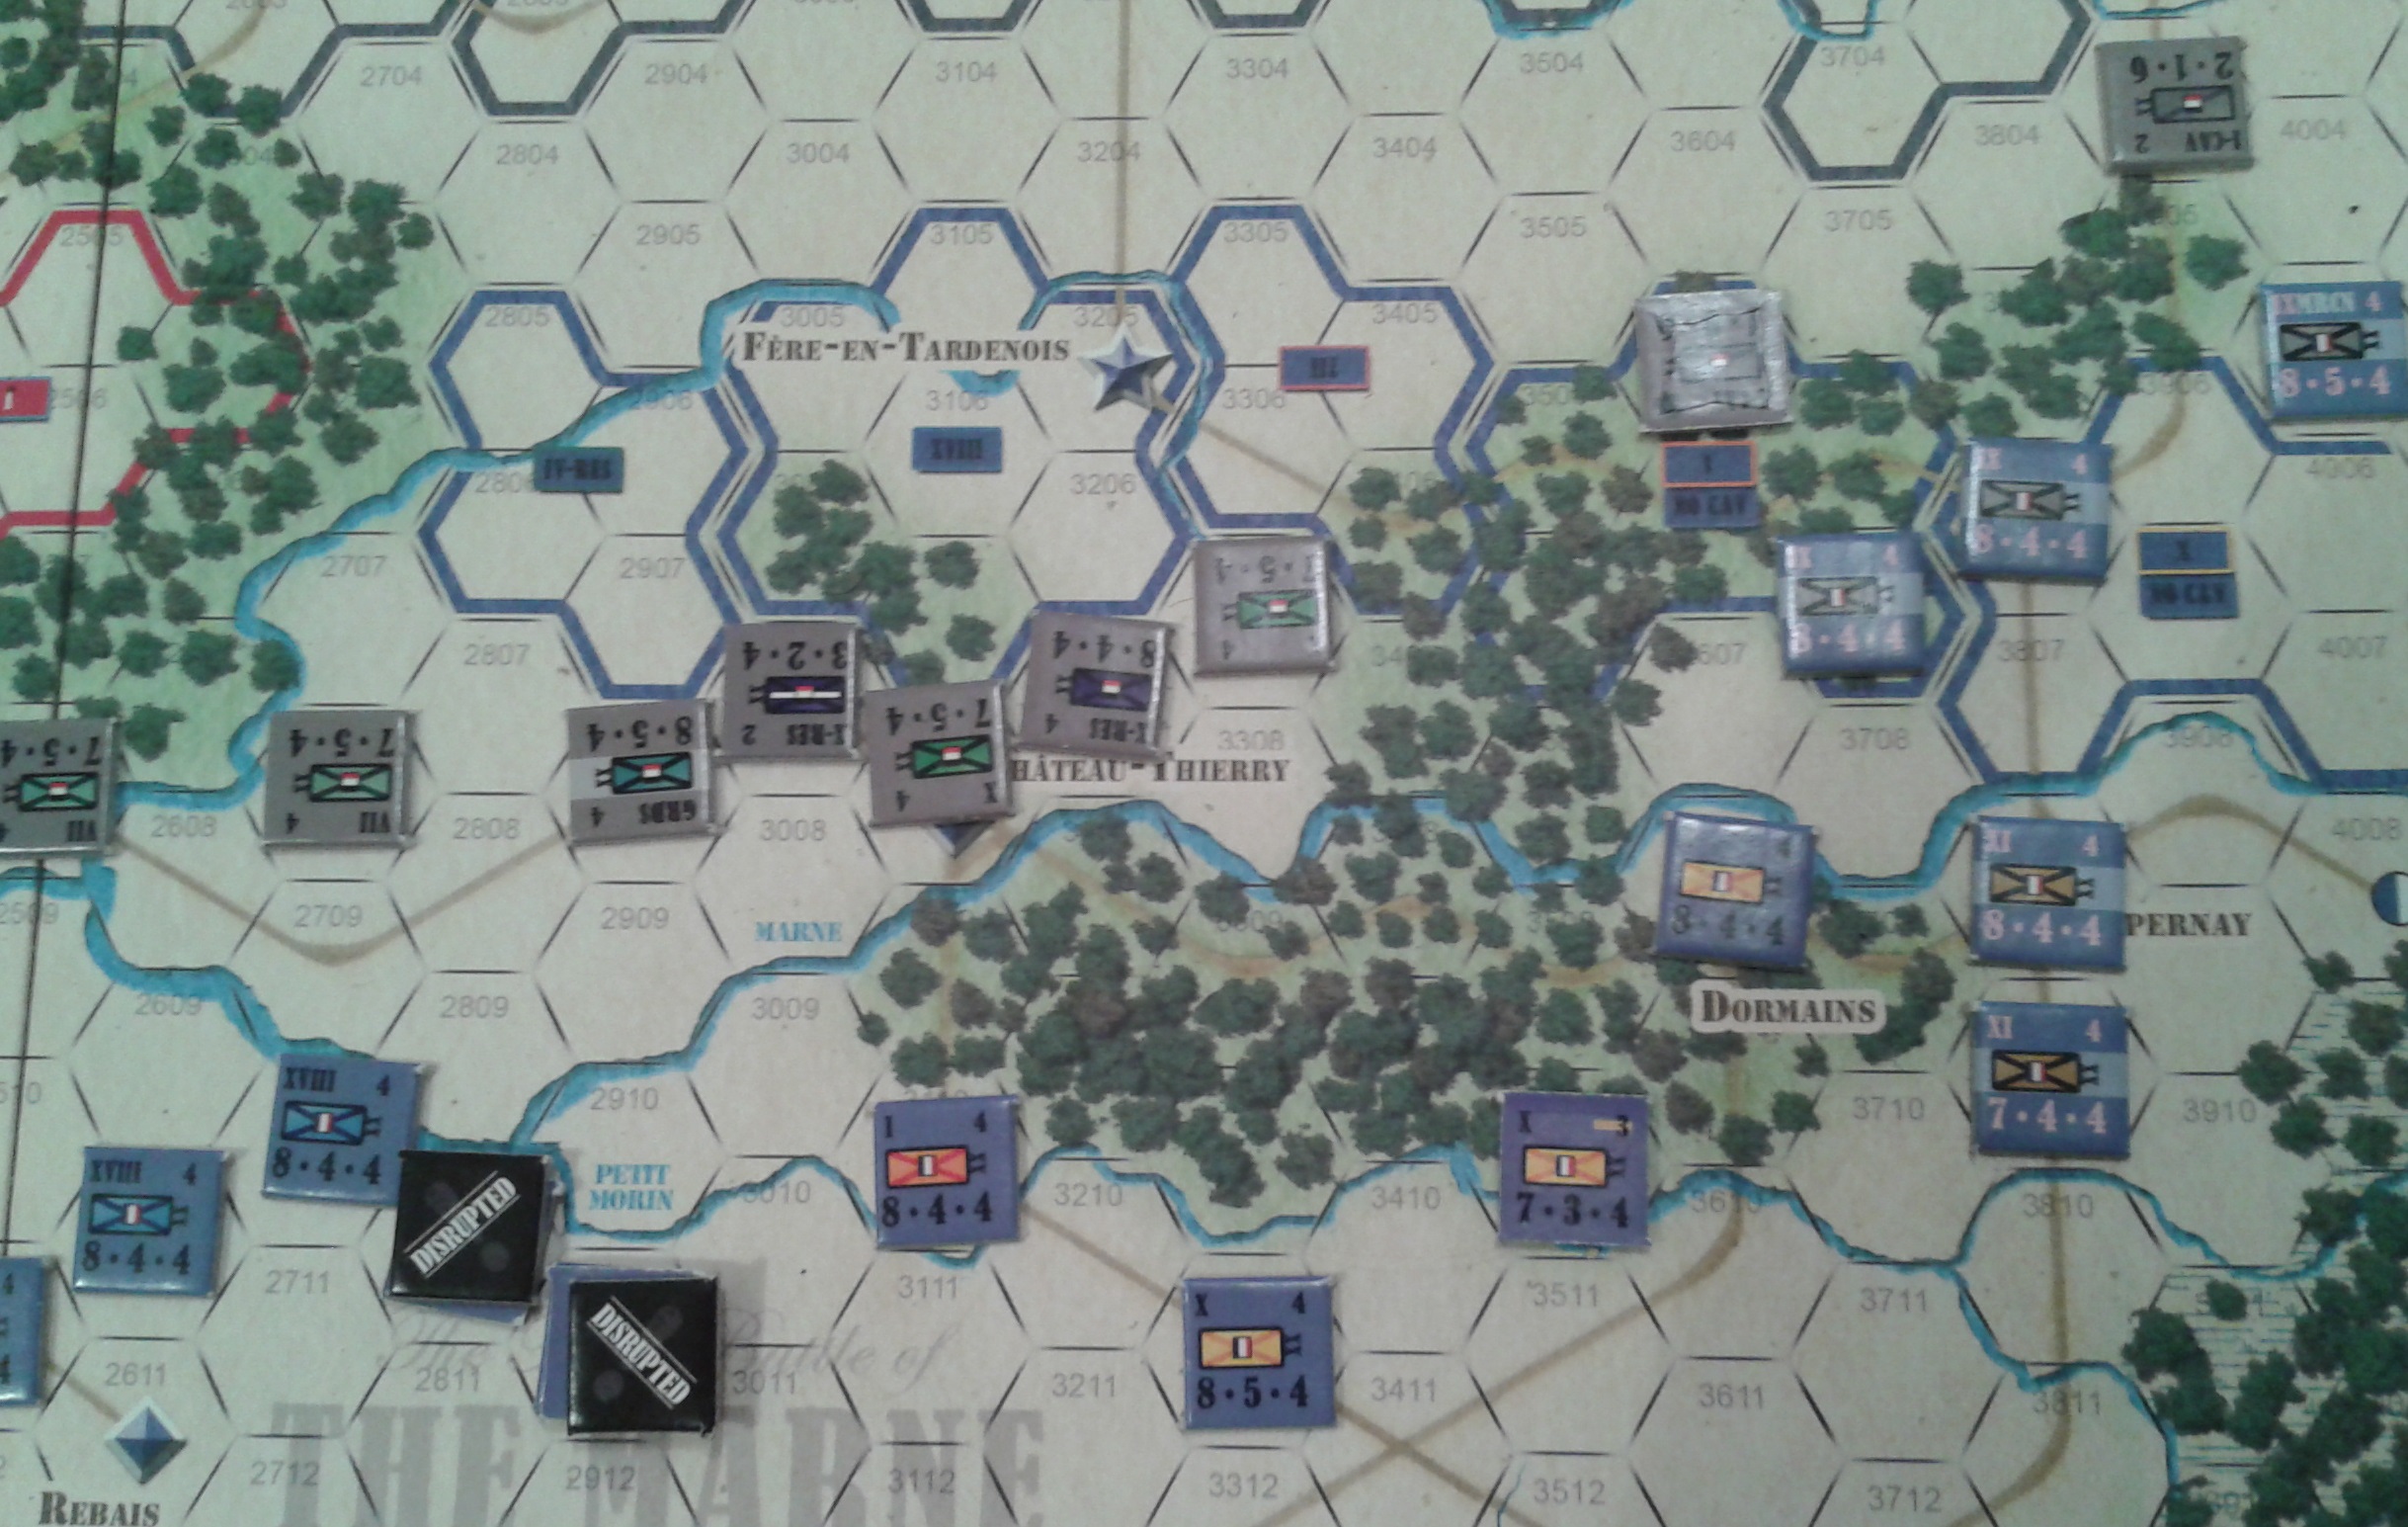
Game the First: End Turn 3. The Germans crossed the Marne as the Entente tried to keep two hexes away.
Unlike traditional wargames, combat in Marne 1914 is by attacker hex, NOT by defender hex. That means you tally the attack factors in one hex, subtract the defender’s modified total (woods, towns, etc add to the Defense Factors), and roll on a CRT that has a nice mix of ruthless destruction and frustrating no effect.
Like Masuria 1915, almost all Marne 1914 units have a higher attack factor than defense factor. French units are generally 8 attack factors and 4 defense factors, BEF 6-5, and German 7-4. Towns add 1 DF, Woods 2. At half attack, the BEF at 3 attack factors is just about useless (at least in our games) as is the French 4 attack factors. We rarely attacked at under +2.
So far, so good.
Confused Combat Mechanic
Once again, Dennis and I are amazed at the genius of the playtesters who apparently had no problems understanding the multiple attacks per hex combat mechanic. As for us, we tried to fathom the mechanic from the rules, but couldn’t. I own up to be incredibly dense on occasion…or often…when it comes to rules, but this confused us both.
The short version: You declare attacks against a defender hex from multiple hexes and then roll all the attacks at once. Step losses are combined, but retreats only happen once. Attacker disruptions occur depending on the die roll, so pay attention, because disrupted attackers cannot advance into a vacated hex.
As attacks by units in different corps generate a -1 to the attack factor total, and most corps contain only two divisions, most multi-attacks will max out at two. Some corps (French IIIrd, IXth, and Xth Corps) have three units and when properly positioned, can launch three attacks that can obliterate a defending German unit with a lucky die roll. The BEF IIIrd Corps is only one unit strong.
Units can retreat through zone of controls, but lose another step in the process — a nice touch.
Try Again
So, with the mandatory Entente retreat movement and combat mechanics straight, we started a new game.
GAME THE SECOND
 Here we go again. The Entente retreated and retreated and retreated throughout Turn 1. Even when the prospect of a counterattack proved tempting, the unsupplied state (half attack factors rounded down) quickly shut down that idea.
The hope? Good rolls on the replacement step table so the units could be built back up instead of eliminated.
Game the Second: End of Turn 1.
Turn 2
The best thing I can say is that the Entente kept a solid line in front of the Germans. Other than that, it was off to the races trying to avoid being battered too much.
The Germans hammered the BEF, Dennis’ strategy was to knock them out since they were already bloodied.
Turn 3
 Hi-ho. Hi-ho. It’s more retreat you know. It’s run-run-run, avoid the Hun. Hi-ho. Hi-ho.
The other hope for the Entente was that the Germans rolled Attacker Disrupted on the CRT. It usually meant losing a step (not that bad, per se), but also a lack of advance next turn because it would come off if a unit did not enter combat.
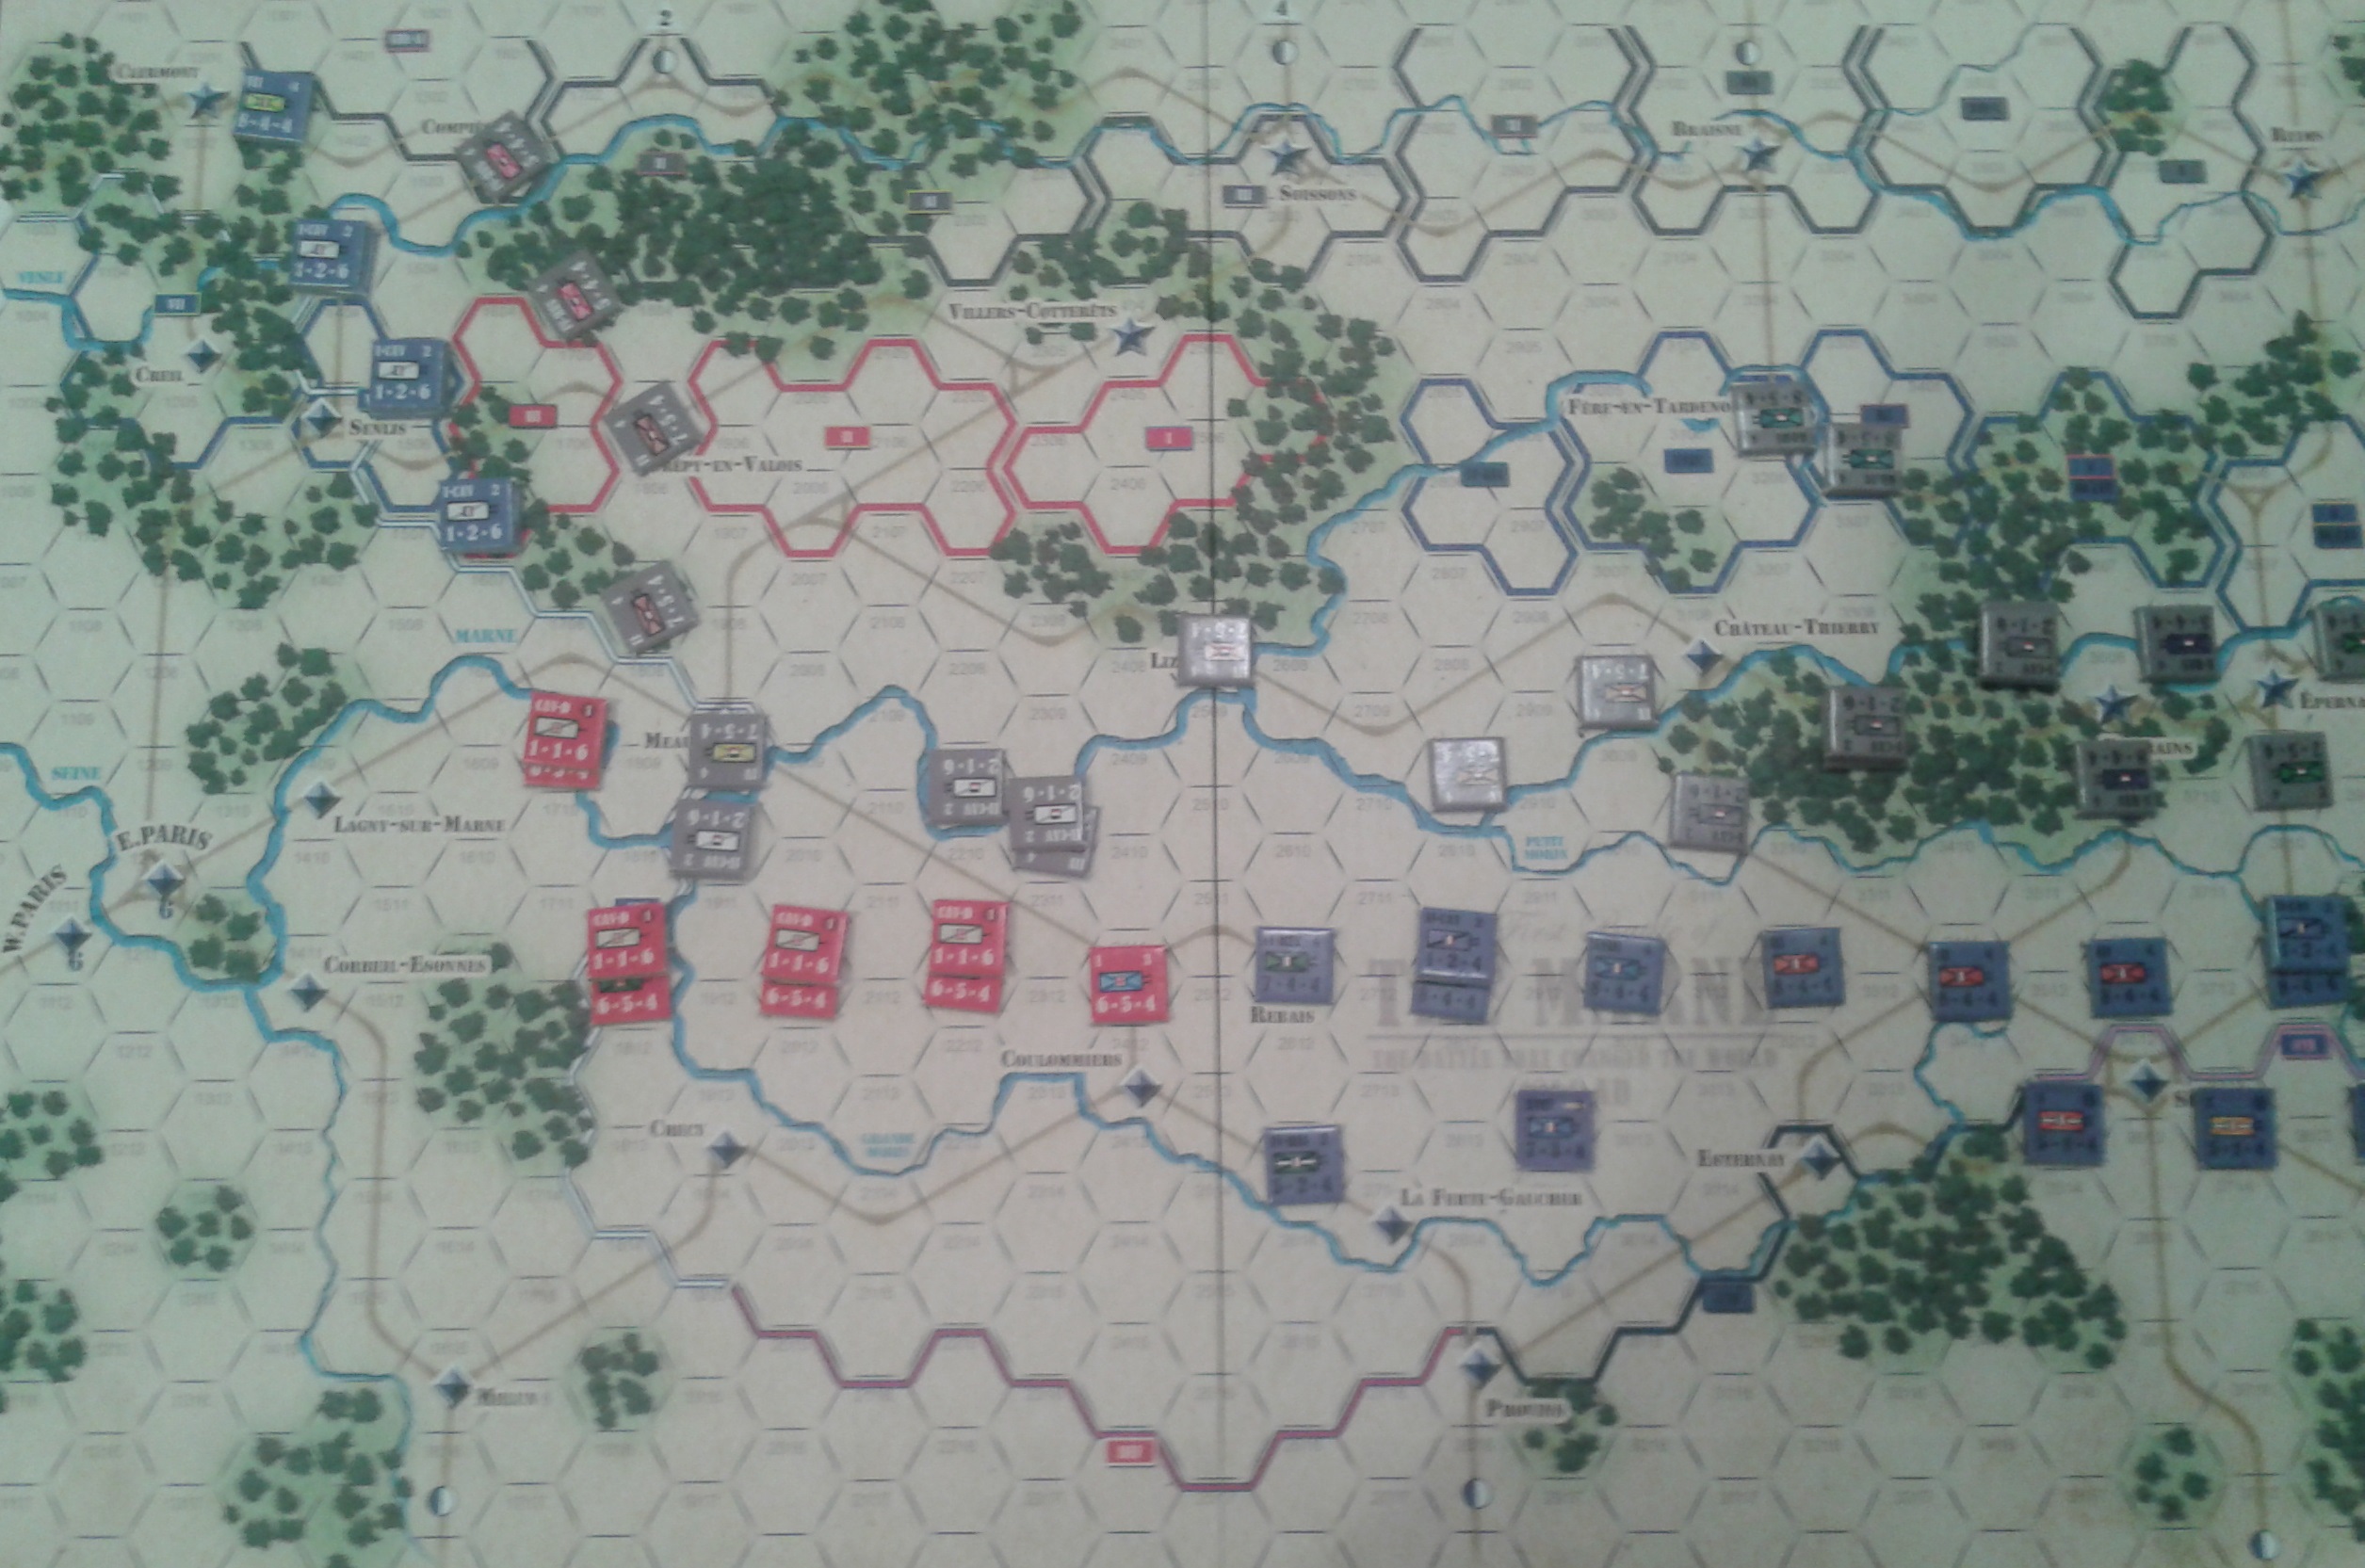
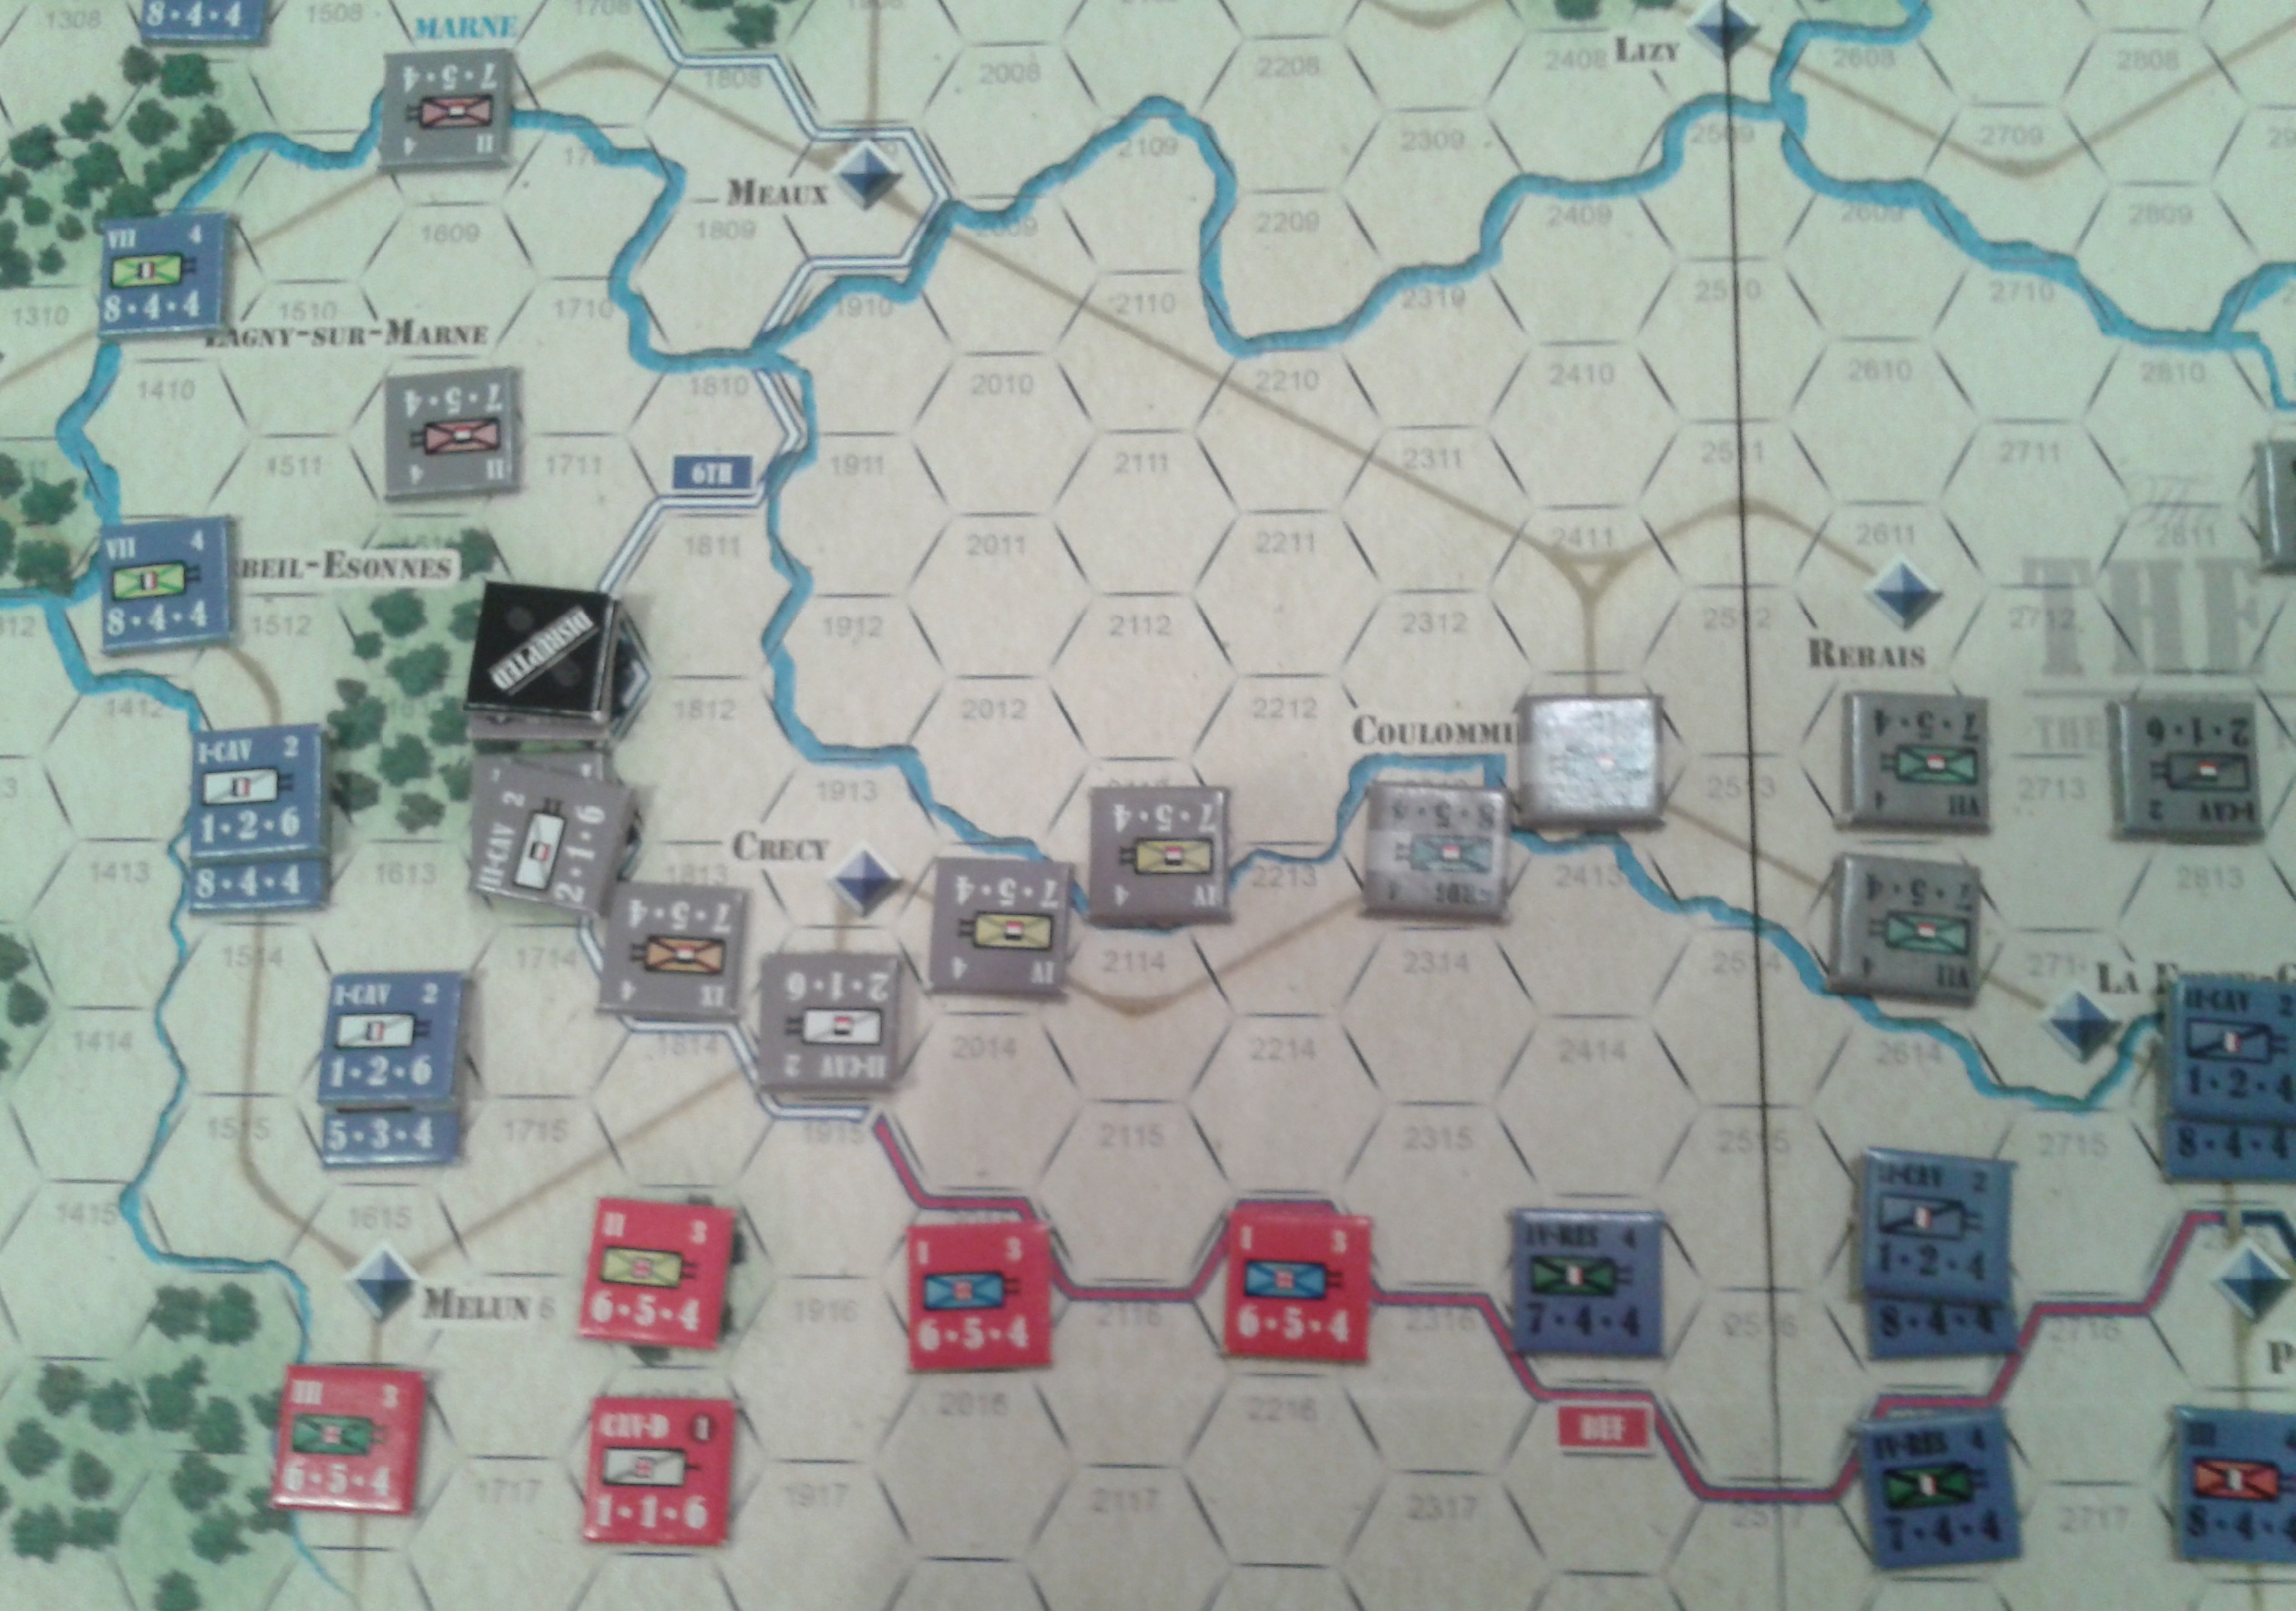
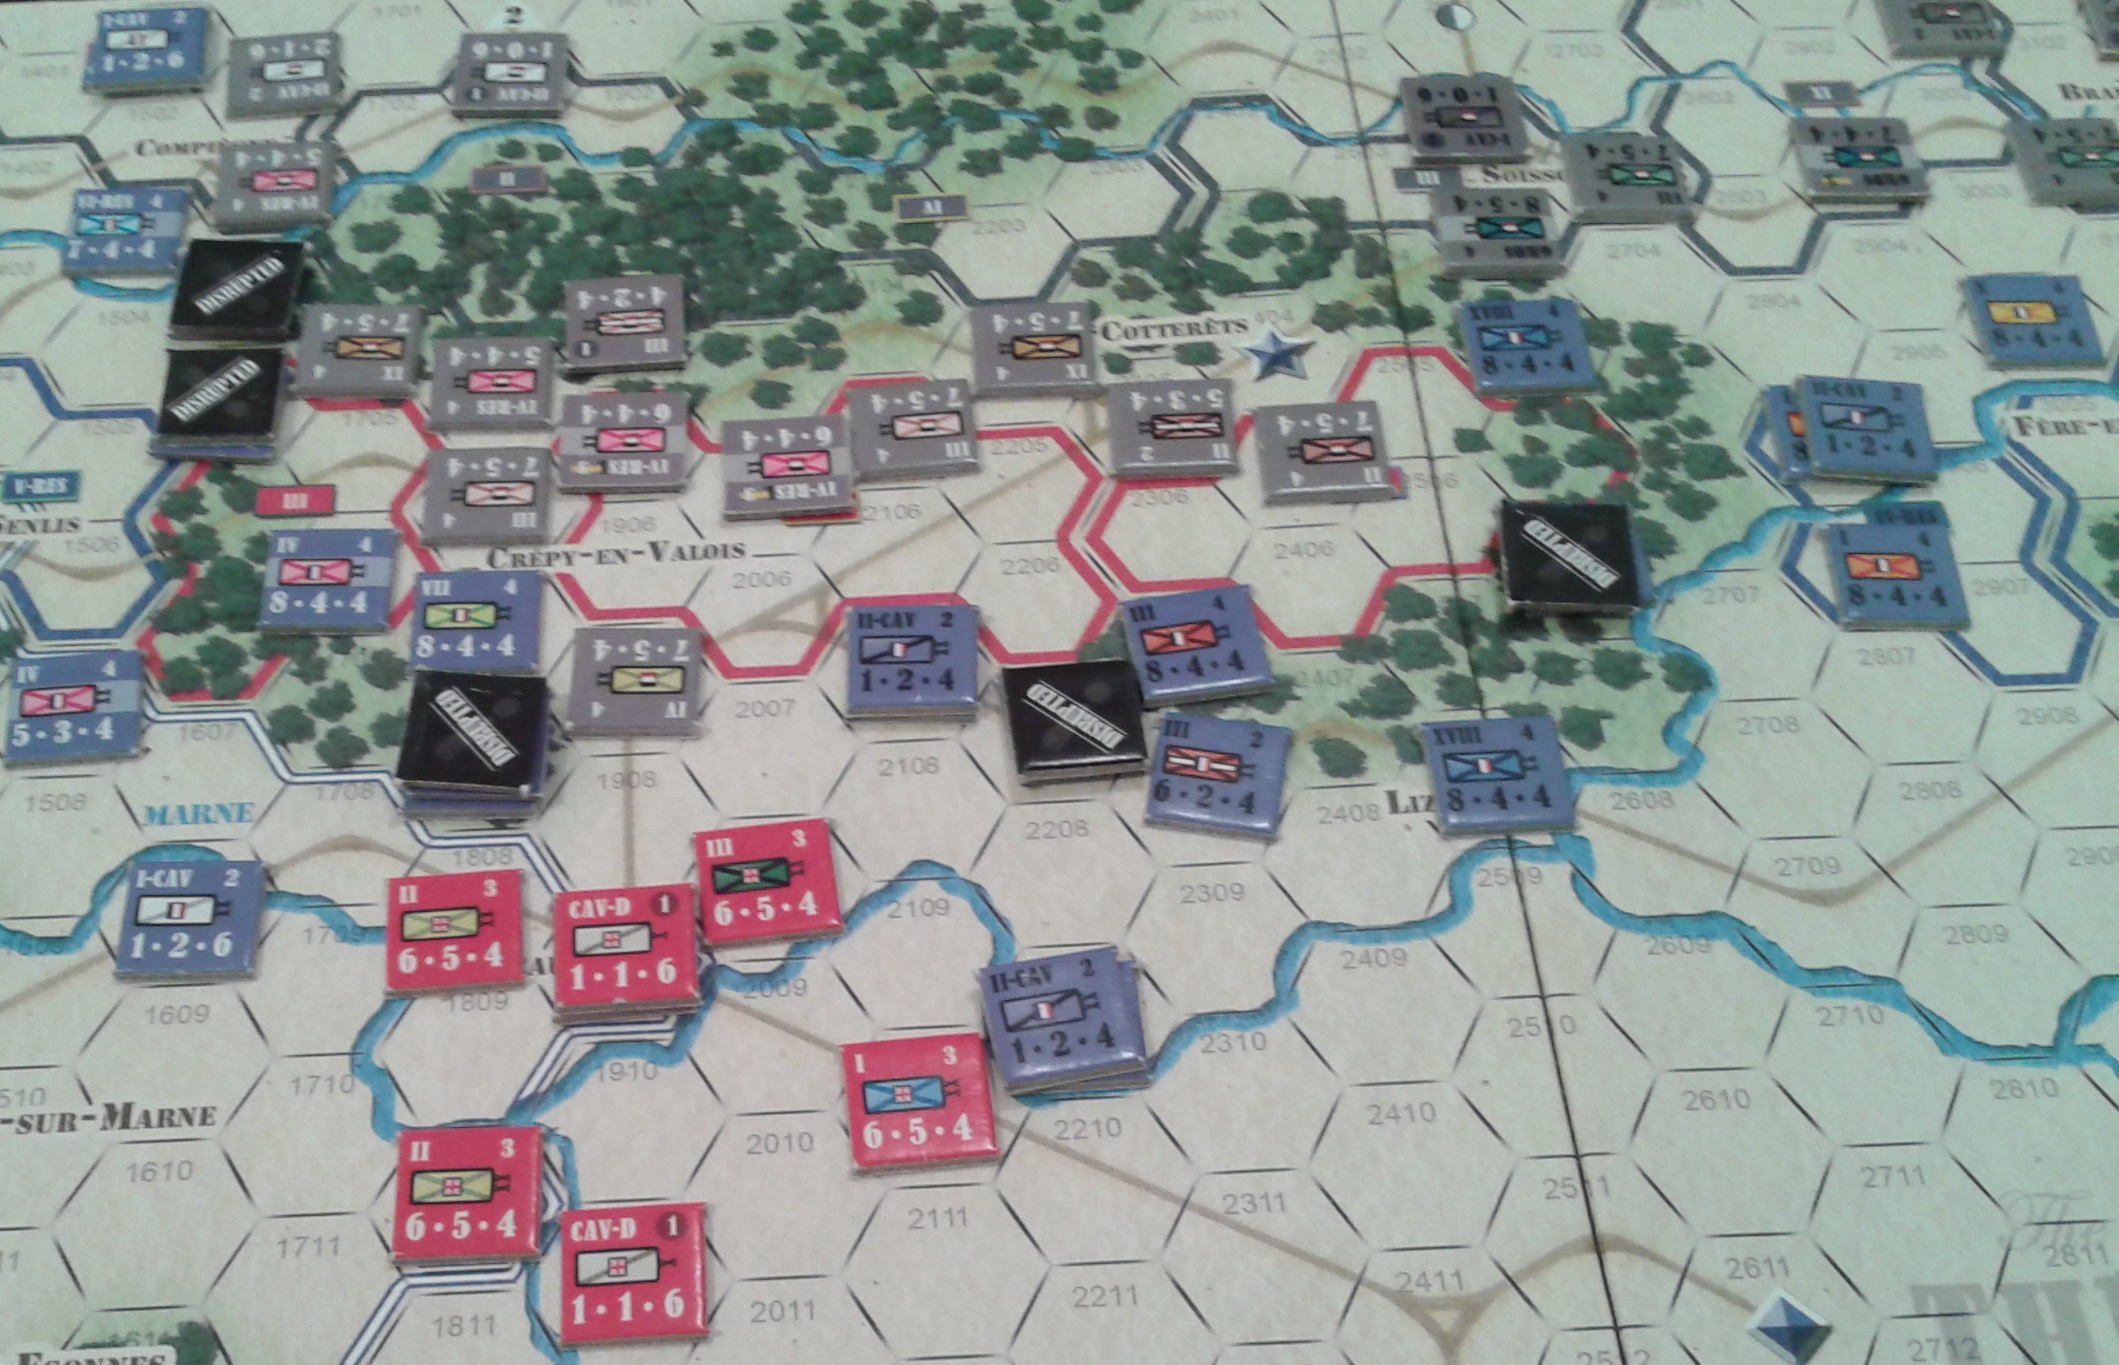
End of Turn 4 on Western Side of map. The Huns press on towards Paris while battering the BEF.
Marne boasts a pretty clever sequence of events. On the defense, the French/BEF can/must always retreat one hex and stay out of German zone of controls. The phase to remove disrupted status occurs after movement, hence, a retreating force can be in regular status each turn, while the attacker must pause a turn to re-order a unit. The offense peters out a bit, or at least ebbs and flows.
Of note, the Germans received the Guards Corp — two very helpful divisions that eased some of the overstretched line. The pummeling of the BEF continued.
Turn 4
The Huns battered the BEF and pressed the attacks on the French Vth Army, but a couple of no effects and a disrupted result here and there created the first hiccup in a continual advance.
Not that the Entente noticed — they still had to retreat at least one hex. The river lines helped blunt the attacks, but even the no effects had an effect — the mandatory retreat meant that river lines could not be held.
Turn 5
 Is that a stalled German offensive the Entente sees? A bit, but the Germans now pushed at Paris from the east. The Entente started to reach the Rally Line, ending the mandatory retreats. The voluntary retreats continued.
End of Turn 6. The push towards Paris continued. Notice the Rally Line that ends the need for Entente units to automatically retreat from German units.
I also managed to roll a devastating series of replacement step rolls that beefed up the Armies. Not great, but better than they have been all game.
Finally, here come the French Taxis! The IV Corp (two divisions) can use French taxis to motor 12 hexes along roads to patch up a line. I didn’t need to move them that far, because the constant BEF retreat left a thin line linking with the French VIth Army, so in IV Corp went to patch up the line.
Turn 6
The Germans pushed closer to Paris, but in the process of shifting attacks towards the French capital, they left a large gap on their eastern-most flank. Admittedly, the gap contained nothing but swamp terrain, but a gap is a gap.
The Moroccan Corp advanced into that gap. Can’t attack a German and kept three hexes away from the nearest German unit (cavalry), but it looked the closest thing to an advance in six turns.
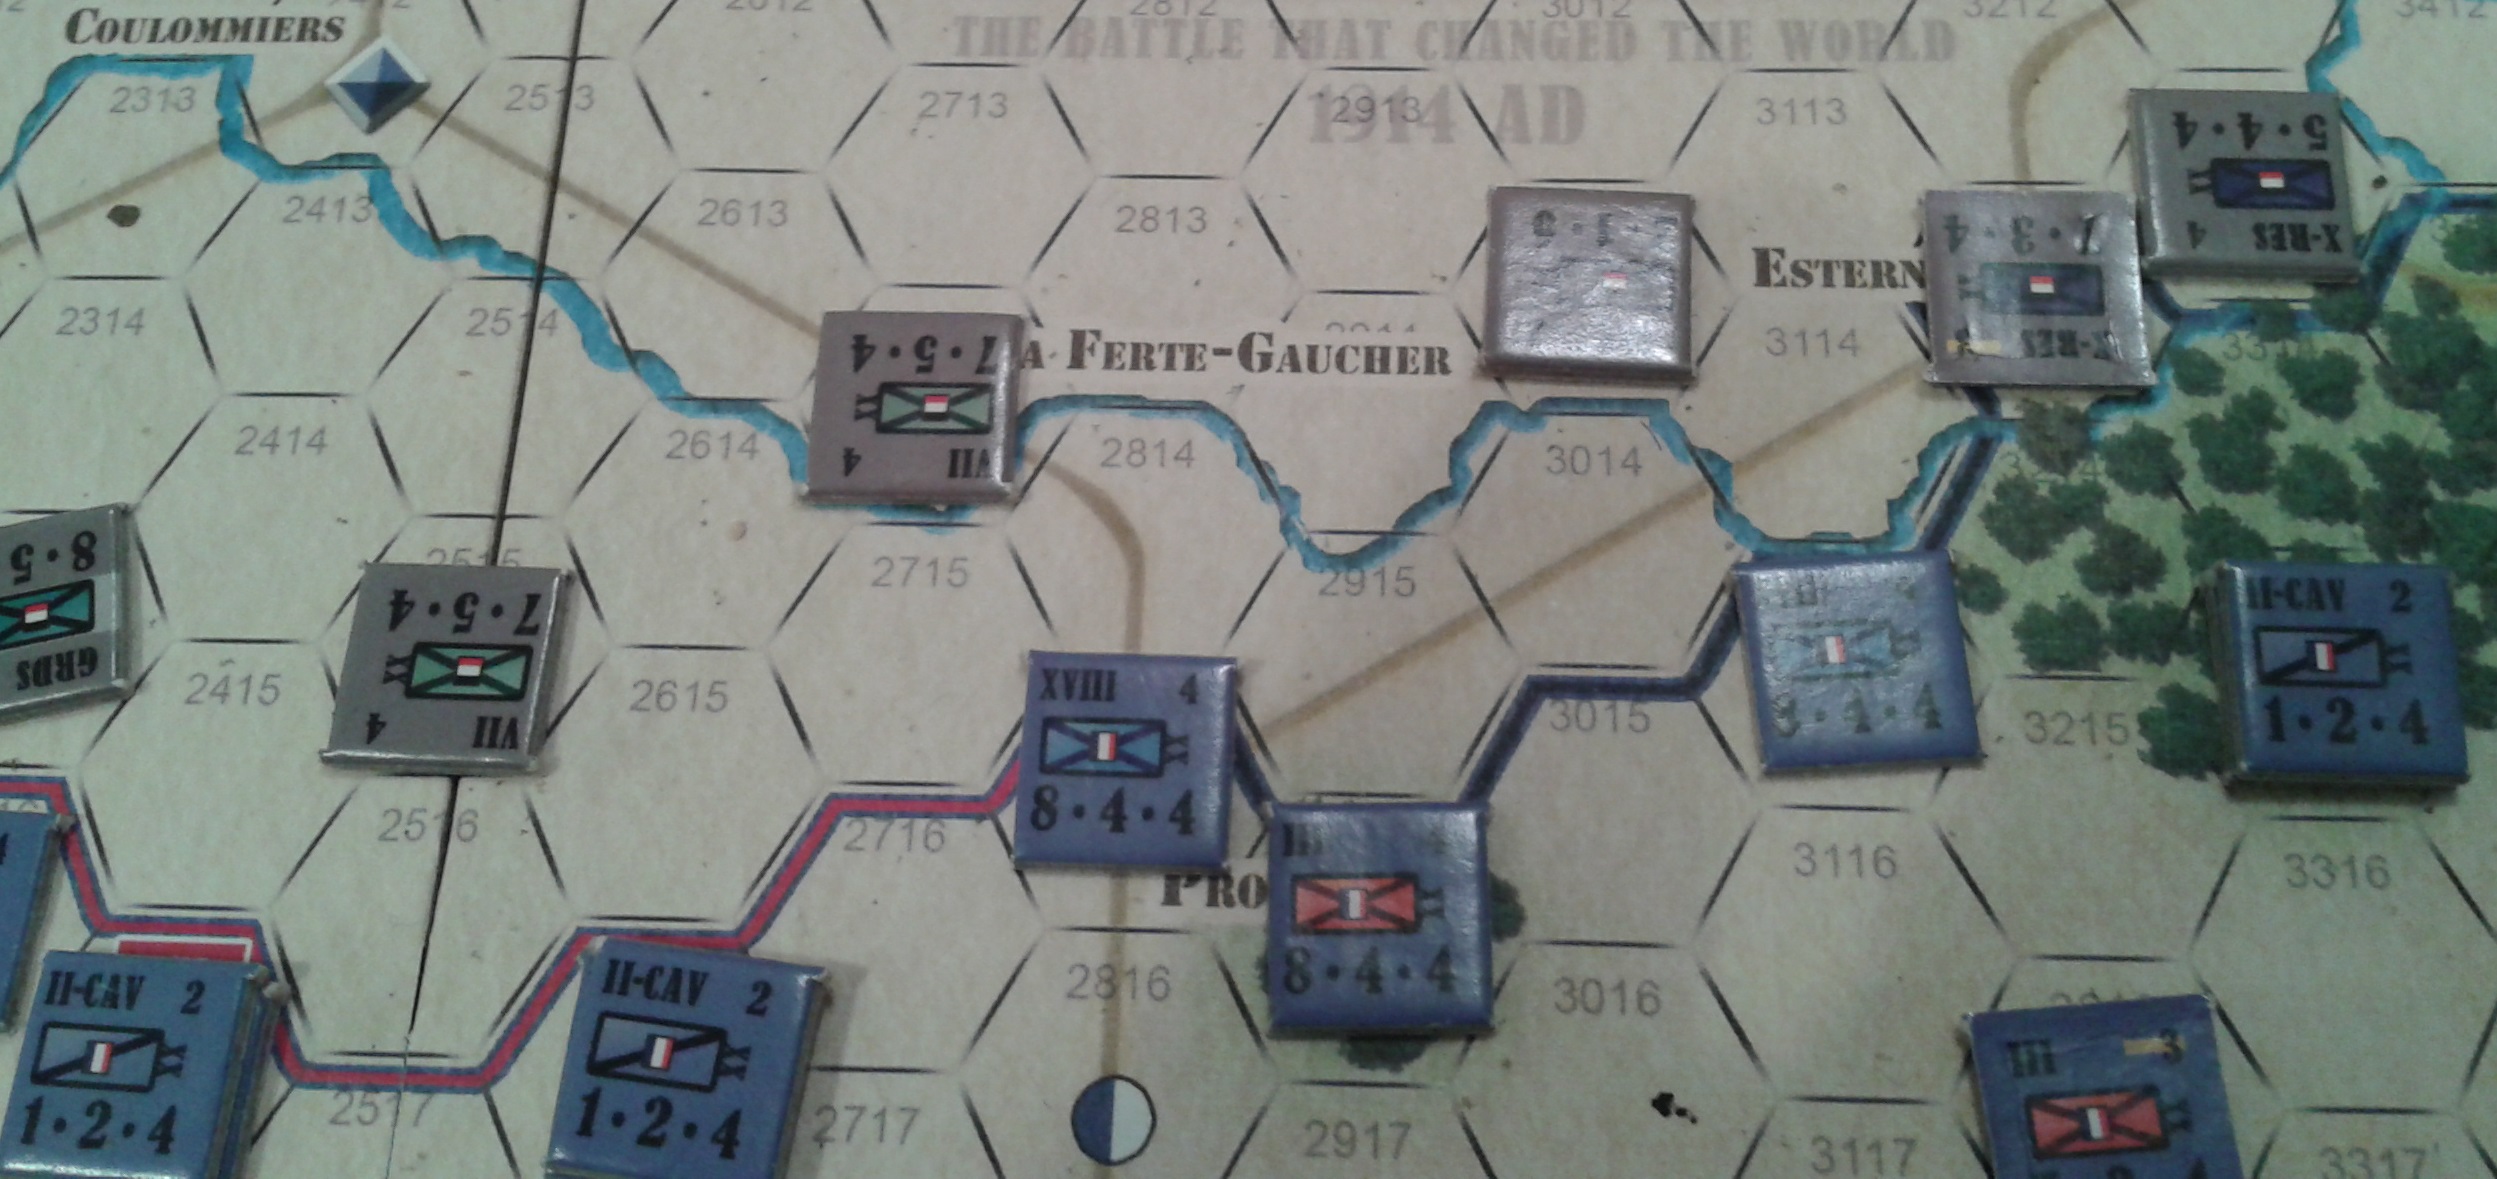
 End of Turn 6.The Germans took Sezanne, but the Entente Rally Line has been reach by many units. Notice the Morrocan ‘advance’ because the Germans left a gap on their east flank.
Better yet, the French VIth Army, with supplies and reinforced with the IV Corp, threatened to attack. Threatened doesn’t mean actually attacked, but le Storm, she was a comin’.
Always Remember the 7th of September
Well, that’s not quite as memorable as the 5th of November, but on the September 7th turn, the Entente rolls a d6 to try and grab initiative (needs a 1). I did a quick Google search to figure out why that date in particular, but only came up with the famous Paris taxi run.
By the way, the taxis transported two regiments out of the entire French 7th Division force — the rest went via rail. Maybe this initiative roll represents the coming of new reinforcements — the VI Reserve Corps and the IX Corps enter the game on Turn 7. Just a guess.
On Turn 8, the Entente needs a 1 or 2, on Turn 9 a 1, 2, 3, or 4, on Turn 10 a 1-5 and automatic on Turn 11 (which is likely too late to regain towns needed to generate VPs).
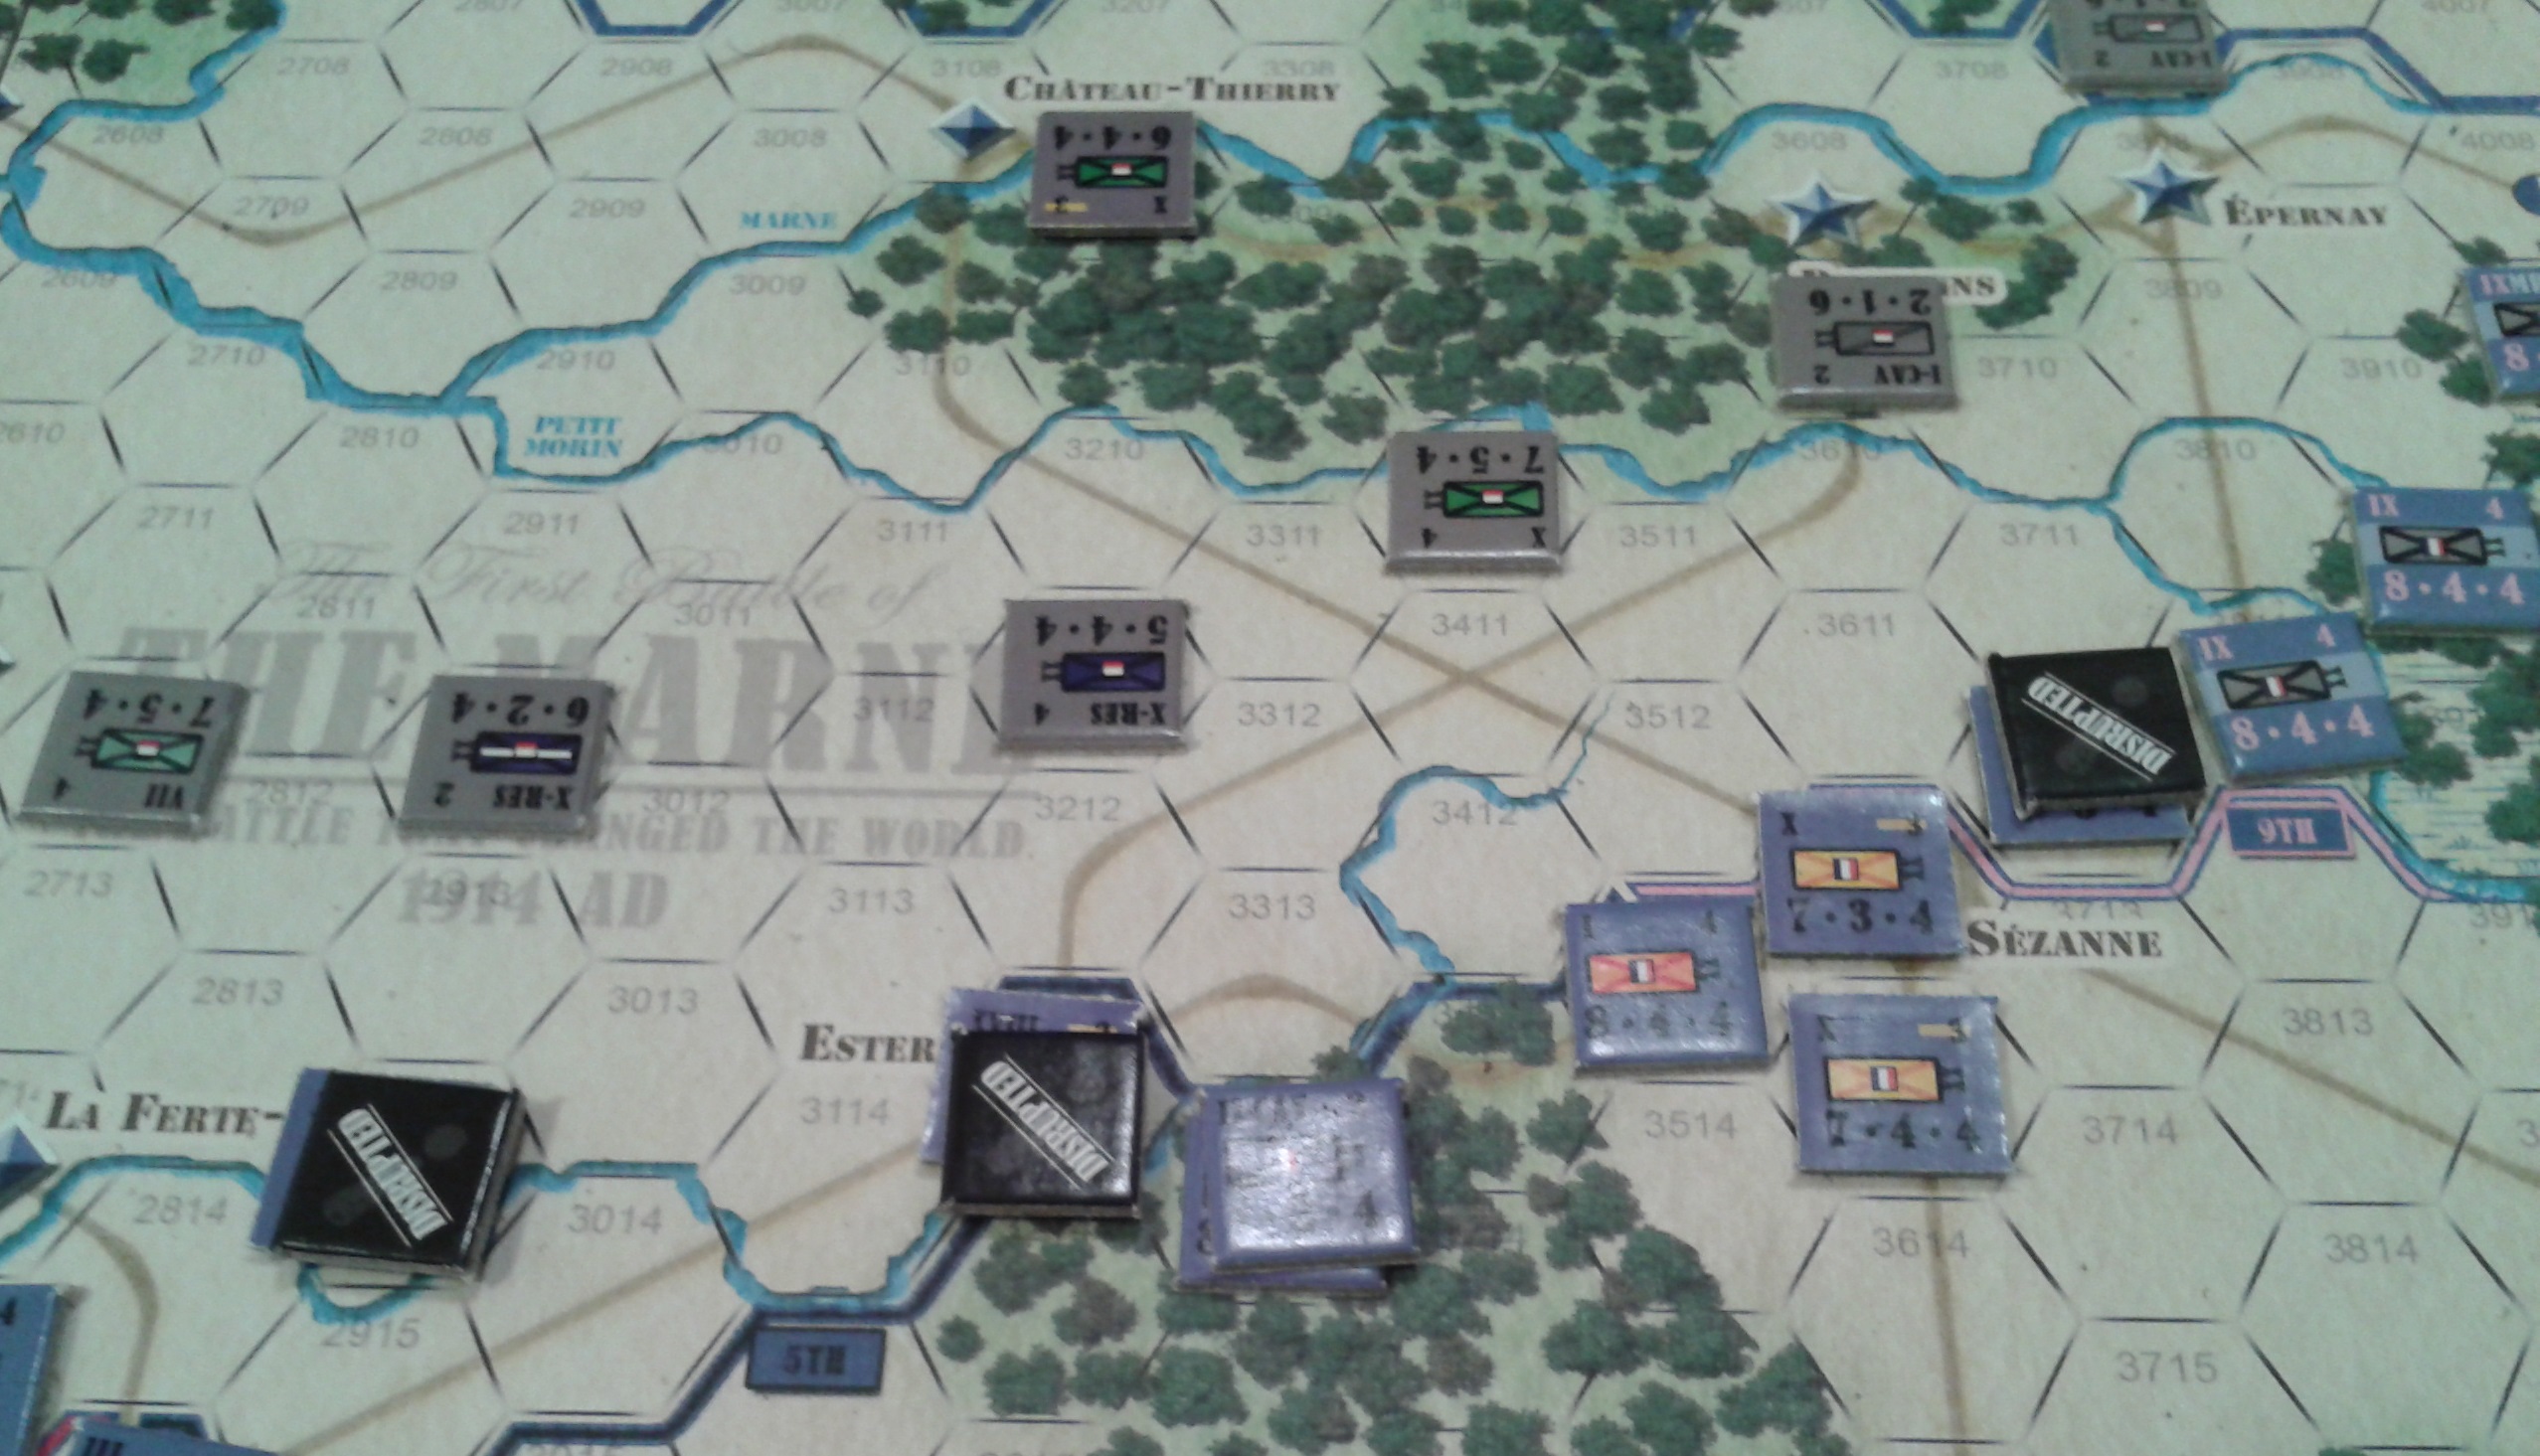
End of Turn 7. The German high-water mark gets close to Paris and also cuts the BEF supply line.
FYI Sports Fans: The Boston Red Sox beat the NY Yankees in the first game of a double header 5-1 on September 7, 1914, but the Yankees took the second game 8-1. Attendance was 26,000 for the first game and 25,000 for the second.
Turn 7
The initiative did not switch, so the Germans made more attacks towards Paris and cut the main supply line of the BEF (1 VP to the Germans). The BEF can use alternate French supply lines, but only one avoids the VP to the Huns. Dennis sat units atop the line.
The Entente faced a no-win choice here. If the BEF had retreated towards its supply line, it would overstretch the French Vth Army to try and keep contact. If the Entente cannot keep a continuous line from one board edge to the other, the German gains 1 VP per turn. The Germans do not have such an edge-to-edge requirement.
Still, the French VIth Army, reinforced this turn by the VI Reserve Corps, counterattacked, and even pushed a little north to stretch the German line some more.
End of Turn 7. Behind the Rally Line. The edge of the board is the hex underneath the supply icon – no more room to retreat even if wanted to.
It turns out that exiting a German unit off the South edge of the map or exiting an Entente unit off the North edge of the map garnered no VPs or any other benefit of note, so the game keeps your units on the board.
Meanwhile, on the eastern edge of the board, the French IX Corp arrived and the German eastern flank was now in trouble.
Turn 8: Cry Havoc and Loose the Poodles of War!
Sacre Bleu! The initiative changed when I rolled a 2.
The initiative change did four things: it gave the Entente a double-turn because the Entente now moves/attacks first in a turn, it allowed supplies to flow to two Armies and one Corp (Entente choice) so they could attack at full strength, it gave the Entente a +1 column shift on the CRT for the turn, and the Entente no longer had to automatically retreat.
It also triggered a German VP count for towns held — 10 VPs plus the 1 for breaking the BEF supply line for a turn = 11 VPs.
End of Turn 8.The BEF supply line is re-established as the Germans fall back in the face of fierce Entente attacks.
I supplied the French Vth and VIth Armies and the IX Corp and started the big shove against the Hun. Sezanne, Esternay, and Corbeil-Essones fells and gaps appeared in the German line. It felt good to dish out a little punishment, even if the attackers suffered numerous disruptions.
Army Boundary Shift
 Normally, each player shifts the Army Boundary (up to three hexes) at the beginning of their turn, which means you have to plan out the entire turn before you move. That’s really a waste of time, so we agreed to shift the boundary as we moved.
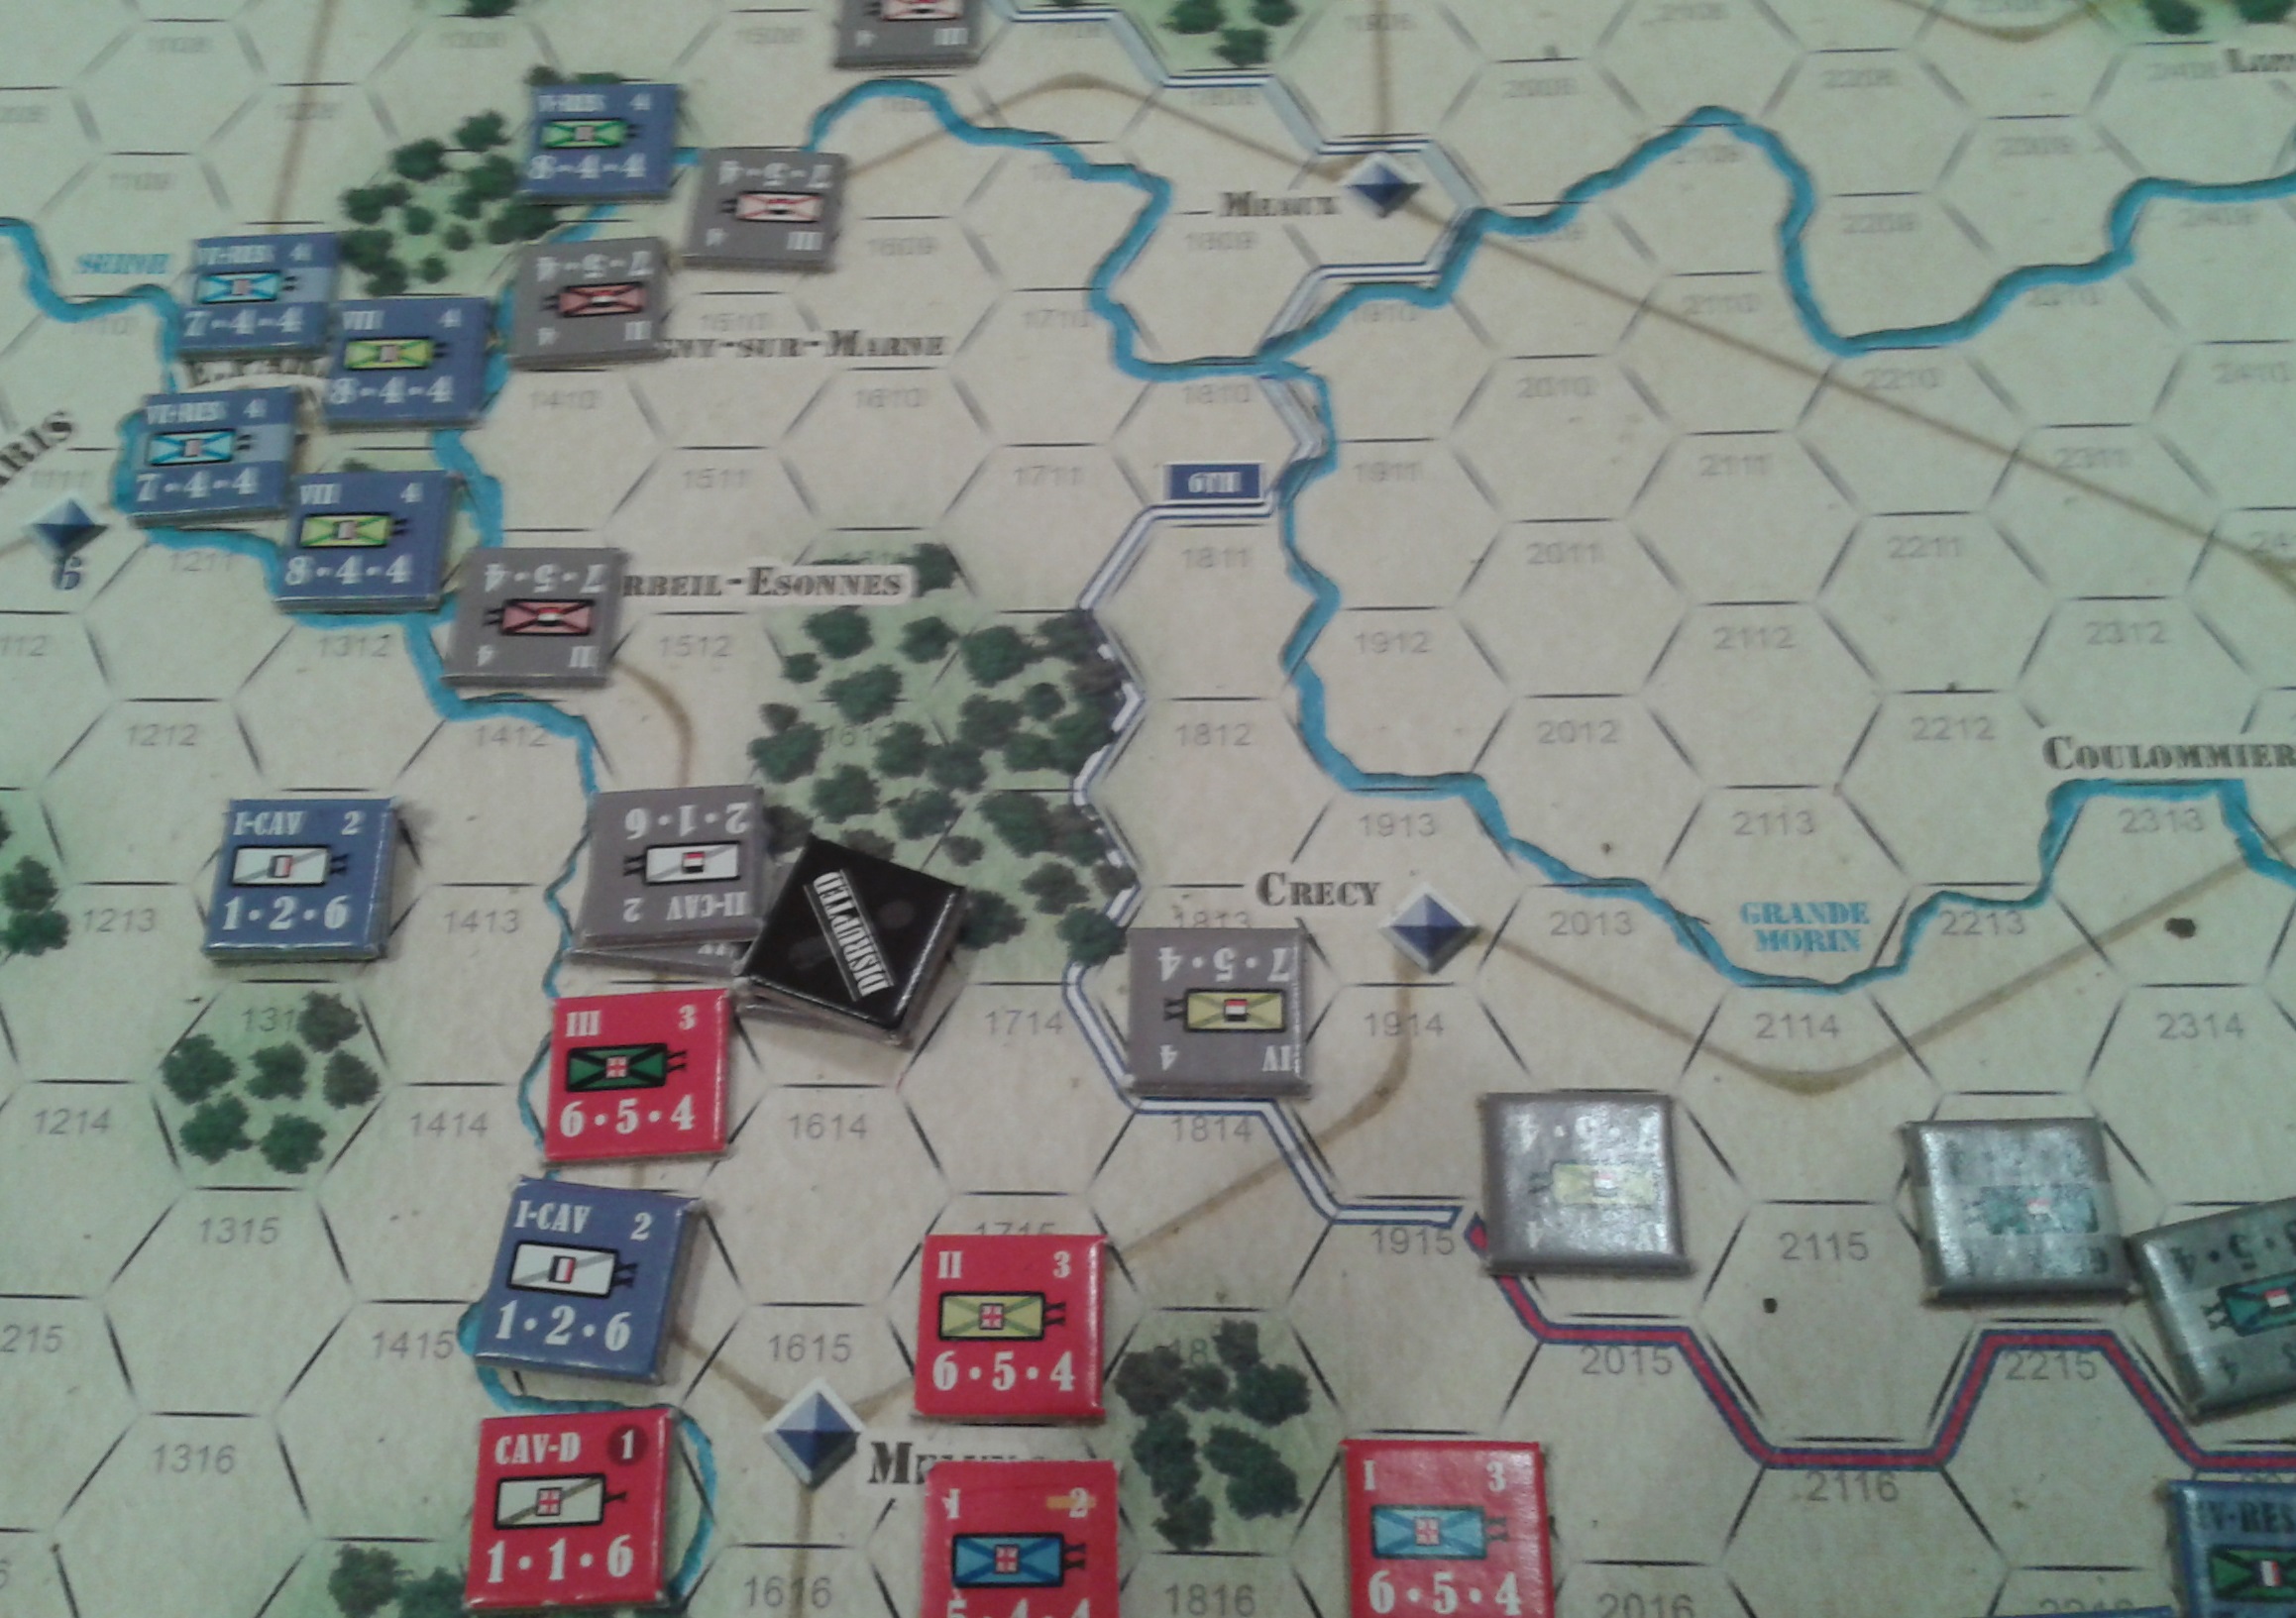
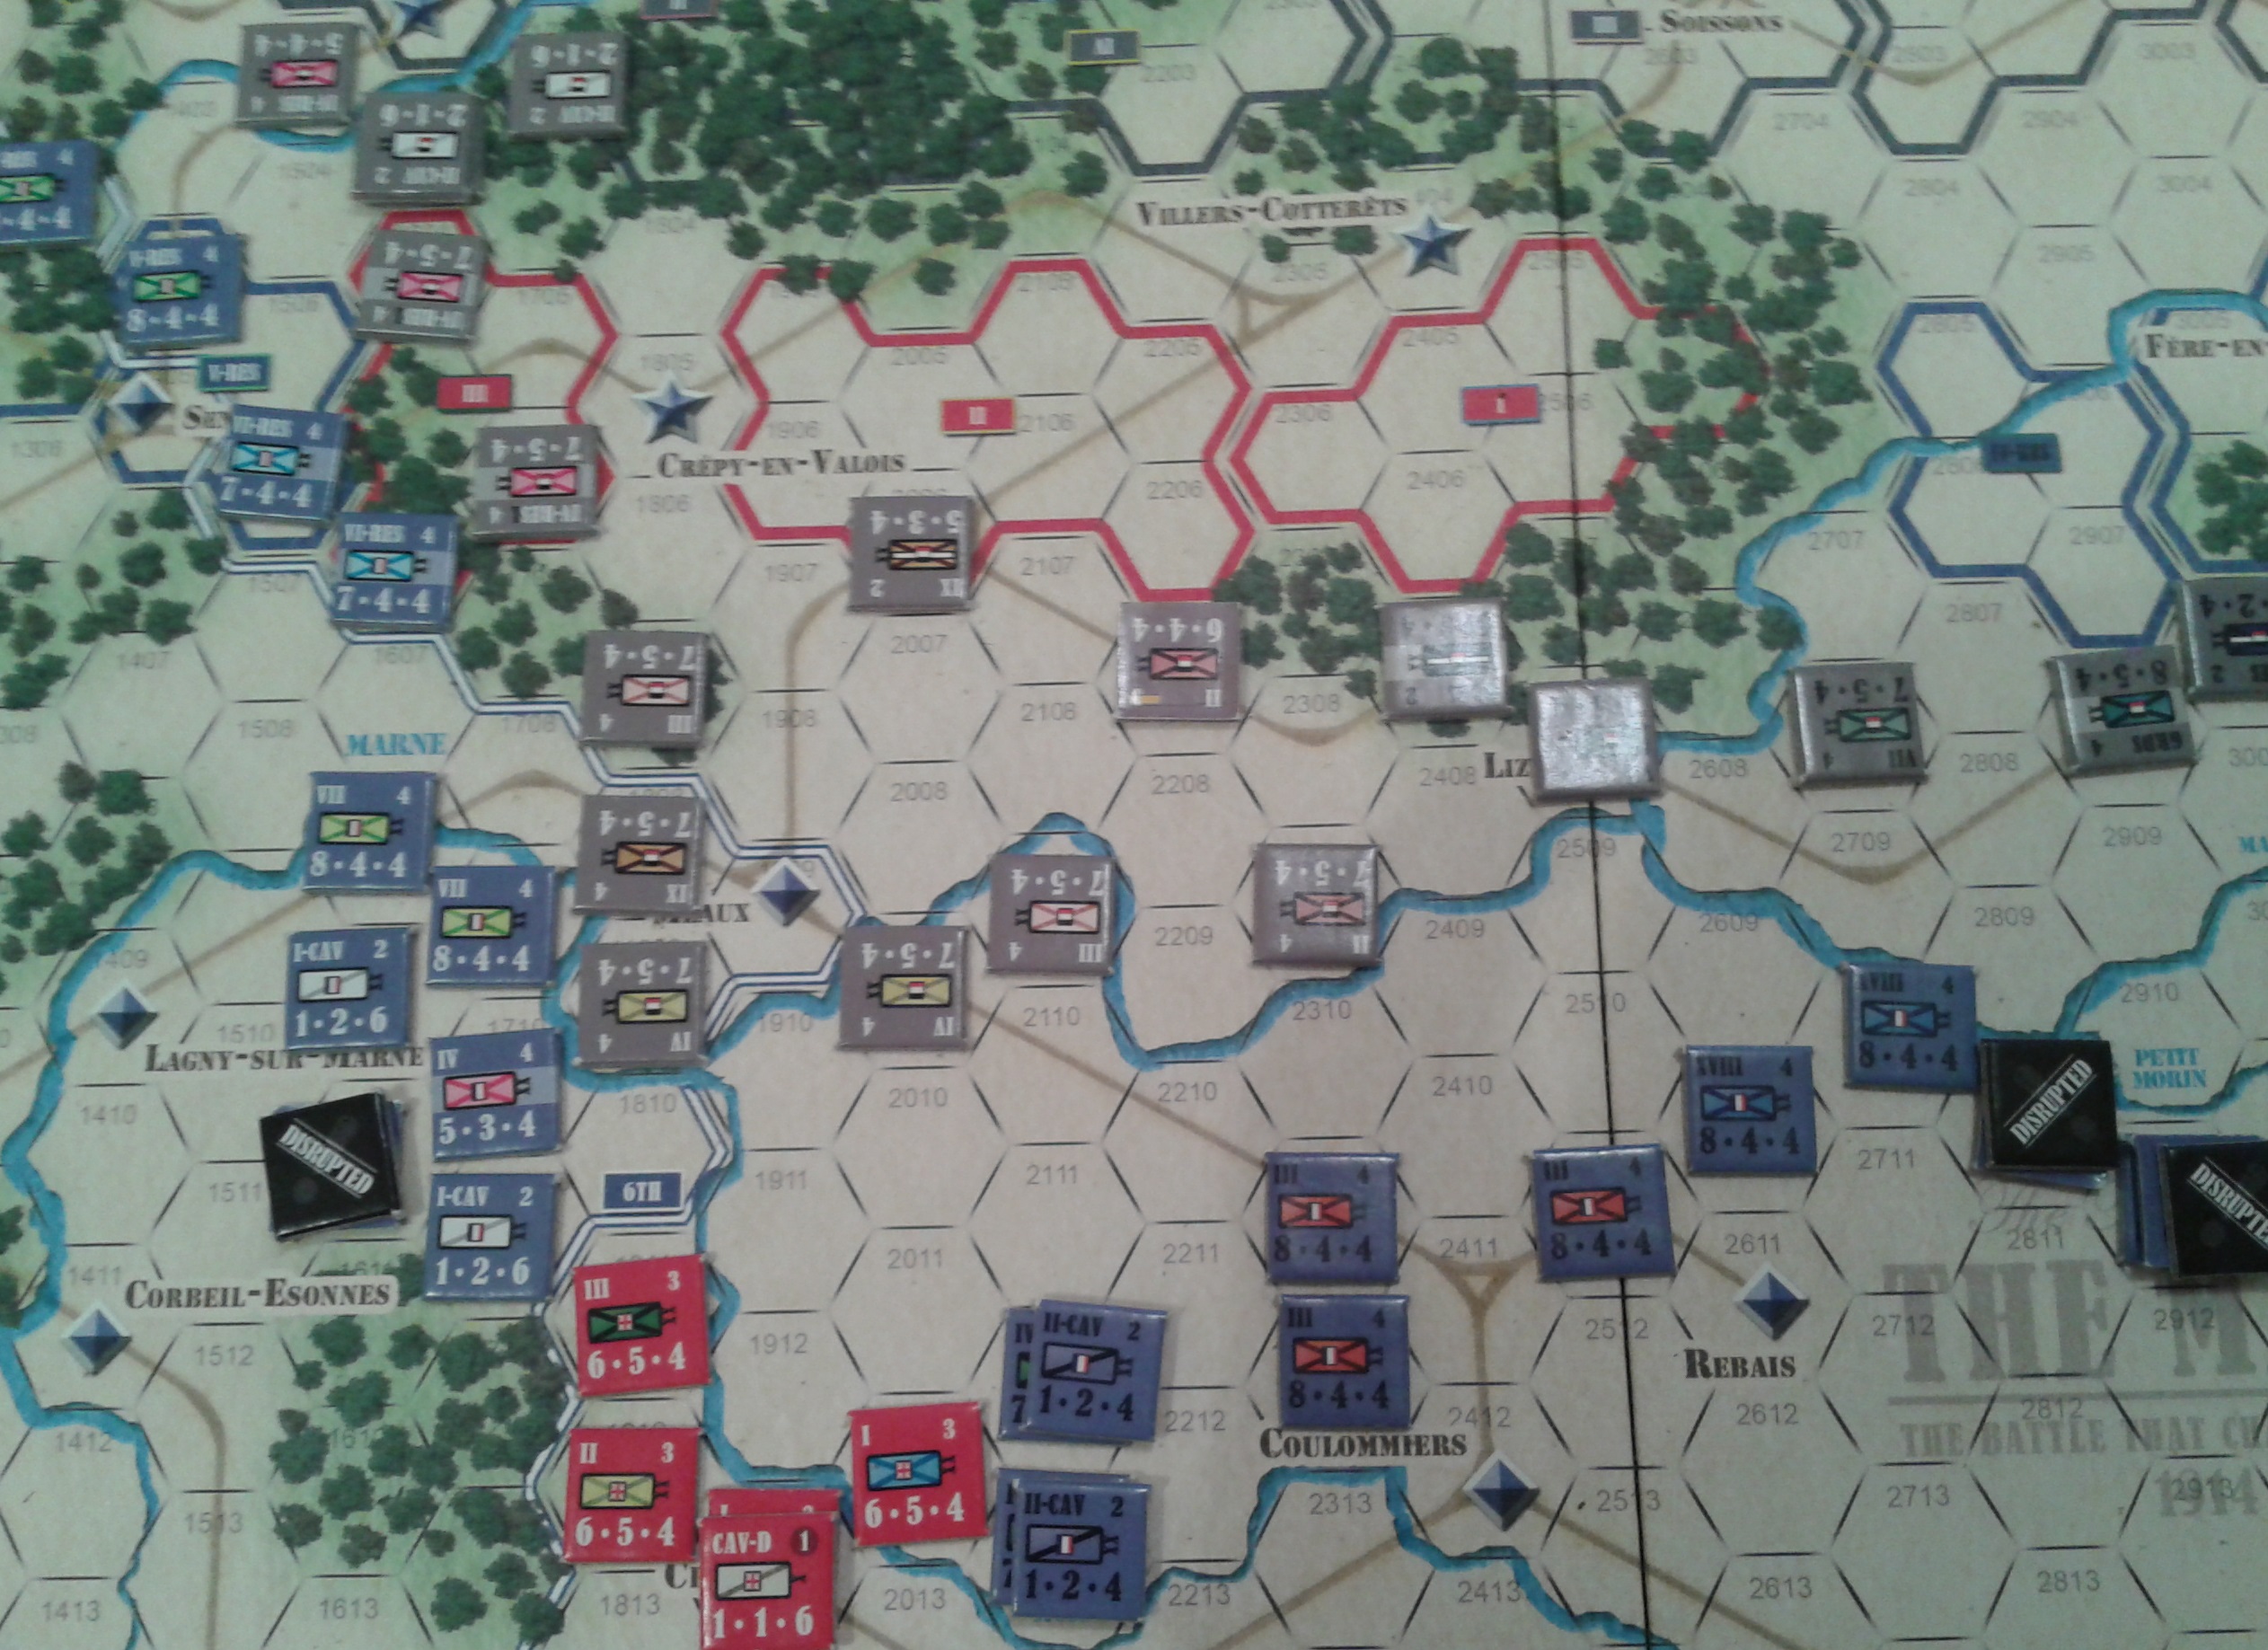
End of Turn 8. French disrupted units cannot advance, but the crippled Huns pulled back. Note the two eastern-most units (right side of photo) are 2-1-6 cavalry units — all that hold the eastern flank.
Turn 9
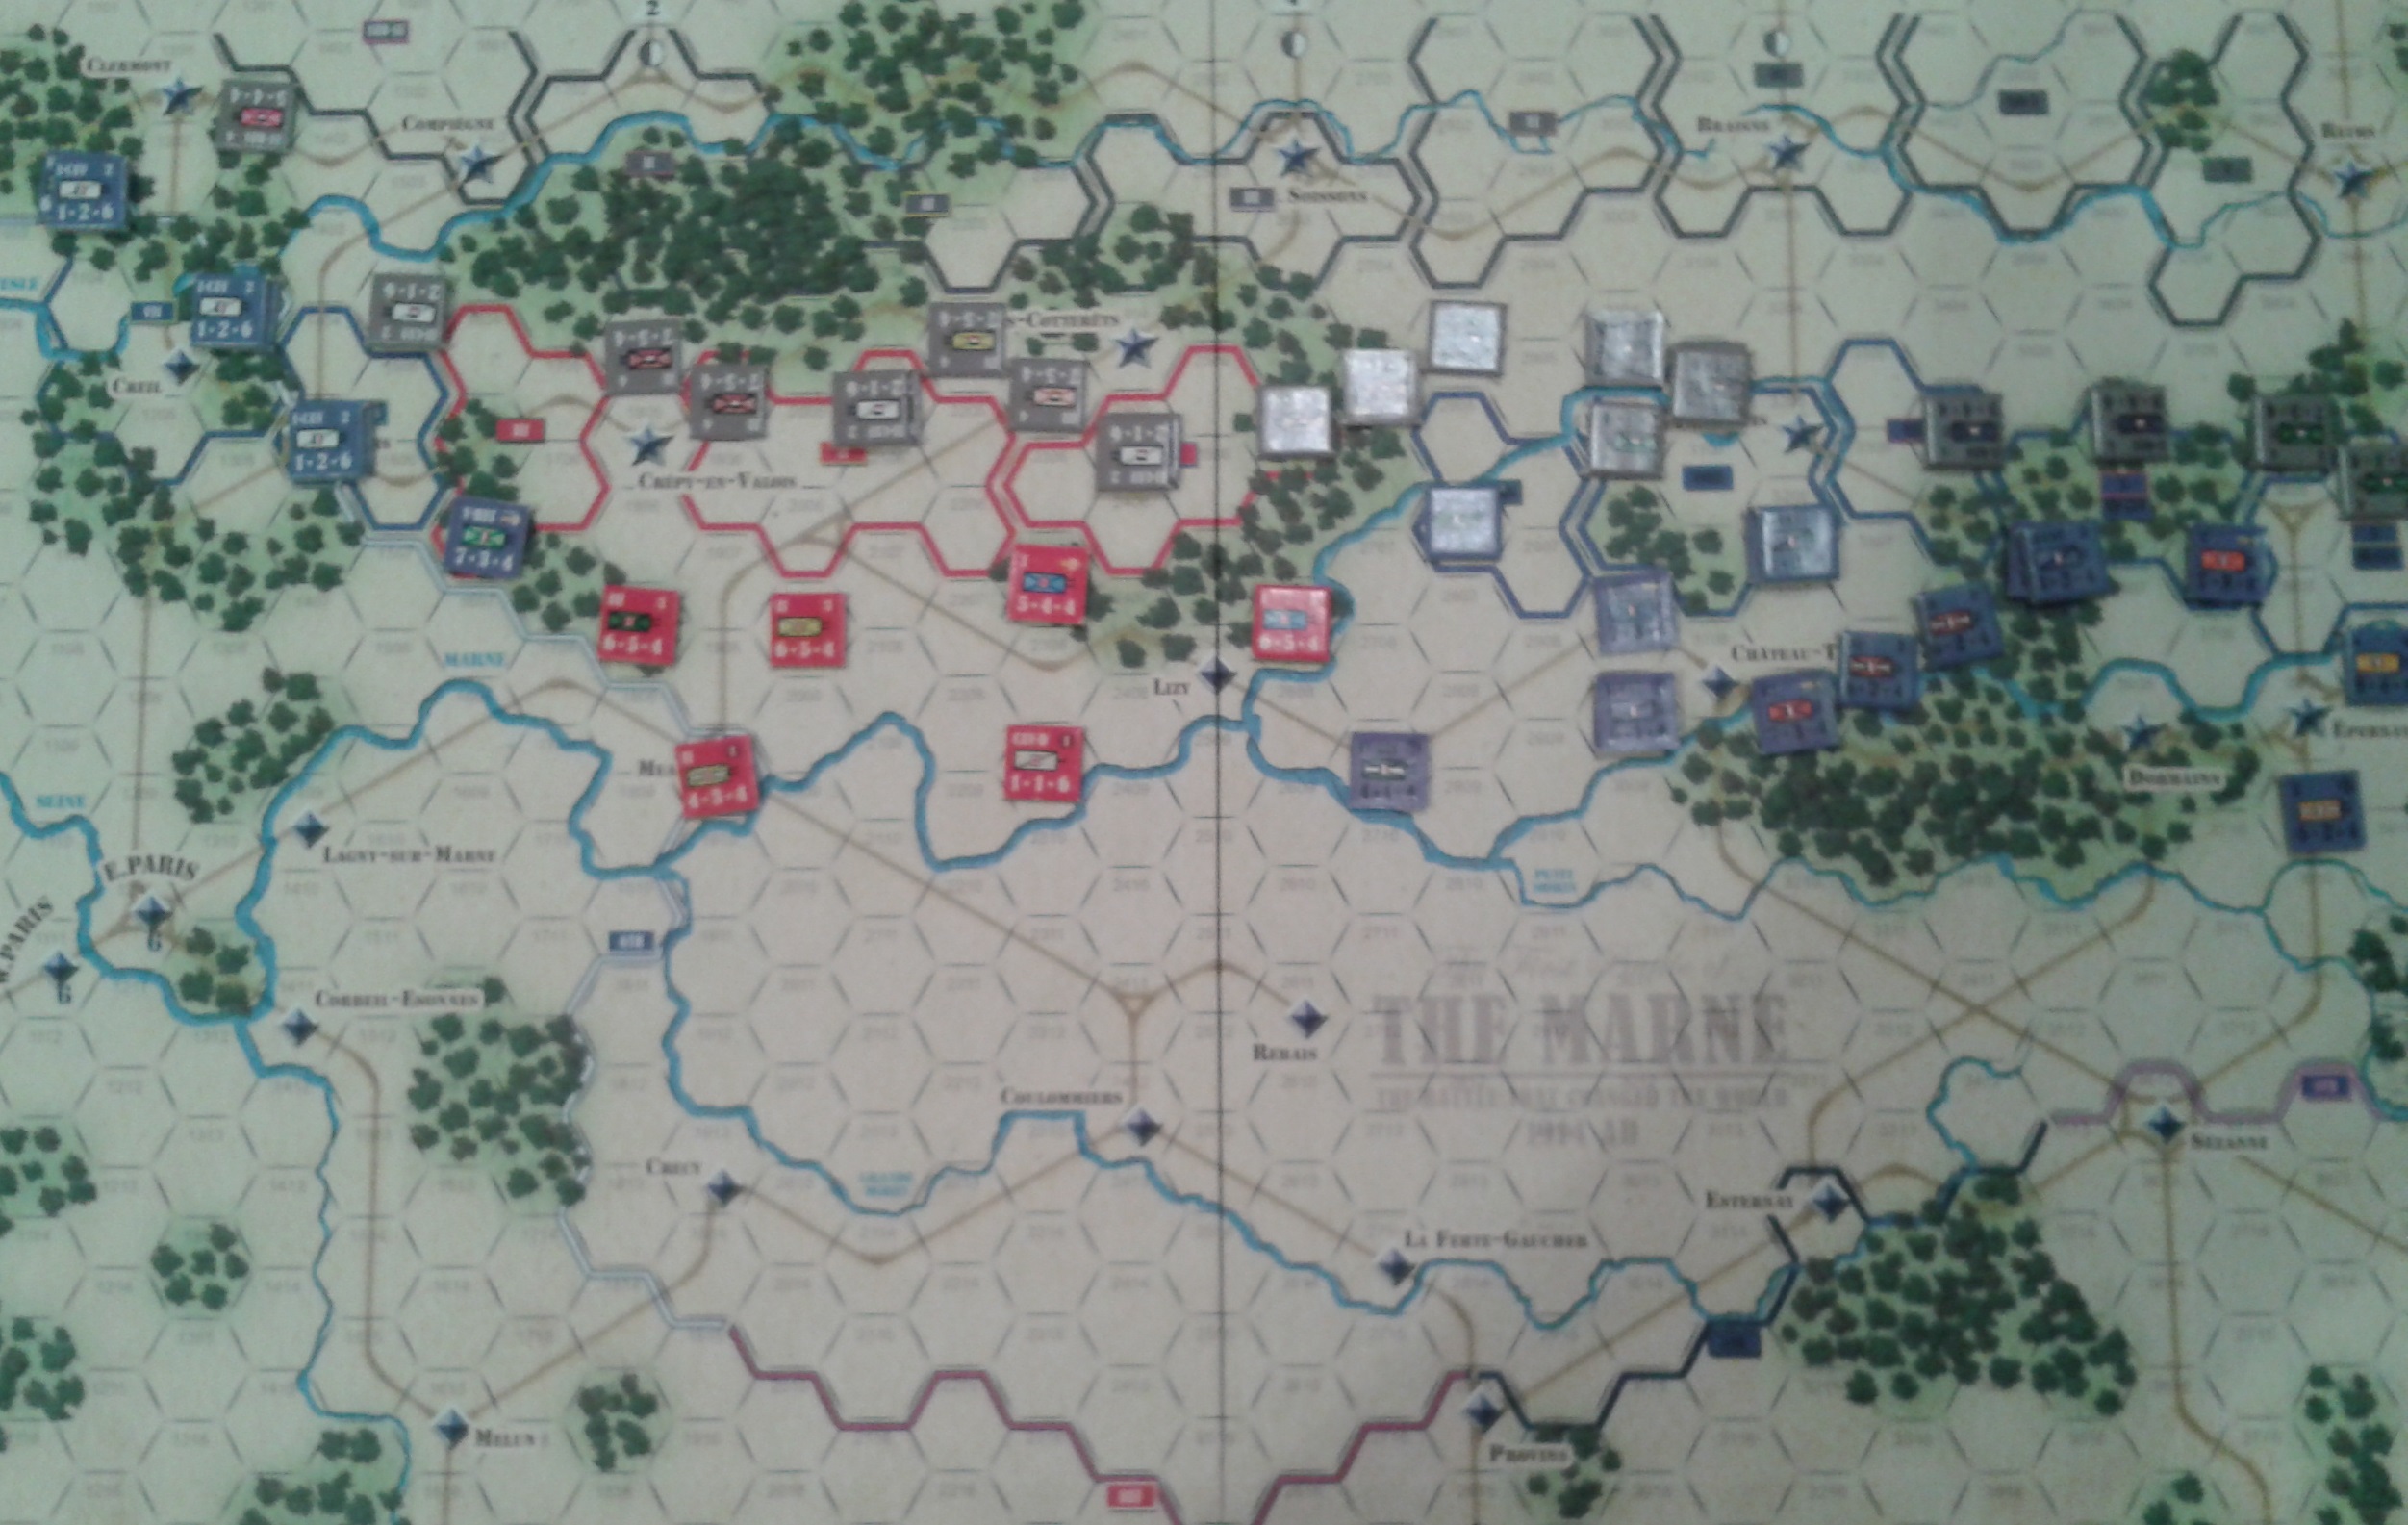
End of Turn 10. More pursuit as the ‘Meaux Pocket’ almost formed
The Germans ran. Just like the French did. It felt good. No, it felt great. I exploited gaps as I attacked. I retook Langay sur Marne and was at the outskirts of Epernay, but the BEF blew its attack on Crecy. The German east flank remained vulnerable, but the Hun pulled back towards the Marne, evacuating a small bulge near Crecy
The BEF is just too small and weak to sustain an offensive. After extensive analysis, my supply decision usually gave full supply to the Vth and VIth Armies and then usually the IXth Corp.
Turn 10
A series of lackluster attacks signaled a tiring Entente offensive.
The Germans fell back a bit in the east as they were outnumbered and out of position.
Unlike history, where a gap developed between the 1st and 2nd German Armies, the gap in the game was between the 2nd and presumably (off-board) 3rd Army — exactly where the French IXth Army arrived this turn.
End of Turn 10.The German center reforms with strength, but the eastern flank remains barricaded by only two German cavalry units…and slow-movement terrain.
Turn 11
I pressed hard in the east trying to exploit the weakness and pushed to recapture French towns — especially the starred towns that deduct German VP points. I blew a hole in the eastern portion of the map and infiltrated my way North with the VIth Army on the western side of the board.
Hmmm. I wonder if I can bag both the 1st and 2nd German Armies with a double envelopment? Very difficult to do with the system and the VPs come with capturing towns, not Armies.
Only three turns left — it will be close.
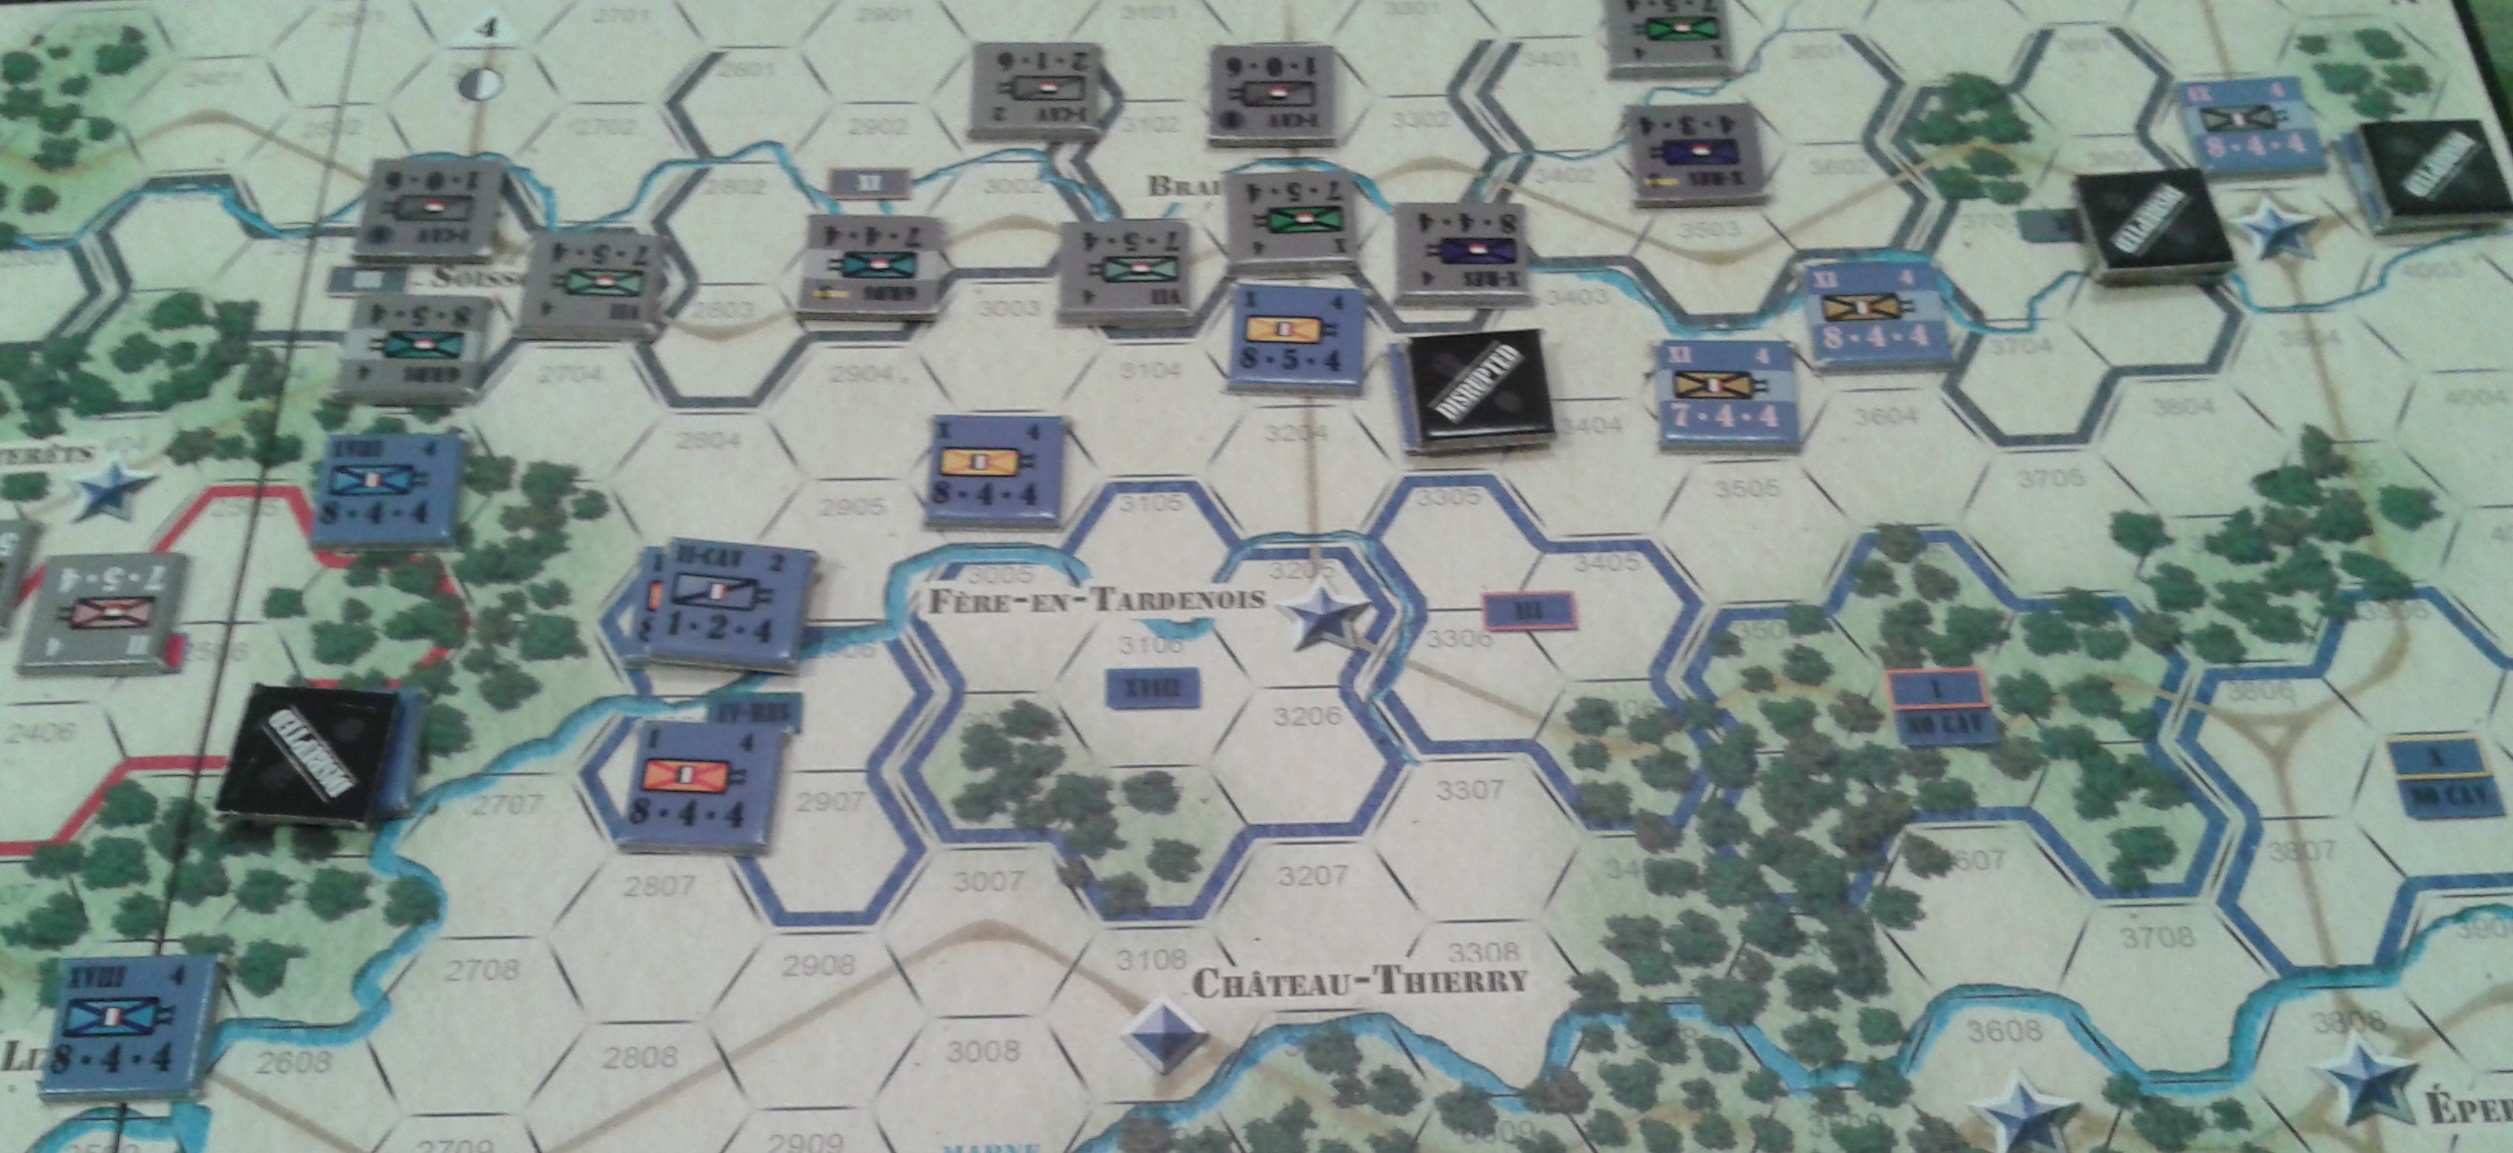
End of Turn 13. The set-up for the last turn – only the towns count: Compiegne in upper left, Crepy-en-Valois in mid-left, and Braisne in upper right.
Turn 12 and 13
The Germans in the ‘Meaux Pocket’ escaped despite my best efforts, but the broad-front advance continued, especially in the east, as town after town fell. Disruptions partially disrupted the set up for the Turn 14 finale.
The Germans collapsed to a semi-circle from Braisne in the east through Villars-Cotterets in the center and Crepy-en-Valois and Compiegne in the west.
Turn 14
A last gasp of Entente attacks captured Braisne, Crepy-en-Valois, and Compiegne. Dennis cleverly left Villars-Cotterets ungarrisoned but ringed with zone of controls that stopped me a hex short.
My quick tally of VPs found that if the game ended in the positions after my half of the turn, the Entente would win by 3 VPs.
The Germans figured that out, too, and launched counterattacks against all three towns.
It started well for the Huns — he recaptured Braisne (2VP). But it ended well for the Entente — the Germans failed at Crepy-en-Valois, and Compiegne. That left a 1 VP minor victory for the Entente.
 End of Turn 13. The French launched all-out attacks against the entire German line hoping for disruptions to immobilize any counterattack. Braisne (upper middle of photo) fell, but the Germans recaptured it on their half of the turn.
CLOSE GAME — BALANCE
You can’t ask for a more nail-biting finish to a game. We often abandon games at the halfway point because after a couple playings, and rules clarifications, we have a feel for the ebb and flow of extrapolating end results. In the case of Marne 1914, we played to the end because both of us could not tell who would win — it was that close. Indeed, 1 VP is as close as you can get to a balanced game.
 By the end of the game, thanks to Lembit’s clarifications, we were battling the situation, not the rules. That’s the ultimate compliment I can give a set of rules.
Moreover, the situation gives both players a sense of opportunity that will arise out of the depths of panic. In the first half of the game, the French run. You may not like the mandatory retreat rule, but the pre-game historical situation was indeed bleak and the rule reflects the panic infecting the Entente troops.
When the initiative shifts, it’s time for the Germans to panic. Not at first, but with ever increasing concern as the numerically superior Entente presses its advantage. Unlike the pre-initiative Entente, the Germans don’t have to retreat, their supply is intact, and they can launch attacks whenever they want. However, trying to hold a bulge with too-few troops to properly do so forces them to react…and likely retreat.
Then again, both of us had second thoughts about the distance we retreated each turn to prevent destruction, but that’s what happens when you play a game for the first time. You don’t know all the key hexes. You don’t know the full extent of offensive firepower. We didn’t even really know the VP conditions except that grabbing towns was good.
 If I had to focus on one game-changer, it’s the random die roll to switch the initiative. I was fortunate to get the 1/3 roll on Turn 8, allowing seven turns of offensive action (the same number of German initiative turns). As it turned out, even a one-turn delay in grabbing the initiative would have spelled defeat. If the Entente fail to grab the initiative until Turn 11 (automatic: roll of 1-6 on a d6), it is highly unlikely it will have enough turns to push back the Germans and grab the towns.
This means that the French and BEF probably have to be stingy in retreating during the German initiative. Likewise, the Germans need to be stingy in any retreat during the Entente initiative.
Ah, but that’s hindsight after playing the game through! Different die rolls, different strategy, and different attempts will likely produce a different ending. Still, it makes us want to play Marne 1914 again, and that’s the highest compliment I can give a game.
RULES CLARIFICATIONS
Thanks to Co-designer and Developer Lembit Tohver (Jon Compton is also listed as the Designer) for his fast response to our questions. His quoted clarifications are in bold italics, while my paraphrases are the rest.
French Vth and BEF Mandatory Retreat: Must retreat one hex South, SouthEast, or SouthWest until cross Rally Line or gain initiative. “The requirement is to retreat at least one hex, not to get further away than 2 hexes from the German units (although this may be prudent). Also to maintain the front line.”
These units cannot double back and launch attacks against German units nor can they advance against other units. They may attack if “there are German units toward their rear (mind you attacking at half strength is not prudent). These forces were basically in complete withdrawal mode.”
If forced to withdraw (14.2.2) one hex from one German ZOC to another German ZOC (lose one step) and can’t move any further due to the movement point cost of terrain, does the withdrawing unit displace? Does it lose another step and become disrupted for remaining in the German ZOC?
“They continue to retreat (and lose steps for ZOC to ZOC movement) until the condition of Case 8.5.1 is met. Once met, they no longer have to retreat and stop. Players do not have option of retreating additional hexes (and possibly losing additional steps). Planning of positioning of your units anticipating the opponent’s aggressive actions is a big part of this game’s learning curve.”
Movement: Disrupted units can move in the movement phase. Disrupted units never advance after combat.
Combat: All attacks against a defender are rolled on the CRT before results are used. Step losses do accumulate, but multiple retreat results are treated as retreat one hex.
When a stack of units receives a step loss and disruption, the step loss is applied to one of the units in the stack (owner’s choice), but all units in the stack are disrupted.
If the defender retreats, any attacker may advance, even if that particular unit’s attack did not cause the retreat.
Attackers never retreat due to a combat result.
CRT: In the CRT, +3 and +4 column, should the result for a roll of “1” be reversed? It seems the “1” results are identical but that the +4 roll gives a worse result to the attacker… “No. This is correct for the distribution of the attacker disruption results on the table (even though it looks worse).”
VPs: No benefits for German units moving off the Southern edge of the board (although breaking the Entente line from East edge to West edge would generate 1 VP) and no benefits for Entente units moving off the northern edge of the board.
During the game, I had an opportunity to loop around the northern edge of the mapboard with a cavalry unit (+2 MP for strategic movement) and exit one of the northern roads, but saw no reason to raid a supply depot or gum up a reinforcement route. “This is something that I view as possible, but un-historically gamey. I want the Entente player to assume the mindset of the Entente High command which was either Defend, or withdraw to not be eliminated. Is this scripting in the game? Yes, but it makes the players enter the position of their historical counterparts and not be gamey.”
Cadre Box: You do not have to spend a replacement point to roll for a cadre to possibly reappear on the map.
The British cavalry division is treated as a Corp and gets a separate roll when trying to exit the Cadre box.
Army Boundary Lines: So, French IX Army comes in and you place the Army Boundary Marker on a hex row. This is fine for going North-South, but what if the German flank gets turned and the Allies start heading East-West? The V Army stays in front of the Germans to the South, but how can the IX curl around and behind if they are forced to stay within the hexrows? “The dilemma here was with the guidelines of the games produced in this series and to keep them simple. This was the compromise I had to make here for gameplay without adding tons of additional rules (having to define ‘Rear Area of the Enemy’ takes up a lot of rules with exceptions.
So, here is an optional rule that players can use:
Army Boundaries ‘Rear Area’: Friendly Units that are considered in the enemy’s ‘Rear Area’ (player’s will have to agree upon what they view as ‘Rear Area’ before starting the game) are exempt from Army boundary restrictions until they are no longer considered in the ‘Rear Area’ of their opponent. ([b] Suggested Method of Determining ‘Rear Area’. At the start of each player turn, the non-active player points out his ‘Front Line'(as per guidelines of Section 4.6) to his opponent and thus establishes his ‘Rear Area’.”
The German’s 20 main units are being stretched against the greater number of French/BEF units (hence the flanks being somewhat open). “Nice to hear. Historically, the Germans screened those open areas with their cavalry.”
THE DESIGNER RESPONDS
“With regards to the 7th of September and why I used that date for possible Initiative change. After reading about the Entente Higher Command’s mindset leading up to the actual counter-attack, I reasoned that the September 7th date was the earliest day at which point they could have reversed the headlong withdrawal of their troops and assumed an aggressive mode. This is a subjective assessment on my part and is open to refute. I felt it was justifiable within the ‘Variability’ design parameters I wanted for the game. Players can use the historical timings which provide a challenging game for both sides.
Thank you for putting together this AAR/Review of the game. Your comments reflect the processes that my playtesters went through as they progressed in learning the nuances of the game.”
— Lembit Tohver
Related Articles:
First Blood: Second Marne – Review
Strike of the Eagle: Soviet Initial Strategies
Masuria: Tannenberg’s Little Brother – The Boardgaming Life Review
We like to hear from you! Please leave your thoughts and ideas in the comment section at the very end of this article.
About the Author
 Russ Lockwood has been bouncing around the wargaming world for the last 25 years in one capacity or another. Most know him as creator and CEO of MagWeb.com (on-line archive of 162 military history and related magazines from Coalition Web, Inc. from 1996-2009). He appeared on camera on The History Channel (Modern Marvels), ABC, NBC, Fox, and various cable TV shows. MagWeb was also covered by the NY Times, USA Today, and other newspapers, a variety of trade and consumer magazines, and a multitude of on-line sites. He’s given lectures at various HMGS conventions, Origins War College, and various professional meetings and seminars. Although MagWeb closed in 2009, those white MagWeb rulers still appear on wargaming tabletops across the country.
On the prior professional front, Lockwood was Editorial Director of AT&T’s web division, Senior Editor at Personal Computing Magazine, Assistant Editor at Creative Computing Magazine, Telecommunications Editor for A+ Magazine (Apple), tech writer at AT&T, Staff Writer (Financial) NY Times Information Service, and freelancer for PC Sources, Windows Sources, PC, MacUser, Byte, Restaurant Business, Hotel Business, Computer Buyer’s Guide and Handbook, and other magazines. He also hosted a radio show, ComputerWise, for five years, and was an on-line editor for ZiffNet on Compuserve and Ziffnet on Prodigy.
He is currently a freelance editor and writer covering financial and defense news, with a concentration on the retail industry. If you are really interested, go to Linked In, where he maintains a profile.
On the miniatures front, you may have seen his byline in various hobby publications in the 1990s and 2000s. Lockwood is also the author of: Snappy Nappy: Simple, Subtle & Ultrafast Miniature Rules for the Napoleonic Era, and, Hyperspace Hack: Ultrafast Spaceship Fleet Battles with Miniatures (both published in 2009 and available from http://www.onmilitarymatters.com and http://www.caliverbooks.com).
Lockwood is also the editor of the Secrets of Wargame Design series, releasing the fifth volume in 2015.
