By Paul Comben
Designer: Godfrey Bailey, Geoff Noble
Publisher: Legion Wargames
Is there fun in total failure?
Some military ventures are simply wrong from the start. Everything about them is inauspicious and ill starred, with calamity and disaster simply awaiting their cue to show themselves to full effect.
Colenso, the subject of Legion Wargames Redvers’ Reverse, is about as good an example of this as you can get. A British army of over sixteen thousand men was meant to be lifting the siege of Ladysmith in the last days of 1899. In their way were several thousand Boers with German rifles, a small number of German-supplied and German manufactured artillery pieces, a winding river the British had not positively identified the fordable regions of, and a fair amount of high ground overlooking the British low ground.

Redvers Buller, the British commander, did not really fancy the prospect; and anyone with a smidgen of military sense would have concurred. Nevertheless, given his own logistical issues and the bad news coming from elsewhere in the evolving war, he felt he had to “give it a go.” In such circumstances, making certain the key subordinates knew what was expected of them, and that no one did anything rash, was of paramount importance. But, when battle commenced, one or two of those subordinates (most of whom were not his choice) seemed to forget which end of the nineteenth century they were huffing about in, or else appeared to think it was very important to take whatever instructions they had been given and then do completely the opposite.
The results were perhaps more embarrassing than they were totally disastrous, with entire brigades heading to the wrong place and long range artillery being deployed within shot of the Boer riflemen. With casualties starting to build, and guns lost, Buller called off the action. That was the sensible course from a sensible man – who would subsequently be replaced as the London press made hay with the news from the front. Could it have gone better? Maybe, but it would be a serious challenge to pull off anything like a success in the same circumstances – circumstances that the player will have to grapple with in this solitaire design.
Components
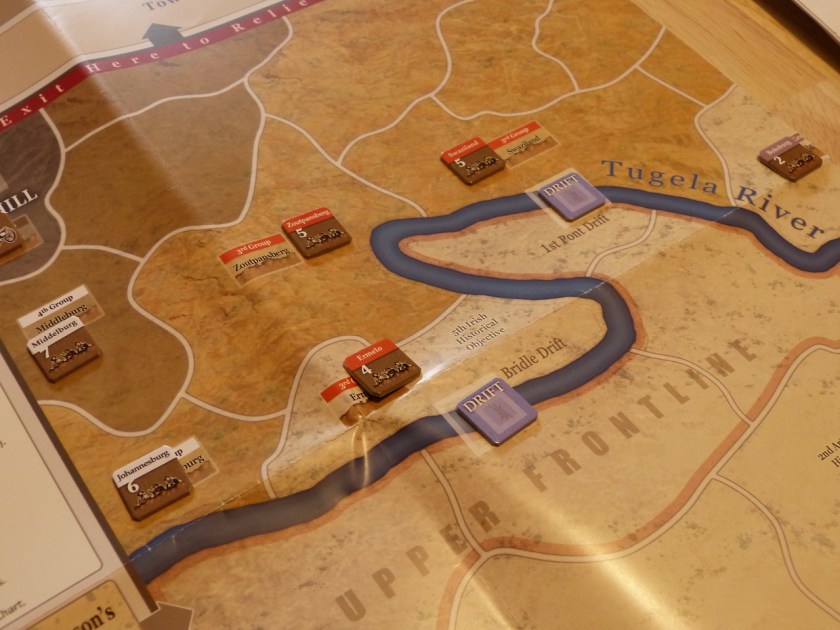
This is a nicely put together game in terms of the materials you will be working with. The playing surface is functional rather than overly flamboyant, but does present a nice aesthetic in how it presents the territory around Colenso. The map is divided into areas, whilst a small number of off-map regions portray the ultimate goal of the British (the road to Ladysmith) as well as a potential flanking threat from Boer forces starting in the west.

The all-important drifts are marked as specific locations between the relevant larger areas to either side of the Tugela River. Here you will place, by blind draw, a drift counter with a crossing number on its hidden side – thus, you have no knowledge initially of which drift or drifts are going to be the easiest to negotiate. To cross, you need to roll 2d6 and hope that your total is equal or less to that particular drift number when its value is revealed.
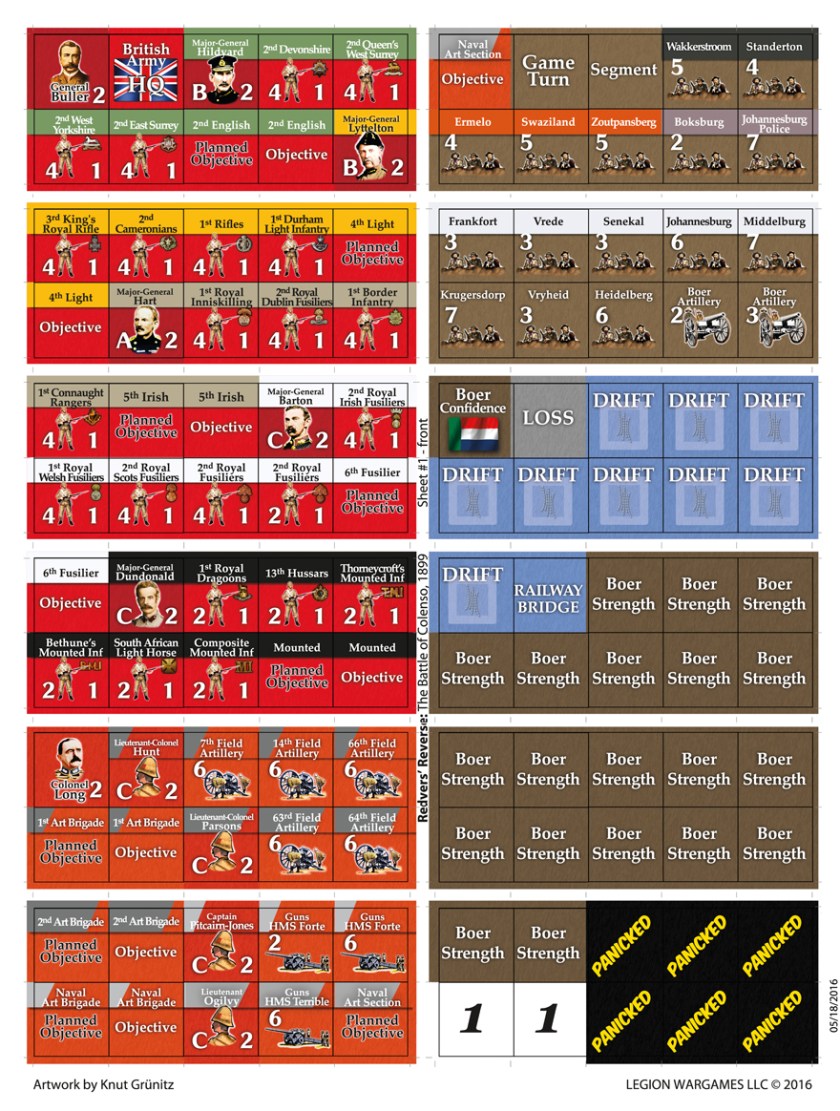
As for the combat units and markers, they also suit the design well – commanders are presented in portrait form, with an A to C rating for aggression (British); combat units show troops/commandos of the opposing sides, with a combat strength and movement allowance for the British and just combat strength for the Boers; the various status markers are clear and unfussy.
The one issue is the actual rulebook – not the rules system I hasten to add, which is a commendable piece of work, but the presentation of the rules themselves. What is wrong? A number of rules in the actual booklet seem one or two sentences short of proper clarity, and in places the rules phrasing is awkward. Added to this, a few key mechanisms have no explanation in the rules at all, and for those you have to go hunting around the charts and tables – such as how the Boer off-map area works; the triggering and effects of a Boer sortie from their own lines; certain command effects, and one or two other things. Overall, and this needs to be stressed, it is not that there are major holes in the rules; more a case of things not being where you would first think of finding them, or at times their not being presented in the most succinct way.
In my opinion, in addition to some rephrasing, the rules could have done with a proper glossary, an index, and a full example of play. On a separate card, you do get examples of Boer rifle and artillery procedures, which is certainly helpful to a point as I was struggling with what the rules themselves had to say in regard to target selection for the Boer ordnance. But, like a few other things, it does not cover every contingency that is likely to happen, and given that this is a cracking design once you have got the gist of it, I feel the team here sold themselves a little short by not committing more to the printed page – yes, there is a video online, but that does not cover all the system or make it clear at all points the whys and wherefores of what is being done.
And so to battle…
The Feel of The Thin
As I went through my test plays, two well-regarded design models came to mind. The first is the orders model from The Gamers – particularly in its Napoleonic and American Civil Wars forms. The second is the area move and combat system found in the likes of Storm Over Arnhem etc. That similarity should not be overstated, but in my opinion at least, it is definitely there. Essentially, what we have in Redvers’ Reverse is a pretty simple set of mechanisms linked to one heck of a hard nut to crack in terms of winning the game.
Getting Your Men Forward, Stopped, or Back Again
Orders travel from Buller, who will ideally be with his headquarters. As is the case with those The Gamers’ designs, orders can take some time to reach their intended recipient – if they actually get there at all, that is. If an order is deemed to arrive (delays are all worked into the lag before you can place an objective marker for that formation), you roll to see what is going to be done with it – ignored, accepted, or prompting a rush of blood to the head (termed a “charge to the guns!”) with most likely desperate consequences for whatever you were actually aiming to do.
Commanders rated A (most aggressive, which here seems to walk hand in gauntlet with notions of “blustering nincompoop”), are most likely to accept orders…or go off on a wild sally with them. By contrast C commanders are dangerously prone to do nothing at all.
The actual mechanism by which orders are plotted and then acted upon is so good and so clever one could well wonder why there is not more of such a process around. In this game, if an order is at least deemed to be heading safely to its destination, a “Planned Objective” marker is placed on the map, anywhere you choose within five areas of that commander’s present location. At the same time, a matching “Objective Marker” goes on the turn record in the spot when the order will arrive – any time from the turn you are already in (making turn placement unnecessary), to a few turns down the line. When the turn marker reaches that same space, you roll to see what the subordinate is going to do with it, and providing that is to accept the order, the “Planned Objective” marker gets replaced by the “Objective Marker,” and now your commander and his men must start heading towards it.
The actual mechanism by which orders are plotted and then acted upon is so good and so clever one could well wonder why there is not more of such a process around
Once there, you have reached the end of that order, and your units cannot do more than stand at that point, or very nearby, until another order shifts them further along. Just how far along that might be depends on circumstances, though I rather suspect there is a fine line between being far too rash and being far too cautious. Simply placing the Planned Objective/Objective Markers way in front of a brigade, with a mass of Boers between the start and finish, may not be that good an idea, as short of calamity or Buller getting the right event to alter things, you are going to be lumbered with that overreach for some period of time. On the other hand, you simply do not have the time for tiny wee bits of bite and hold. What is the right approach, I freely admit, is going to take rather more plays than I can presently muster.
Anyway, at game start, Buller and his artillery commander, Long (one of the prize prunes of the actual battle), have enough command points between them to get everything underway – or at least try. Subsequently, Buller will optimally get three command points per turn (i.e. three orders to three commands), providing he is alive and his headquarters unit is in the same area and operating – if it is in movement mode, or Buller is elsewhere, or dead, or elsewhere and dead, command points will be further reduced. Long can always issue one artillery command.

This raises the interesting question of when is the best time to get Buller and his HQ on the move? At some point this will become an imperative, as otherwise the lag on orders in some regions of the battlefield will be far too long. The obvious answer seems to be to move Buller plus his tables and tents once you have the army more or less in motion towards objectives they have yet to reach, or is otherwise doing things that do not require a series of interventions.
Of course, this presupposes that everything is going fine and dandy – which an awful lot of the time it will not. In one of my test games, a damnably poor show was put on by the two brigade commanders on my right, who just sat there like Leonidas Polk on a really bad day and just refused to do much of anything. And then there are other issues, largely to do with timing things correctly, and that against the nasty little ticking clock the system sets against you.
Ideally, and as Buller more or less planned to do, you would set your artillery up to degrade the Boer forces facing your chosen crossing points, and then, and only then, move your infantry from supporting positions to make their advance against the hills beyond. But, as I have already demonstrated, you cannot count on things moving in one coordinated series; and then, in addition to that, there is a rather clever presentation of Boer psychology built into the game system. What this basically boils down to is that the game presents the Boers as being somewhat nervy at the prospect of facing British regulars; but, the longer they hold, and the less success the British have, confidence will they begin to rise – up a point each game turn when nothing bad happens.
This makes wining the game even harder, as the British need to drag down Boer confidence by having some positive accomplishments of their own – lower confidence making it that bit easier to bring the Boers to a form of crisis/wavering check. In practical terms, this means that you need to get most of your stuff moving sooner rather than later, because of rising Boer confidence and, from turn five, the Boers drawing for their own events, many of which are far from helpful to the British cause. This is when, amongst other things, Boer sorties can start picking off unprotected artillery, your left flank can be threatened, and you really need to start hindering that Boer rise in confidence.
However, it is far more likely that, come turn five, you will still be trying to get at least some tardy portion of your army on the move, whilst your forward elements are stuck by the river trying to get a crossing die roll whilst being peppered by rifle fire and at least some Boer artillery.
there is a rather clever presentation of Boer psychology built into the game system
Given the circumstances, you may wish to withdraw at least something, but just like those Napoleonic and Civil War Brigade systems, you are going to be stuck around wherever you put the relevant objective markers unless you can make an emergency withdrawal. This, like a lot of other things, is often easier said than done, as at least a quarter of any command needs to be lost before you can even attempt it, and then those more aggressive fellows are not going to be inclined to clear off. However, if a command’s losses top fifty percent, the attempt automatically succeeds – although by then it might be considered a tad too late.
Other Things Along The Way
Unlike the Boers, the British draw events from turn one onwards. A fair number of these are rather helpful – e.g. Buller, alive and fuming, sending out extra orders; drifts being found without die rolls; Long, the artillery commander, getting on the move with whatever is with him. But others are not helpful at all – this or that commander putting the chaps in close order (Boers get a positive fire modifier); Buller having a dither; a certain Lt. Roberts getting shot up the kopje (the son of Buller’s boss, as the game puts it – counts as a full step loss); and other commanders stalling their operations through the imposition of hesitation.
Fire and Cold Steel
The combat system for Redvers’ Reverse is simple in itself – the challenge is to make it work in an effective way for your forces. Some of this might well come down to luck, as if you persistently cannot get across the Tugela where you really need to, there is precious little you can do about it. The only “guaranteed” crossing in the historical scenario is the one remaining bridge at Colenso, and good luck with that as it is ringed with Boer positions, and British units on it suffer a drop in morale as well as giving the Boers a nasty fire modifier.

Fire itself will remind many of that Storm Over Arnhem method – here, you have a lead unit plus just one other to create multiple fire, which gives you a base sum to which is added a die (rifle) or dice (artillery) roll, further modified by whatever is in play regarding terrain etc. However, one nifty addition is a random strength draw from a Boer strength pool, which will add/subtract/do nothing regarding the current strength of the active Boer unit (this is done for an active unit once per turn to create the historical doubt as to how many Boers were north of the river).
Beyond the matter of variable quantities of commandos, what is obvious here is that the British do not really want to crowd out areas with more units than can effectively fight – unless you have no choice. If units occupy an area to the point of overstacking – nine stacking points with each British battalion counting as two of those – more nasty fire modifiers kick in.
Fire effects come in step losses for rifle fire, or changes in morale state for fire from artillery – a little like the artillery effects one sees in Musket and Pike.
Sometimes, nasty modifiers will be unavoidable – you have to cross the river, and crossing the river makes you a target of note and drops your morale. The key is, try and do these things with at least some reduction in the fire coming at you.
And then there is the cold steel – probably rather hot steel factoring in the state of things and the time of year. The one big difference with close combat is that the Boers, if they are indeed on the receiving end, lose their terrain modifiers for being in the emplacements they prepared before the battle. The procedure is otherwise akin to any other fire – roll a die and consult the table.

Step losses are pretty self-explanatory, but changes in morale state are worth listing. Beyond “normal” a unit can be disrupted, suppressed or routed. All of these are shown by status markers. What the design does not do is put you into fiddly procedures as morale drops. Disrupted and suppressed units function less effectively; routed units head back towards their side of the map. Leaders play their usual part in sorting this out, although incoming fire can kill them or affect their own morale. Leaders can be temporarily panicked, or they can be defined as “standing firm” – something that confers a benefit or two for the short time it is likely to last.
One little oddity here is that, unless I have missed something, leaders roll for their personal morale before you see if they have just copped a nasty one themselves. I can see no harm in reversing this.
Winning and Losing
To state the totally obvious, you will need to do massively better than Buller did in order to win. Winning means knocking the Boers about to wreck their confidence and get the British forces well on the way to Ladysmith without wrecking your army. In the games I played I got nowhere near this. In the first game, inevitably I made mistakes over where things went and got shot up. In the second game I went to what seemed to be the right places, but could not get across the river…and got shot up. This did not bother me, as I was thoroughly entertained as it all went horribly wrong.

I do not doubt that you can win, occasionally, with the largely historical framework in place, but, both to even things up (or make things even harder), as well as keep the game situation fresh, the design comes with a large number of variants. Some of these favour the British, and others will have you at a further disadvantage. The event selection is guided both by a verbal description and a numerical weighting – with the proviso being that the two sides are matched (if you choose something to assist yourself to some extent, you must balance that with an equivalent for the Boers. An example of this in action, is choosing the pro-British event that restores the railway bridge at Colenso (a +1 weighting) and balancing that by adding more close order events to the British event cup (a -1 event).
Can I Cheat The System?
Honest answer – no idea, and frankly I am never interested in trying to break a solo system, let alone anything else. What I will say is that I would advise players to play up to the spirit of the game – yes, play up, play up, and play the game! In this context, one little thing that did come to my notice was an aspect of the Close Order event. As it stands, it is left to the player to decide, in most cases, which brigade gets lined up for target practice. Of course, without restraint, you are going to choose the brigade furthest from harm, which is something that strikes me as against the intention of the rule. As such, you may want to determine the brigade randomly, but this is only my own suggestion.
And perhaps, just perhaps, it might be possible to “bait” the Boer rifle/artillery targeting, but that is just a thought, and in any case, there is hardly anything ahistorical in preparing a form of feint.
Conclusion
Although it took me longer than it should have done to fathom the intent of certain rules, overall this is a fantastic game. You will look at the map, with the armies deployed, and in all likelihood, you will not like what you see – which means that at the deeper level you will like what you see.
In short, an excellent design by people who clearly know the subject; and furthermore, a game where you are as likely to enjoy your failures as relish your victories.
Highly recommended!
About the Author

Paul has been involved in the hobby since the early 1970s. Of largely Belgian ancestry on his father’s side, and English (Yorkshire) on his mother’s, after finishing his education he worked in tourism and student services, and also spent some time in the former West Germany. He met his wife Boo in 1990, and they married a couple of years later.
Paul hails from a long line of former servicemen – one grandfather was a sergeant in the BEF of 1914, whilst two of his great grandfathers were killed serving with the Royal Navy. His own father, who was born in Britain, served with the army in Malaya in the early 1950s.
Related Articles:
Antietam – Burnished Rows of Steel – A Board Game Review
Glory III – After Action Report
Alarm on the Marne- A Boardgaming Life After Action report on Turning Point Simulations “The Marne”
Masuria: Tannenberg’s Little Brother – The Boardgaming Life Review
Dancing Through Raindrops – Design Philosopy and the Board Game “In Magnificent Style”

Hi Paul,
Thank you for your article.
You said: “One little oddity here is that, unless I have missed something, leaders roll for their personal morale before you see if they have just copped a nasty one themselves. I can see no harm in reversing this.”
Yes, most definitely needs to be reversed, makes more sense.
As regards rules presentation, I wanted to minimize the amount of text so, not to repeat rules, I opted to have the rules printed over all the relevant components rather than concentrated in the single rules book. Overall something like the following:
Rules Book: Playing Pieces, Game Set Up, Scenarios, Segment Rules, Orders of Battle, Design Notes
Map: Sequences of Play Rules
Terrain Effects Chart: Terrain Rules
Event Cards: Event Rules
Variants Chart: Variant Rules
It is a rather different approach and it would have been a good idea if I’d described this rules presentation format in the rules book.
Hope you are enjoying playing the game.
Godfrey Bailey
It’s a wonderful design Godfrey. After decades of wargaming around the “usual” subject matter – D Day, Eastern Front, Napoleonic era etc. – I make a point of looking out for quality designs on subjects that are rarely covered. My time for gaming is also somewhat limited, and my available space even more so. Therefore concise and clever games on different subjects strongly appeal to me.
I look forward to the employment of the same model for other Boer War subjects. In fact, having written my review, I swapped some emails with Harvey Mossman urging him to get his own copy of the game set up and played.
Thanks again for such an enjoyable game
Paul
Great reead thank you