by Paul Comben
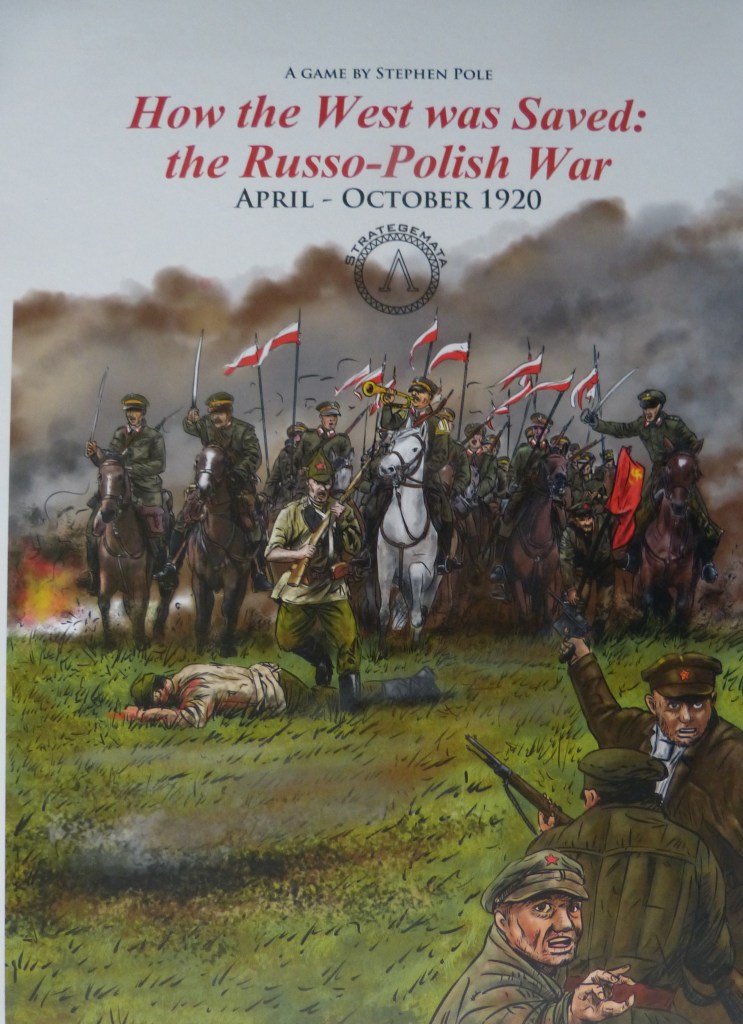
Designer Stephen Pole
Publisher: Strategemata:
Game Simplicity Meets the Historically Complex
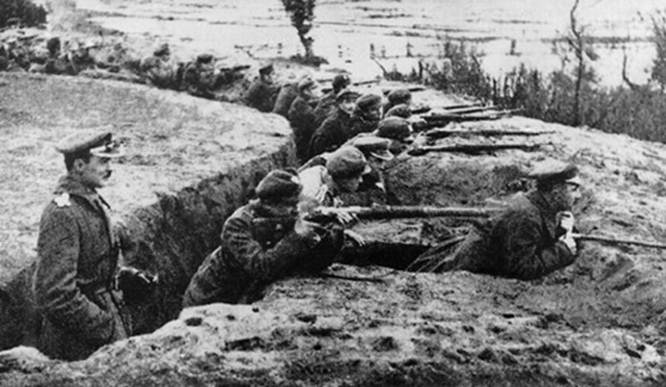
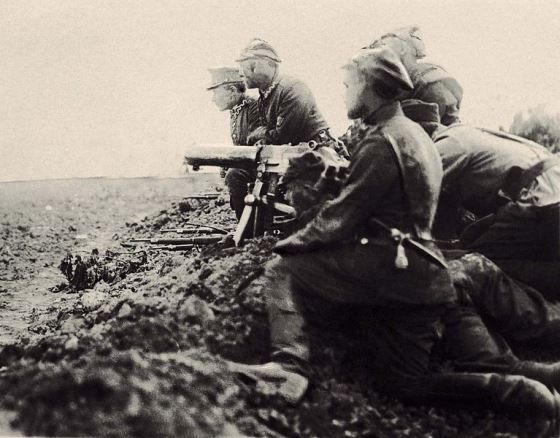
Other than knowing when it took place and what the overall outcome was, I must admit I had very little previous knowledge of the Russo-Polish War of 1920. Reading through a few introductory texts did, however, confirm one thing that I had suspected was very much the case with this conflict – that it was an incredibly complex, one might even say wild, mix of military and political events flashing into focus, then to some extent disappearing, only to be replaced by further variations of the same.


For those gamers who have looked in its direction, the war did receive a first authoritative treatment via the design, White Eagle Red Star, originally published by GDW, and then having a revised version released by Compass Games just a few years ago. Physically that revised version is a rather large game and not necessarily one that all gamers will be able to readily accommodate. Alternatively, there is Strike of The Eagle from Academy Games – perfectly valid, beautiful, and clever, but as a dice-less block game, perhaps not massively solitaire-friendly.
This new game has a smaller footprint than either of those other designs, and while there are a few issues with solo play, there is nothing in the system that cannot be worked around in that regard. Moreover, the game comes with a set of rules that should not perturb anyone with their short and very mild learning curve.
So how does it model the subject?
Through a few nuances here and there, the rules establish certain basic realities (essentially a framework) for this conflict – supply, command, the combat realities of the era, and the sense that nothing is entirely under control. All the game colour – that is all the relevant machinations, politicking, feints, slips, clashes of personalities, disasters and opportunities – is then added via a deck of forty event cards.
Before enlarging on the cards, let us first take a closer look at the rules. These are the fourth set of rules I have read for a Strategemata game and are in virtually faultless English. This might simply be due (I am making a small assumption here) to the designer having drafted them, and is someone who has English as a first language. It is important to stress that there was hardly much wrong with the phrasing of the other rulebooks, save the occasional lack of using the most appropriate piece of grammar or descriptive term. However, of much more interest is what clues we can pick up from the rules as to where the designer (Stephen Pole) was steering aspects of the design and what design touches from his other work one can possibly identify as being present here.
In that latter regard a quick look at the rules for his two Napoleonic designs for Europa Simulazioni (covering the 1812 and 1813 campaigns) show that the supply rules for those games may well have influenced his thinking for this, his latest offering. In particular, the notion of supply fed through depots is key here, as it was, with its own variations, for those campaign designs set just over a century earlier. In How the West Was Saved, combat units are entirely dependent on depots feeding supply to them – ideally in a chain of such issuing from the primary supply source; although the system will still work if an established depot becomes isolated from the others (it simply costs more to maintain in resource points each turn). The chain is dependent on no depot having more than three intervening hexes between it and the next, with more difficult terrain counting as two such hexes.
Another aspect worthy of note is a pronounced stress on unit facing – something that might strike many gamers initially as a little unusual given the scale of the game – mainly divisions operating in 50km-wide hexes. I initially assumed that the emphasis on units having their combat ability linked to strict facing protocols was to do with the trench, wire, and linear mindsets of the period meeting the reality of very extensive campaign areas that could not be completely blocked and bottled-up in the manner of a range of positions in Artois. I was actually rather delighted to discover subsequently that that was the very explanation the designer was offered on Consimworld.
One short optional rule the adds to this – although I am not absolutely certain as to whether I am taking it beyond the designer’s intent, as it involves padding out stacks of units with the copious supply of extra, unmarked counters. As written, the rule simply refers to creating the pretence of more force being present than is actually the case. However, I did find myself wondering if being able to place a blank counter on top of a stack would create a more effective sense of chaos meeting linear doctrines at work as the precise facing of his stack would not be ascertained until a moment of combat.
Be that as it may , via small bits of tuning here and there, the game mechanisms very much place emphasis, at least in my opinion, on the difficulty of the forces engaged to coordinate much of anything, offensively or defensively, or cater for any contingency arising. The last example I will give of this for now, pertains to the sheer size of the campaign area and the challenge of getting forces to move if they are too far away from a valid command unit or are part of a “revolutionary” ownership tussle between rival Soviet commanders in different parts of the fledgling Soviet Republic.
In the former case, the process of getting units on the move (activation) runs the risk of failing if a command unit is not stacked with the activated force or is immediately adjacent. The farther away it is the more chance the order and the resources (resource points) spent to create the order/activation will end up on the scrap pile – a simple process of rolling 1d6 and if the result is equal to or less than the passable hex distance between the command unit and the activated force, everything grinds to a halt. The sort of challenge this can produce can be readily understood simply by comparing the number of command headquarters available to each side (initially four apiece) to the number of hexes units are already flung out to. The potential for mishap is substantial.
In the latter case, the game caters for command rivalries between the northern and southern portions of the Soviet front. Cooperation was not particularly abundant, and therefore seeking to shift forces North or South of the on-map demarcation line during the redeployment phase (when a small number of units can move by rail) can prove resource costly.
When it comes to the cards, although there is only the one common deck of forty, a certain amount of subdivision is possible. The most obvious division to make is between the few cards that carry events that will have repercussions for both sides and the balance of the deck which has a wide variety of greater or lesser campaign events whose precise effect depends on which of the two players has played the card in question. Each of these cards contains two sets of text – only one of which will be employed each time the card is played, with the text pertaining to the owning player’s side being the one that will become active. A simple example of this is the event card that refers to one of those odd moments that can occur in a war – in this case when Polish troops mistook a herd of cattle for Bolshevik cavalry! If the Polish player employs the card, their required retreat is under his/her control and may even have a small redeployment advantage to it (irrespective of the embarrassment). If, on the other hand, it is played by the Soviet player, he or she will control the required retreat and will obviously be looking to visit some mischief on the Polish player.
The game uses a system of alternating activations by which neither side gets to do that much before the opponent can make a limited play of their own.
The mechanism for playing cards is very straightforward. After temporarily removing the small number of cards whose context only applies once the game is properly underway, each player randomly draws one card from the remaining deck. No cards, however, are played on turn 1, meaning that players will be going to the early stages of turn 2 with two cards in their hand – the one they have just drawn in addition to the one they drew at game start. The initially removed cards are shuffled into the play deck immediately after the initial selection -these are mandatory to play at once if drawn.
From turn two each player will play one of the two cards they possess.
One interesting aspect here is that unlike many other games that have any kind of event deck, you will not exhaust this deck prompting a reshuffle – fourteen turns means twenty-eight drawn cards by the end of a game that goes the full length. With forty cards in total, some events will not see the light of day in any given game.
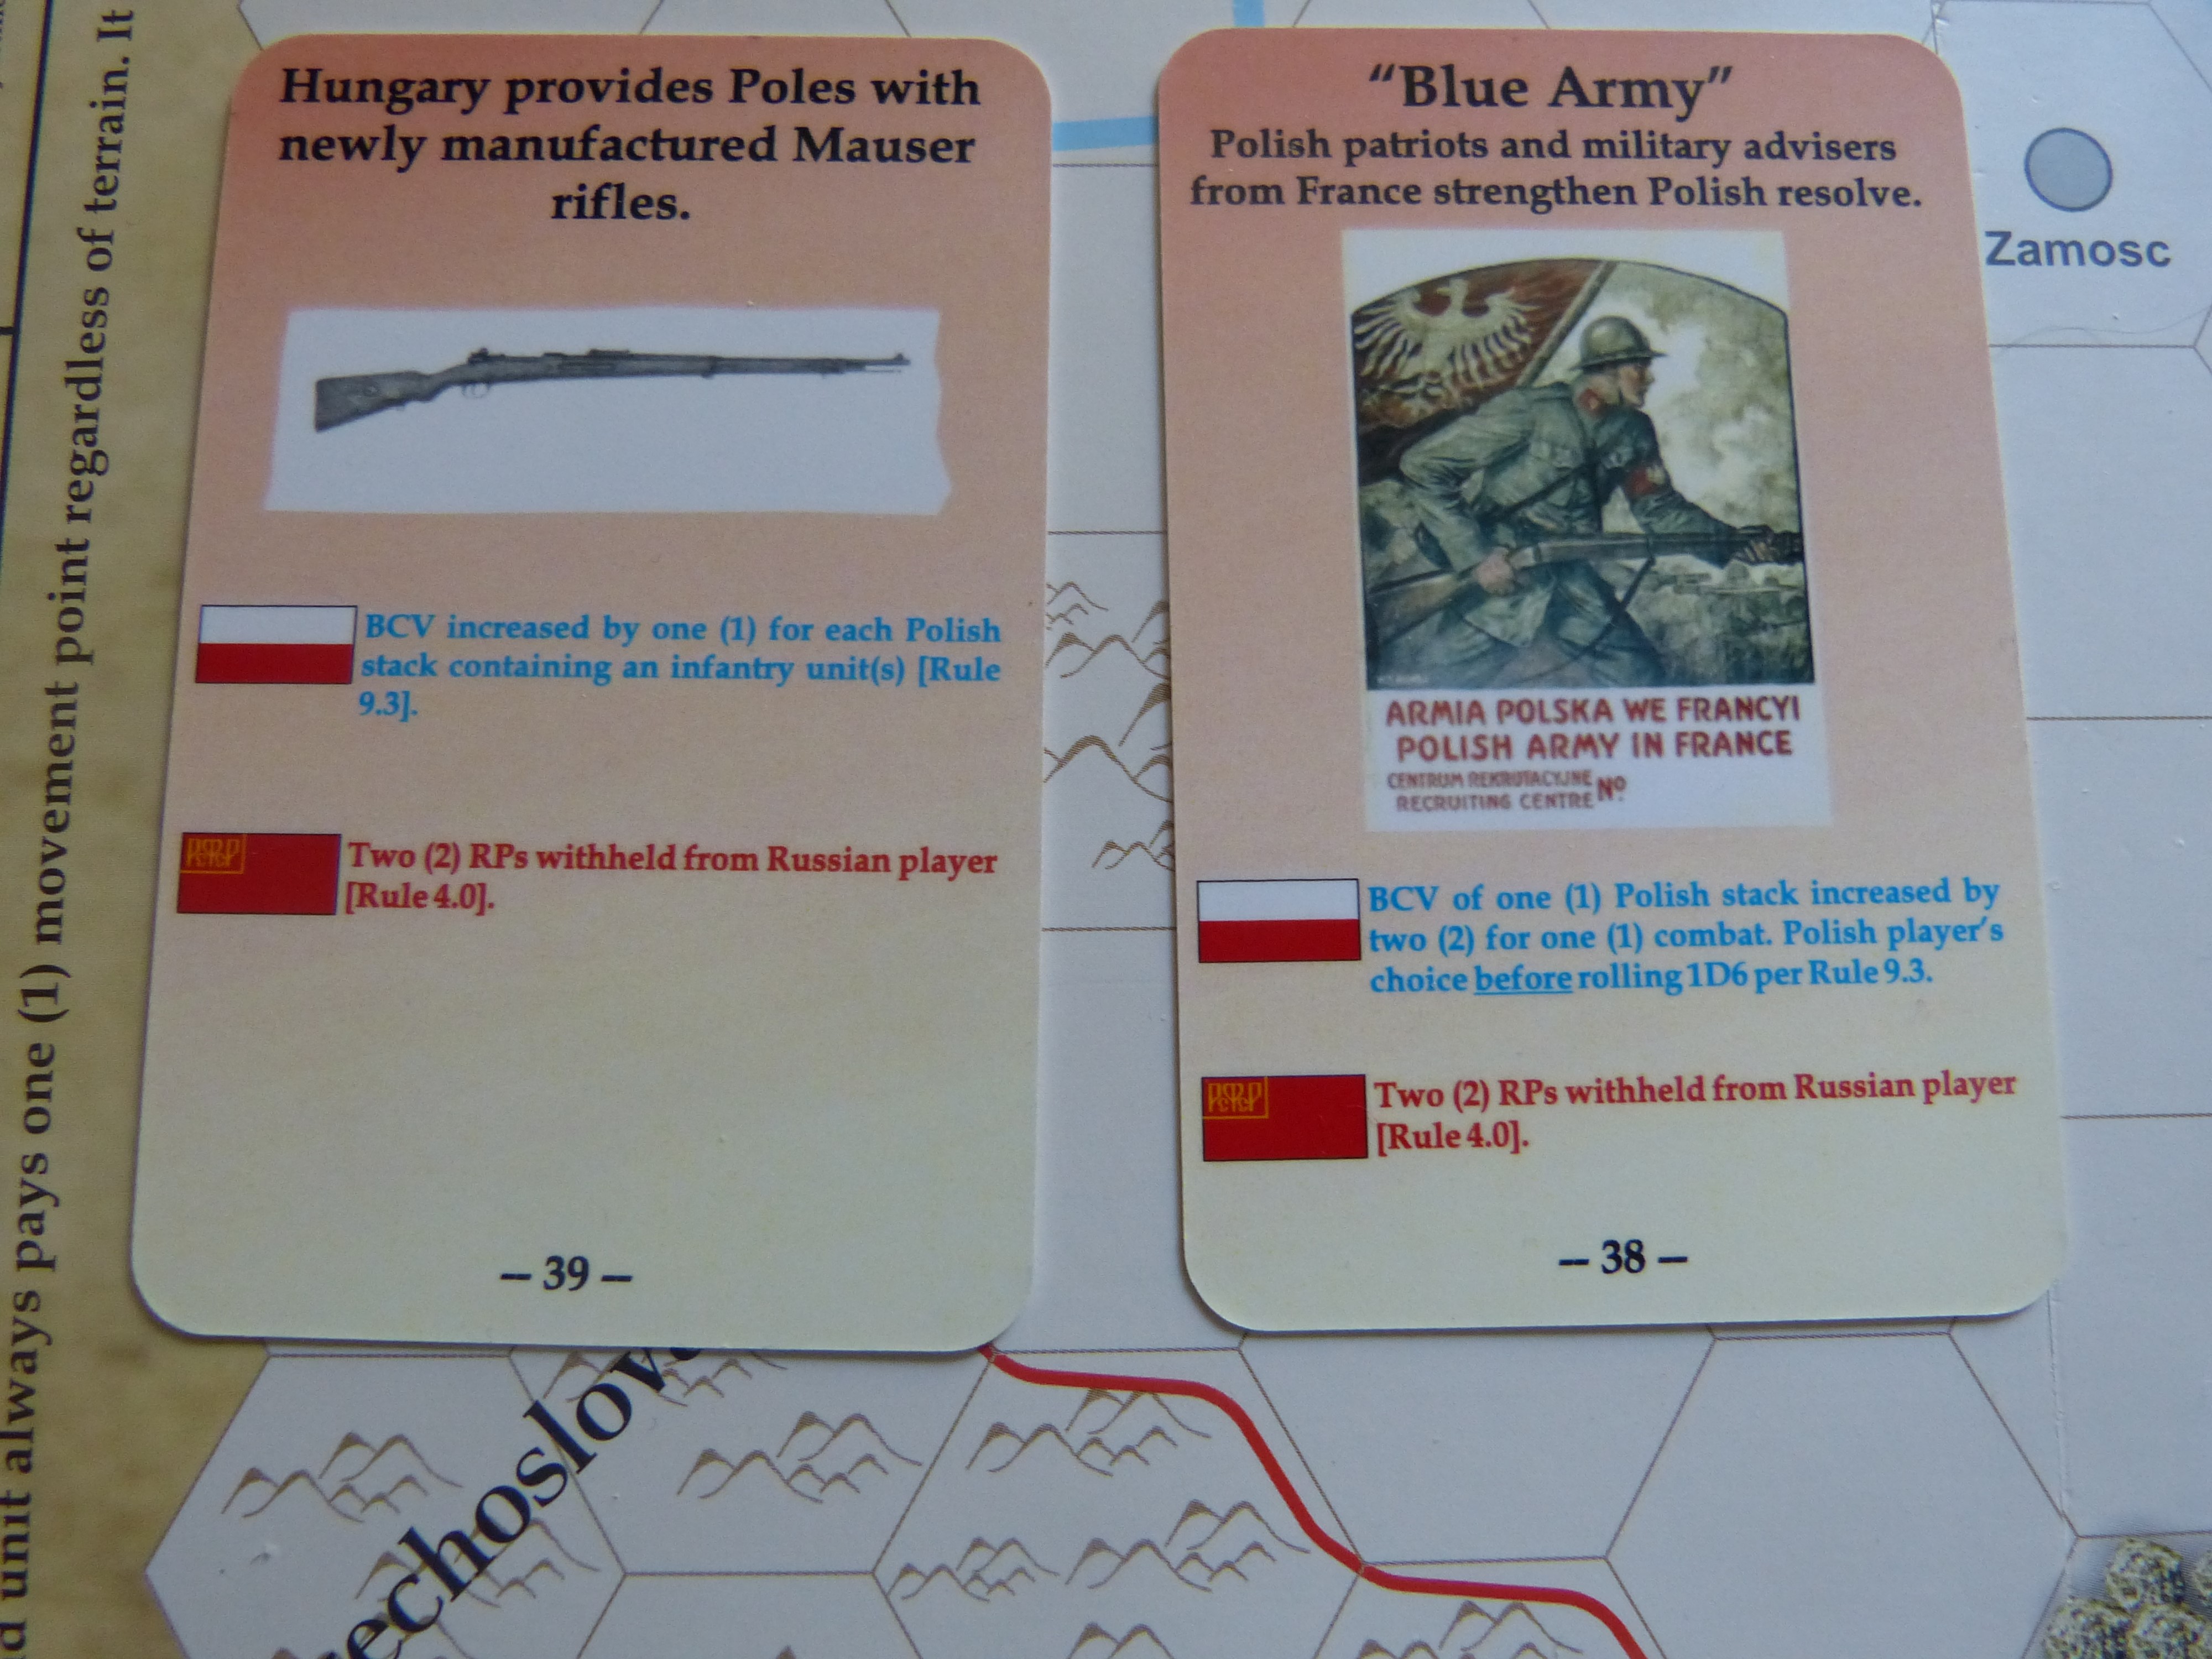
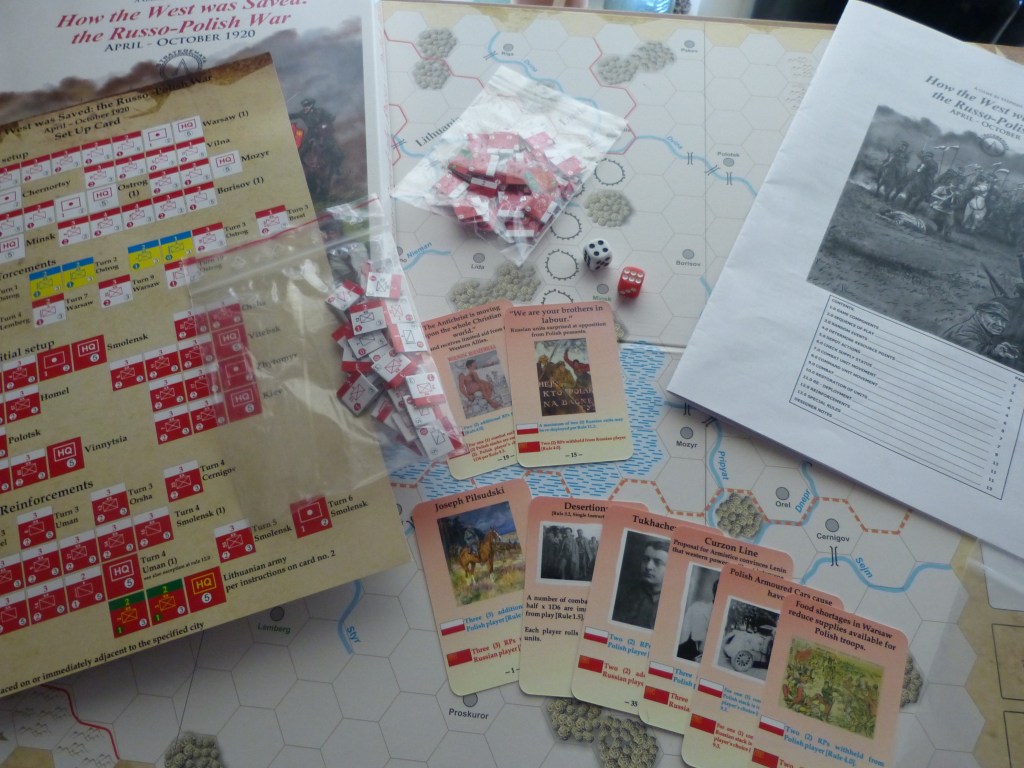
All forty cards are illustrated and give every indication of being durable. Illustrations include contemporary photographs as well as various examples of propaganda posters.
Every combat unit, with the exception of artillery, has a facing strip to the top of the unit, and such units have two combat factors – one for when they are engaged in combat through their front facing and the other if they are attacked from any other direction . Note that units can only ever attack through their front facing. Cavalry is given a certain roaming ability (moving at its full movement allowance of five) although this does come at the risk of wearing down (reducing) the unit in question. And as part of its own inherent wanderlust, Soviet cavalry also has the ability to keep in supply at a longer distance from a depot – six hexes. The chief use of artillery is to provide advantages in attacks upon cities. The units in themselves, whether Polish, Ukrainian, Bolshevik/Soviet, or Lithuanian, are not massively different in terms of comparing infantry and cavalry forces. Such differences are essentially the job of the cards.
The Pulse of The Game
One additional aspect of the actual rules is intimately linked to the sequence of play: the game uses a system of alternating activations by which neither side gets to do that much before the opponent can make a limited play of their own. What this boils down to is spending resource points from a limited supply in order to select a stack of units (including possibly just one unit) and performing an action with them. Actions range from simply changing facing (though all units in a state must face the same way) to getting units to another location and possibly into combat. Resource points for each turn are a combination of the base figure provided on the turn record track plus a random figure derived by a modified roll of 2d6 – the result of the red die is subtracted from that on the white die and any positive or negative total is then applied to the total available.
In broad terms, the better you have your army deployed vis-a-vis unit grouping and depot placement the more you will be able to do without exhausting your resources simply to shuffle a few things about. Note, that if you send different units from the same stack off in different directions, they all must be paid for separately. Thus, unless you have an incredibly good reason, performing such an action is going to get through a substantial amount of your limited pool rather quickly. Depots themselves can be disbanded and there will be times when a lack of points or the overall disposition of your forces will make such an action inevitable. Knowing when it is time to do this is likely to be a matter of fine judgement and decisions are never going to be ideal.
Further uncertainty comes in the shape of certain event cards that will either add or subtract from the current resource point total. As an example, the event card “Trotsky’s Political Commissars Interfere with Military Decisions” will take two resource points from the current Soviet total.
Resource points also have another key function which is that they are imperative to maintaining established depots. In theory, both sides can establish substantial depot networks, but as these all must be paid for at the relevant point of each turn, having too many will markedly diminish the ability to spend resources on the process of moving forces around. With, say, 8 depots on the map and one of those currently adrift of the rest of the network, it will cost the owning side nine resource points to keep the whole lot going – which is prone to leave the bulk of a side’s forces virtually immobile. This is likely to become a delicate balancing act because pushing and prodding with a lot of things across a lot of front is going to be just as detrimental as only being able to move a few stacks. Indeed, if the player has a key objective in mind, mustering forces for that aim and letting the rest of the front make do Is likely to be the better option providing it is not taken to extremes. It will boil down to reading the map carefully and not permitting profligate expenditure on what is ultimately extraneous.

And take heed – unused resource points do not get carried over; you therefore should spend the lot if you can benefit but be careful what exactly you spend them on.
As for combat, that is a matter of attacker and defender totalling factors, determining what card events and various forms of support adjacent units and assets can offer to the total, and then rolling a die each and determining consequences by subtracting the smaller total from the larger. That difference, halved, is the casualty point requirement – eliminated units (which will not be coming back) count 2, reduced units, 1. The loser inflicts half their loss on the winner. Attempting a coordinated attack is possible (via an extra stack that is also facing the defender) but is somewhat risky – 1d6 being rolled first and on a 1 or 2 the entire attack is aborted, while on a 3 or 4 the original attacker goes in alone.
The game can be won by two different methods: If the Soviets capture Warsaw they win automatically; likewise, if the Polish forces enter Smolensk that results in an automatic victory for them. If this is not achieved by either side, victory goes to the player who holds six objective locations by game end. If this also is not the case, the game and the unfolding history is considered to have ended in a stalemate.
Playing the Game – Opening Situation and Turns One & Two
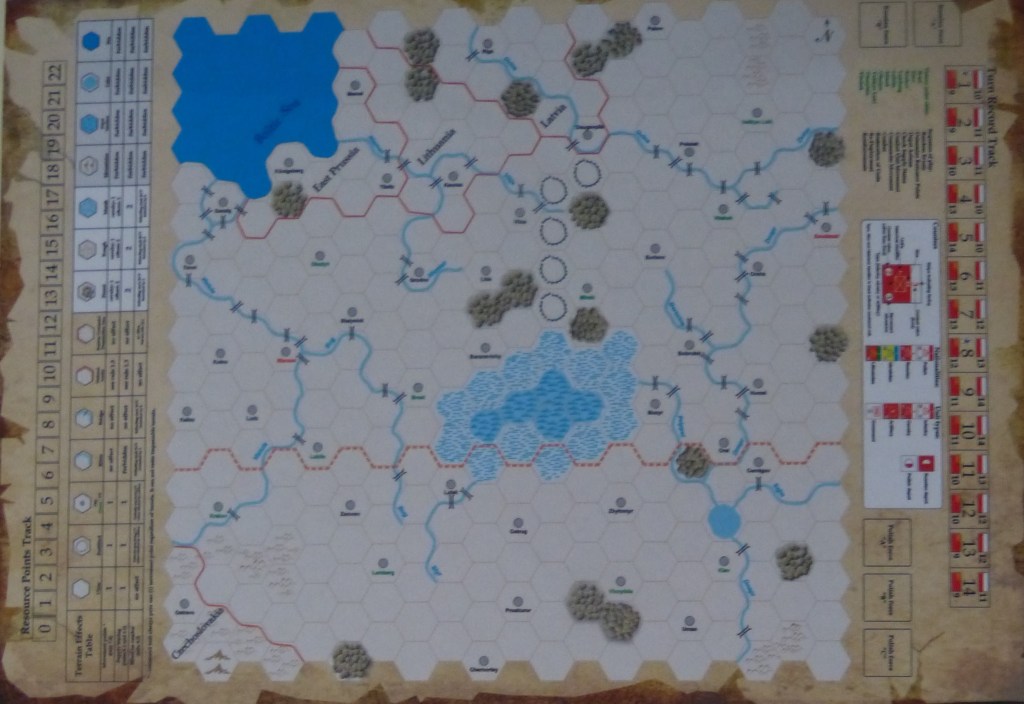
If we take a look at the map one terrain feature rather stands out – the Pripyat Marshes. As has been the case with so many other campaigns, this massive forested and boggy region divides much of the operational area in two. The central area is utterly impassable, while the outer regions are readily traversable by cavalry but are a pronounced hindrance to infantry (higher movement cost) and the passage of supply (same reason). North of the marshes, extending close to the border with the dubiously neutral Lithuania (pro-Soviet), is a chain of fortifications. Note that rivers can only be crossed for the purposes of supply at bridged hexsides.
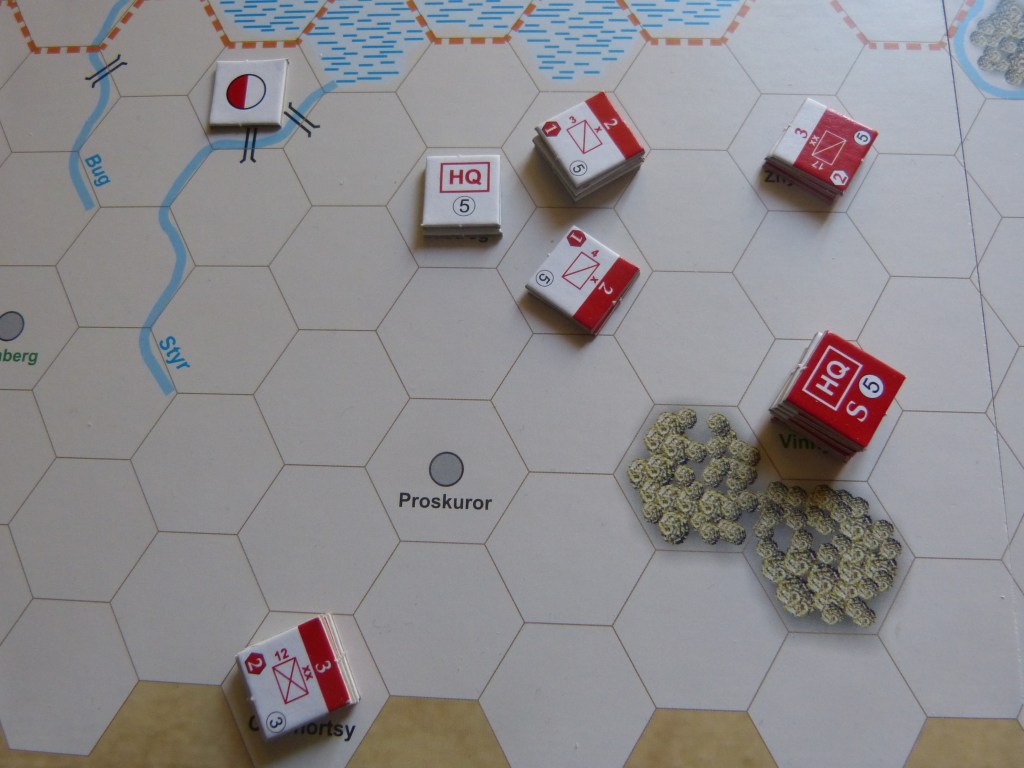
With regard to the initial Polish dispositions, although they are within striking distance of Smolensk on the north portion of the map, mustering sufficient punch at an early stage will not be easy. Polish forces are simply too spread out, and to make matters worse, those forces they may wish to bring up nearer to the front are simply too far away from command units to guarantee that any offensive-minded move can be effected. Other units are hundreds of miles back in and around Warsaw. Immediately east of the marshes, the Polish force at Mozyr is rather hanging out on a limb. Likewise, the forces that begin at Chernortsy (southern edge of the map) are doing nothing positive by being where they are.
Finally, as far as the Poles are concerned, the significance of the depot at Brest must be stressed. From this location the chain of Polish supply splits either side of the Pripyat, and thus the depot needs to be maintained irrespective of whatever occurs further east.
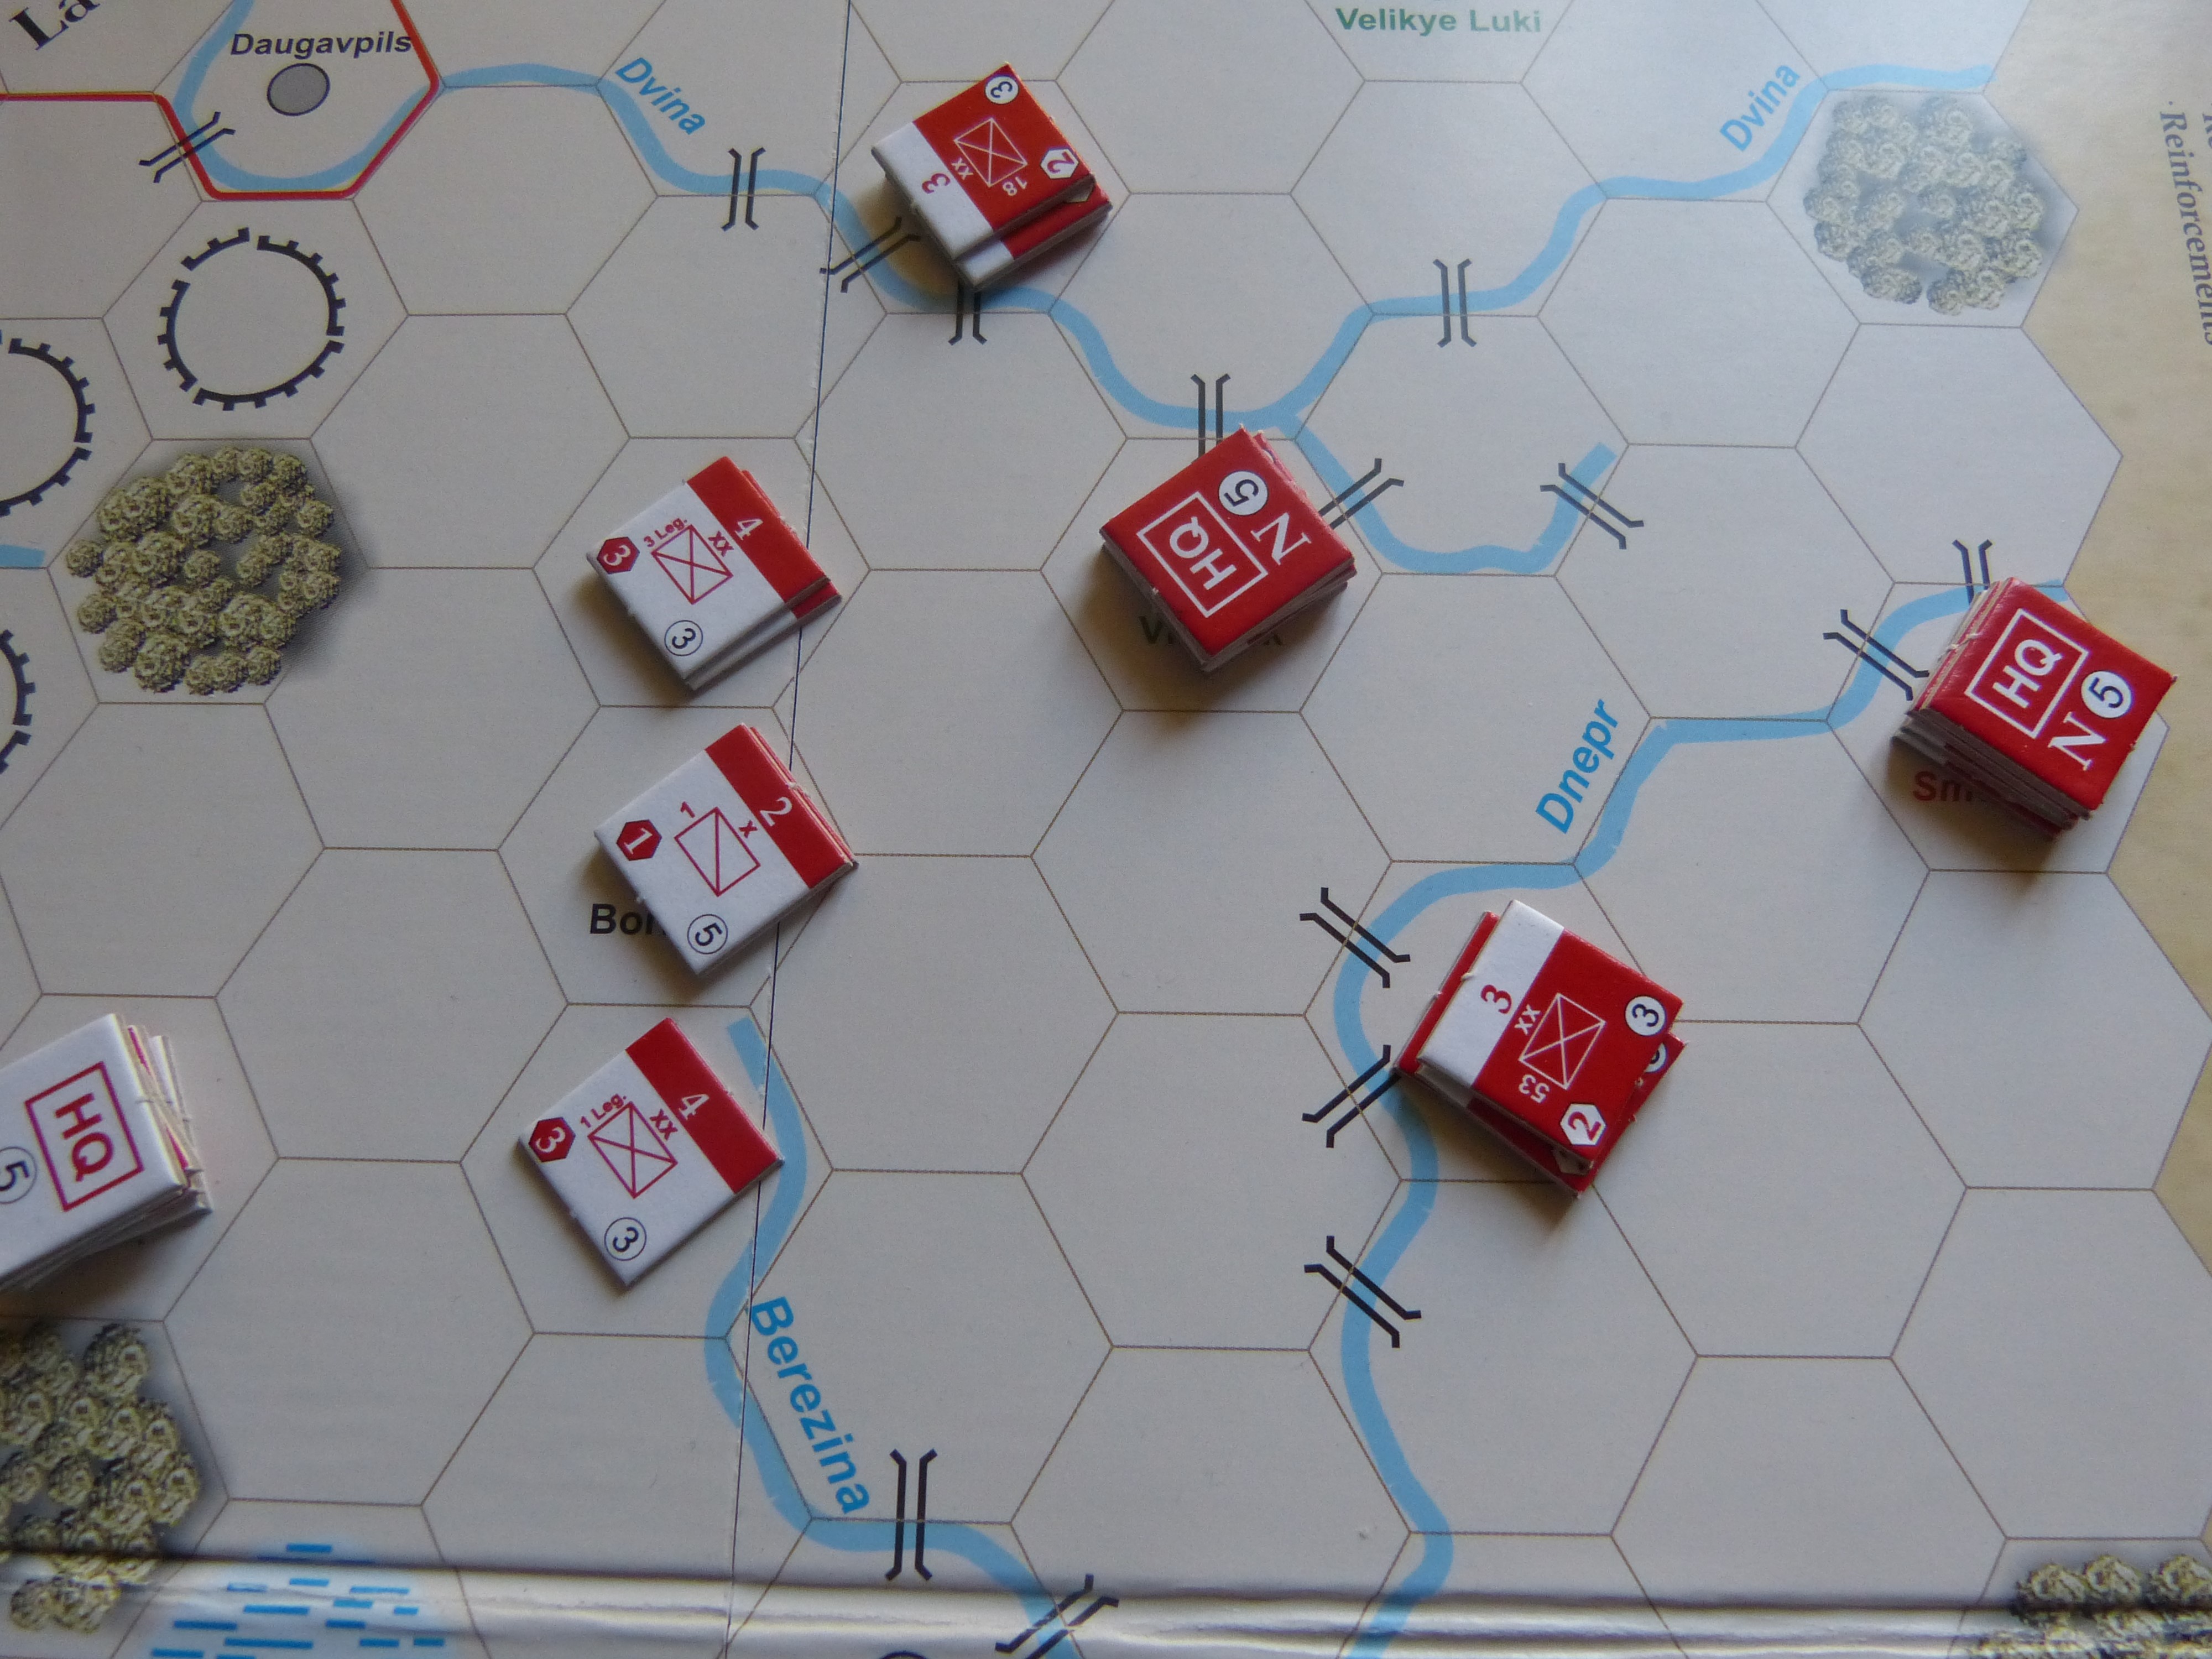
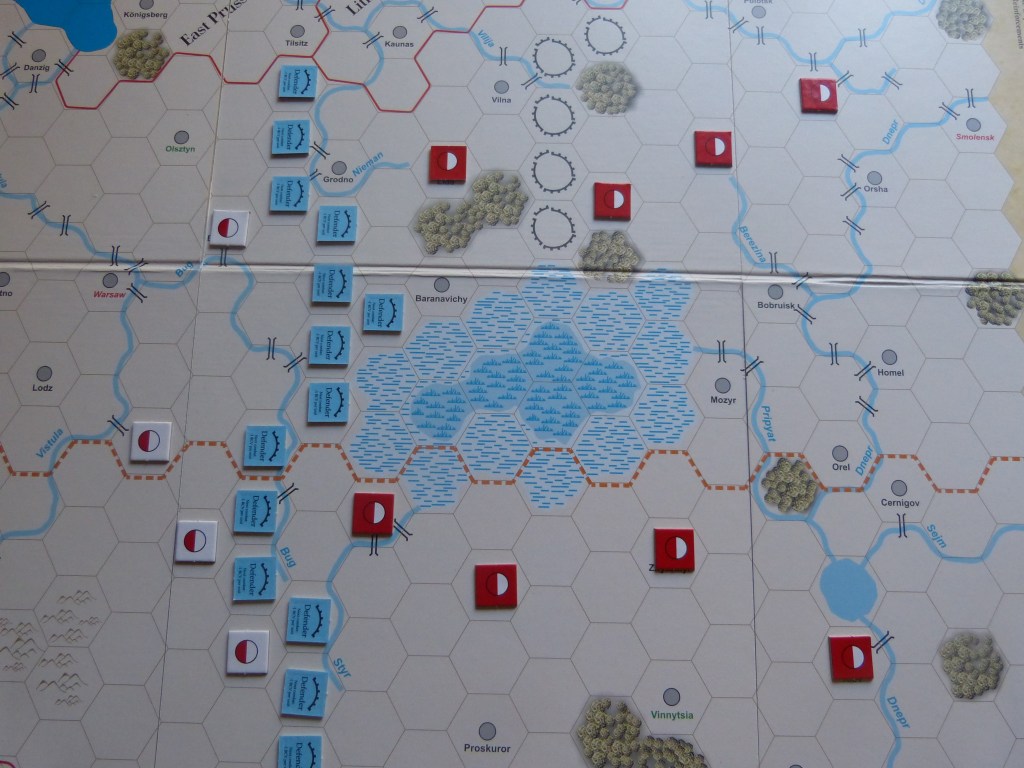
Things are initially a little less complex for the Soviets. Their forces are much closer to their own primary supply source and are somewhat more in position for a coordinated offensive effort than the Poles. The Soviet position is not ideal but moving units in numbers with decent command unit linkage should prove relatively easy in the early going. However, it is tempting to add the warning that if they do go “all-out” along the front west of Smolensk and it goes badly wrong (bad combat rolls, bad cards, bad judgement in the use of resource points) they might be in danger of losing the game rather swiftly. This photo and the one following show the “active” areas of the northern and southern portions of the front at the start of the game. I should stress that what follows is not some indicator of ideal play, but rather a means to get some feel of the game system across to readers.
The Soviets decide to get some offensive action going on both these sectors, while the Polish side attempts a level of force consolidation (including establishing a few more depots).
First turn combat achieves very little – the Poles are passive, and their consolidation attempts are not exactly a blistering success (owing to command units not being able to be in two places at the same time, not a great deal of anything actually got moving). Meanwhile, what forces the Poles did have on the front largely fended off some desultory attacks, although the force at Mozyr was brought out of supply by the mere act of a Soviet stack moving to contact (below).

In what I must admit was probably a bit of a mistake, while the Soviets made full use of the end of turn redeployment phase to get their line rather more sorted, the Poles only moved one unit as the idiot in charge of them (me) wanted to keep the Warsaw reserves (several divisions) in place to see where future events might clearly prompt them to go.
Cards for turn two gave the Poles one of those events that has to be played immediately (Stalin’s Insubordination), while the Soviets got to play a card that restored their turn two resource points to the printed total after their random dice roll took two points away.
The Mozyr force then commenced its unsupplied withering away, while the number of depots both sides had now got on the map chewed through an awful lot of their limited resource points before anyone got to activate anything. The consequence of this was that attacks were large but limited to a few particular locations, and were conducted knowing that neither side had anything left in the resource point bank to restore any units that came out of the action on their flipped (weakened) side. The Ukrainians have now entered the war as a Polish ally, although their forces are rather sparse to say the least.

Combat this time around, however, was far bloodier, with both sides suffering divisions eliminated as well as other forces flipped to their weakened state. The Poles came off worse, although they did have the consolation of these reverses occurring a long way to the east and with neither side able to repair damage in the short term.
One thing I did glean from my first experience with the combat system is that you should never voluntarily opt to lose or even reduce cavalry as part of the combat resolution process, as cavalry simply gives too much of a combat advantage if stacked with infantry. Whatever was going on with the mounted arm in Western Europe, here it clearly remains integral to fighting effectively, so, in most cases, if you can give up something else, do so.
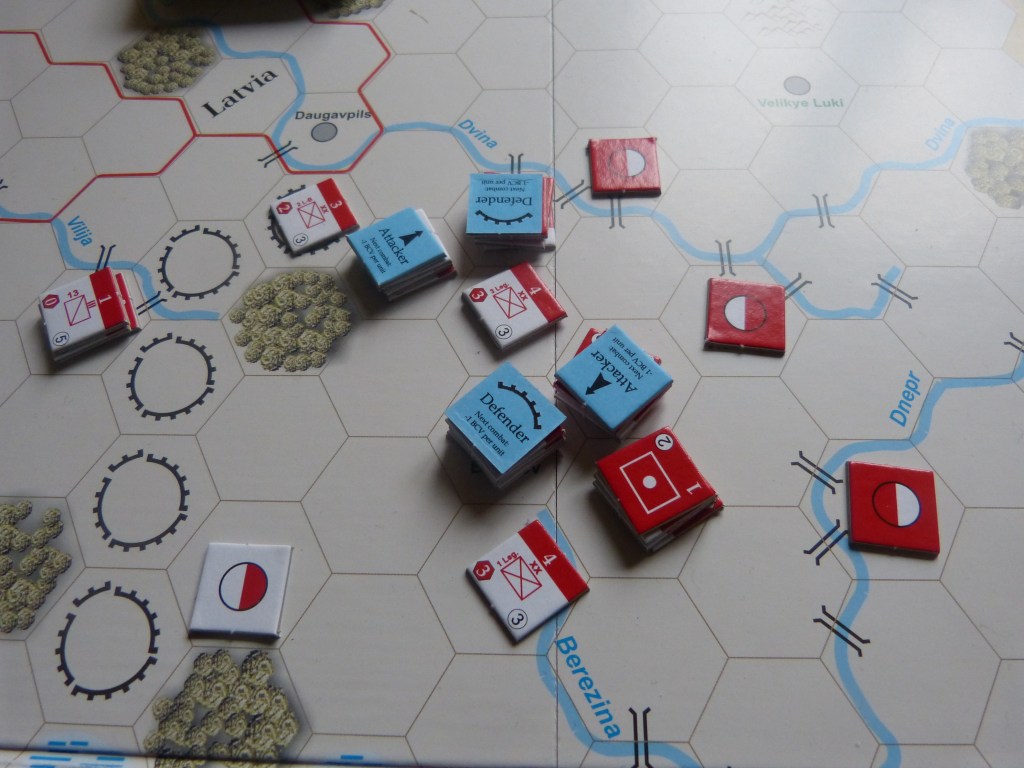
Further north the Poles get some revenge as they also manage a supported/coordinated attack (note: the supporting stack got faced the wrong way while I was counting factors) leading to not insignificant Soviet losses.
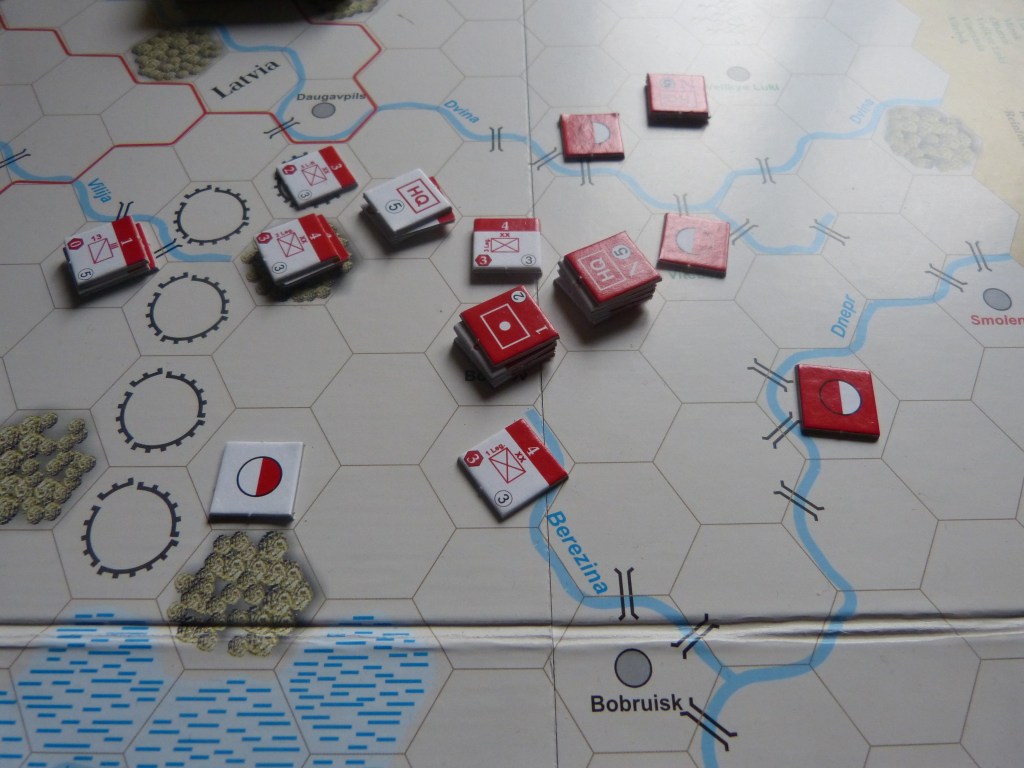
For turn three, both sides will have to nurse a number of damaged units through to the next rebuilding phase and hope that resource point rolls and event cards do not get to hamper matters too much.
Conclusions
I have played and analysed four Strategemata games to date, and it is hard not to see this as the best of the lot. What pushes it over the line is the quality of components, a fundamental clarity in the rules, and the simple fact that the overall system suits the subject matter very well. All three of the others have merit, but forty carefully thought-out event cards, a real wargamer’s map, and that bit of extra class that permeates this package swings it for me.
Of course, this is just my opinion and is bound to be somewhat subjective. The map presentation is minimalistic and the only features on it are those that have effects in the game. It is utterly functional, totally bereft of ambiguity, and possesses an aesthetic that might not win over everyone, but personally I found it seriously appealing. One component issue that is not so positive is the finish on the counters. While they look very well on the map, they have that “slippery” nature to them and are a bit prone to skid across the map out of their stacks irrespective of how careful one is. There is provision to keep larger stacks off-map and use force counters, but I doubt if anyone will play this without a few units pinging out of their location as you move things around.
The only other negative I need mention is the lack of a game summary sheet with reminders of the key modifiers and such. Looking at the overall package, probably the best place for this to have gone was on the back cover of the rules. However, this is given over to a bibliography tagged to the end of a substantial set of historical notes. While such bibliographies are always indicative of an in-depth and well-presented design, I really missed a handy quick reference to assist with working through combat processes and supply procedures. Yes, after a few plays you may get to remember everything anyway, but then you will play something else and when you come back to this, as I think you will, you will have forgotten those bits and pieces and have to swot up again.
But now, let us get back to some positives, and a little more exploration of a feature I have already mentioned – the supply system.
Where this really does a job in the game is creating that important sense of logistical “elastic.” This is something that campaigns fought over considerable distances must feature otherwise something fundamental is missing. Going way back into the gaming past, the system here did prompt memories of the SPI design, Panzer Armee Afrika. The system in that case also demanded the establishing of depots at points along the campaign trail, but if memory serves, omitted any form of in-game expenditure to keep the network alive. Here, by contrast, you do get a genuine feel of the elastic loosening and tautening depending on where the front line is. Thus, for the Soviets at game start, close to their primary supply map edge and only really requiring one extra depot here and there to keep things going, keeping logistics neat and tidy should not be too much of a task. But any significant advance westwards and things will become far more complicated, and for the sake of economy, you may find, as the Poles do initially in their more distant positions, that a great deal is dependent on assessing the continued viability of a given depot location – both because of geographical factors as well as never really having enough points in hand to establish all the depots you might wish.
There are important mathematical considerations here, which, if we allow ourselves to see the wood despite the trees, speak out rather plainly. If, for example, you have seven depots on the map, and, on a given turn, only eleven resource points in total, assuming all are chained properly, they will cost seven of your points before you get to any actual manoeuvres. And then, if you only activate three stacks, you will be left with only one point to spend on restoring a weakened unit, or, as the Soviets, re-deploying a unit to either side of the demarcation line.
Perhaps then, as the Poles themselves discovered, the best place to inflict the decisive defeat on your enemy is right by your own front door.
Finally, I regret I am not able to offer more comparisons with the two other games I referred to – I do not own them, have never played them, so must limit observations to obvious aspects and opinions from others that I find totally reliable. What I will say about this design is that I do find it an admirable entry into this field, and I am very glad to have had the experience with it that I had.

With supply needing to travel hundreds of miles if the chains are to be maintained, and only being able to place depots in cities, the current Soviet deployment is seriously costly in resource points – 8 points before any activity. By contrast, the Poles only need to spend 4 points to keep their side of the front in supply with all depots maintained.
Soviet options could include disbanding (temporarily) most or all the depots behind the two westernmost ones, accepting a cost of two resource points per depot to keep the remaining ones viable. However, this is likely to be a short term expediency measure, as any move further west will require more depots – and they can only be built if the overall chain is back in existence. The Soviets here might be close to victory in terms of captured locations or taking Warsaw, but a canny Polish player who has enough of an army left can find all sorts of possibilities as the elastic works in his/her favour.
Paul Comben
About the Author

Paul has been involved in the hobby since the early 1970s. Of largely Belgian ancestry on his father’s side, and English (Yorkshire) on his mother’s, after finishing his education he worked in tourism and student services, and also spent some time in the former West Germany. He met his wife Boo in 1990, and they married a couple of years later.
Paul hails from a long line of former servicemen – one grandfather was a sergeant in the BEF of 1914, whilst two of his great grandfathers were killed serving with the Royal Navy. His own father, who was born in Britain, served with the army in Malaya in the early 1950s.
