By Paul Comben
Designer: Emanuele Santandrea
Publisher: VentoNuovo Games
There are a number of ways to describe the nature of the German Blitzkrieg, but for the purposes of this introduction to Vento Nuovo’s latest release, it is probably best described as the military equivalent of a flat-track bully. German Blitzkrieg was fast – but, by that very fact, as well as the rushed reconstruction of the German armed forces operating in the early war period, it certainly did not like having to go too far, or last for too long. Put it in a longer struggle, or take it away from its ideal ground, and the bully would begin to weaken. Take it entirely beyond its comfort zone, and it was likely to die on its feet.
Of course, it thrived racing around Poland’s flat bits, with the vitals of the enemy just a few score miles beyond the jump-off point; and likewise, it did very well for itself going through the largely flat and cultivated bits of France and Belgium – it might have been a different matter if the Allies of 1940 had defended the Ardennes at least half as well as the US Army did in 1944…only they did not, and that, in turn, helped the decision come incredibly quickly. From Sedan to Abbeville, as the crow flies, is just a little over 150 miles of pretty easy going. Danzig (as was) to Warsaw (was and is) is about two hundred miles. Against forces of limited means, with most everything in the shop window, and nothing by way of notable distance or topographical difficulty to slow things up, Blitzkrieg did very well. But what about Russia? From the old fortress city of Brest to Smolensk, which sits close to the western edge of the Moscow ’41 map, is about 420 miles – of utter topographical misery…woods, forest, more forest, swampy forest and forested swamps. In other words, the panzers and everything following on behind could travel further than all the decisive stretches of the earlier campaigns put together, and still not really be anywhere the enemy could not do without. And from Smolensk to Moscow is another 250 miles…of woods and forest and swamp and rivers and indigenous hostility. In the game, this stuff slows, confines, and degrades many a unit seeking to progress through it – and this stuff sits in a broad belt right in front of the Soviet capital.
And it is at this point that Moscow ’41 gets underway – the Germans totally strung-out by their outstanding “success” thus far; and the Soviets trying to pick up the pieces of their own absolute failure over the same period of time, and work out what to do with whatever they manage to put back together. To put it bluntly, both sides are in a pickle – although whether that is more sauerkraut than beetroot must be largely a matter of individual perspective. But just to understand how these problems look and feel on the board, let us just remind ourselves of how the basic framework of recent Vento Nuovo designs presents military realities.

Key to the approach is the expenditure of levels of support from headquarters/leader blocks to support the function of the fighting units they command. All of these resources are at a premium, and err very much on the limited side of, well, limited. So, prod around too much with units just to fight or move for the sake of it, and you will burn up logistics for no useful end at all. You must therefore move to a purpose and not take your leaders over the brink! Furthermore, there are intricate relationships in these games (the partners thus far being Waterloo 200 and 1914: Germany at War) between what you may want to do and when it is best to do it. Beyond the purely moving and fighting aspects, this broad family of titles also challenges you to find the optimum time to replenish those command facilities, regroup, or augment forces, and thus employ what can superficially be regarded as time lost to put the screws on your opponent to a very considerable but not always immediately apparent degree.
Needless to say, invading Russia in 1941 is not the same as waiting for the Prussians to arrive in 1815, or for the BEF to get into place in 1914, and so the strong groundwork of this new design is thoughtfully supplied with mobile exploitation possibilities, airpower (just for the Germans), artillery assets, construction of defence lines, and events on the front peripheries affecting what goes on here and there on the main lines. However, even allowing for these factors, and for this being a design that brings dice back into combat resolution, I would recommend reading my articles (on this site) on both the earlier Vento Nuovo games if you are new to the designer’s approach and want to get some grounding into what is going on at a fundamental level.
Meanwhile, I would like to press on here with looking at the challenge that is likely to unfold as you contest the 250 miles between Smolensk and Moscow as the full game begins in the latter part of July 1941.
This game gives and it takes away. What do I mean? Well, just by looking at the map and the full game’s very first impulse pairing, we see that the German player has a great deal he or she can feel pretty superior about…only it all comes with subtle or blatant provisos, limitations, hindrances…as well as enraged Russians or partly bewildered Russians getting in the way.
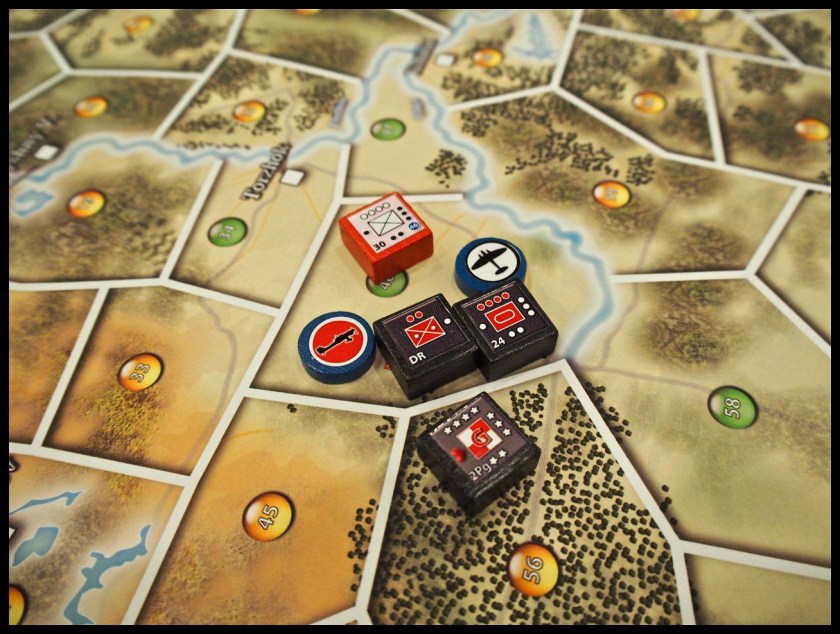
The Wehrmacht, as well we know, could never have got as far into Russia as this game relates unless Soviet incompetence were combined with German military prowess. So what precisely will make the German player feel superior as he or she reads the rules and sets up the pieces? For a start, the Germans possess a number of armoured corps that will hit harder than just about anything the Soviets have. Furthermore, their various army leaders are somewhat better at sustaining their units. There is also considerable amount of airpower waiting to be deployed; and on average, German units are just that bit more deadly in battle.
Great.

But now here comes the bad news: the Germans begin the full game with very little of anything on the map, and that coveted and highly useful airpower is not present at all – not unless you can bring it in via a random draw of forces in a reinforcement action. But a reinforcement action is not arrows moving east; on the contrary, it is arrows not moving at all as far as the front line is concerned. But, at least according to my own early and tentative thoughts, you have to reinforce pretty quickly; and you need to have the discipline as a player to know that you simply cannot keep pushing and shoving each impulse, but must pause to catch your logistical and reinforcing/replenishing breath…or else. If we stick with that opening German position, although you might want to begin the aufmarsch to this or that new glory, I am inclined to think that you have to bring up some serious quantity of your lagging forces – the ones still marching forwards in the July heat and dust, singing about blooming blonde Erika auf her Heide. And, just to display the subtleties of turning those screws and the game “taking away” in an understated form, if you do reinforce as your first or very early option, the Soviet player is going to have to think pretty hard about how to respond – for inherent to all these related designs is needing the initiative disc to perform such “admin” tasks, and even as the German player is giving it to Stalin’s stand-in, old Ivan or Dimitri or Vlad might have to go and give it back again in order to sort himself out.
Why?

A major issue at the very start of the full game for the Soviet player is that his forces, although visually abundant, are in total disorder after their mockery of a defence up to this point. A large number of formations are depleted to the point of waving bye-bye, and just as many either have no designated headquarters present or are too far away from the headquarters they technically belong to. The consequence of this is that if the Soviets choose to reinforce their lines, they can well end up with even more units that have no one to tell them what to do; and if the German player gets a sense of this, and is skillful enough to exploit it, a lot of Soviet units can end up like sitting ducks waiting to augment the toll of German kills. The other likely Soviet first or early impulse response (assuming they have the initiative to spend) is a strategic action that allows a decent number of units to move to positions where army administration begins to mean something. But that, of course, will not be augmenting those forces with more forces to give some cover somewhere. It is a difficult balance that players are challenged to find a viable solution to.
Earlier in this article I produced figures for the distances between the notable points of earlier Blitzkrieg campaigns, or the earlier or later parts of this campaign. What must become obvious to the German player, upon whom a great deal of the onus will inevitably fall to “drive” the game, is that while the shortest distance between two points is a straight line, going the direct way towards anything in this game is asking for trouble – and it rather hints at the tension between Hitler and his senior generals in 1941 as to what exactly they should be aiming for as the sheer breadth of the front started to complicate and multiply the options. If you are able to read the historical notes I wrote to accompany certain purchase options of this game, you will see that Hitler was far less eager to capture Moscow by direct and precipitate methods than were many of those same generals. In game terms, Hitler was rather more attracted by advancing the game’s representation of the Fourth Panzer Group along its Leningrad track, and also by moving other forces further to the south and southeast, where major economic assets awaited capture, and where the terrain was that much easier.
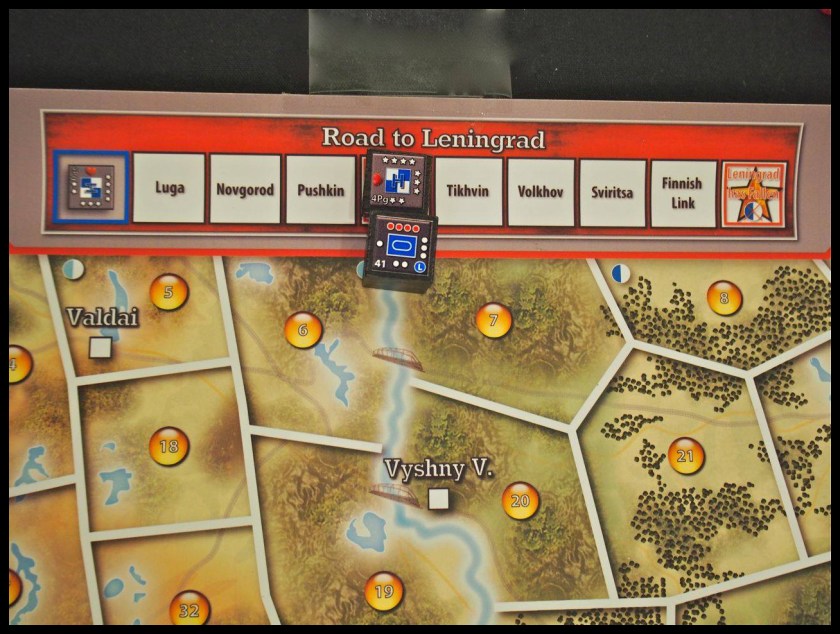
Take a look at the map: if the German player gives the Leningrad Track some decent attention, and does the same regarding the objectives which presage the fall of Kiev, a considerable amount of Soviet supply goes out the window (or off the map) which is a very handy thing to happen for the Wehrmacht as it not only gives them a victory boost and frees up a quality armoured corps, it also adds to the possibility of Soviet unit surrender through a want of supply.
Do you want this as the German? Ja! Do you want this as the Soviets? Niet! The last thing you want to see is the German player able to progress his or her forces on the Leningrad Track to the point it all starts getting seriously uncomfortable, and that will only be made so much the worse if the Germans take their time to move the enterprise properly, get into the wide open spaces on the southeastern quarter of the map, and have three victory locations right in their sights.

One interesting aspect of how this design plays its own games with the susceptibilities of players (and this playing to both sides’ apparent advantage…and disadvantage) is the difference between units eliminated by direct combat destruction and those “simply” forced to surrender. The Russians, within a certain amount of reason, should not mind plain and simple combat losses too much, as they have a decent chance of coming back. Units and defensive lines acting as little more than speed bumps are part of this approach, as is moving a mass of depleted knick-knacks in a way the German player can construe as threatening and then waste time fretting about. If the German player has lost track of where your ground-down units are, or if their forces are getting stretched and worn themselves, this is to your advantage.
Something linked to this, perhaps easily overlooked, is how Hans or Fritz…or Adolf, deals with your depleted bumps and your maneuvering remnants. If they just seek to eliminate them in pure combat, it is no big deal as they merely return to your reinforcement draw pool – and providing your logistical value has not been shot to pieces (lost too much too early) as I said earlier, you may well get them back. Even depleted better units (the ones with better hit chances in combat) can be used to this end. What you do not want however, is some clever invader looking for surrender results against your bumps and ruses, and causing some quality units to disappear forever as well as potentially adding to the German victory level. Note: Surrendered units never come back, and if lost in sufficient numbers, improve the opposing side’s logistics!
Nevertheless, it has long been the maxim of those who have defended Russia that you trade space for time…and then wait for the bad weather to arrive. The question is: how much space to trade, and when is the right time to give it up? Naturally, this will all vary from game to game, in terms of how losses are playing out and what is showing on the clock. The German player, unless he or she is inordinately lucky with their dice rolls, will be making the Soviet player’s job that much easier by conducting direct and brute assaults; but if but if things are moving on tracks about the board and curling around to the south, the Soviet player must think hard about where to make and stand, and when is the time to let go and move further back – providing their HQ units are still doing enough of a job.


A clue for withdrawal or any form of cutting your losses may well come with a change in weather – or rather, the growing likelihood of a change in weather. Once the summer heat has gone by, and blooming blonde Erika has been replaced by frigid Freda, there is a growing chance of rain (the chances get “upped” for each die roll to ascertain if weather stays “as is” or gets worse). After the dust will come the rain, and after the rain will come the snow. As the Soviets, you will almost certainly want weather deterioration nearly all the time; and note, once weather progresses along the scale of intemperate misery, it never gets better – only worse. Once the modifier has reached a certain level, you can count on a change in the climate pretty soon, and that may help you decide when to withdraw as the Soviets, or if you really need to get a move on as the Germans.
Blitzkrieg does not like bad weather any more than it likes long distances between things. In this game, bad weather plays merry hell with German logistics and German airpower and German panzers trying to push forwards…just like it did in real life…several times. At this point, whoever is moving the Wehrmacht blocks might want to make a careful count of what they already have in terms of winning short of winning everything. Take enough key cities and add a pile of Soviet surrendered units, and you can win the game short of winning in full-on Barbarossa terms. On the other hand, if you do try to win everything, utterly and completely, with your panzers on the streets of Moscow and Stalin dead or rendered merely a hapless fugitive, you might just overstretch your already overtaxed Blitzkrieg…rather like at least one other invader before you, and then where will you be? Napoleon also got to Smolensk, and then thought he might stop or go another way. But he ended up on Moscow’s very own path to temptation, and we all know what happened next.
Moscow ’41: Four Things to Watch For
1) Luftwaffe Fliegerkorps
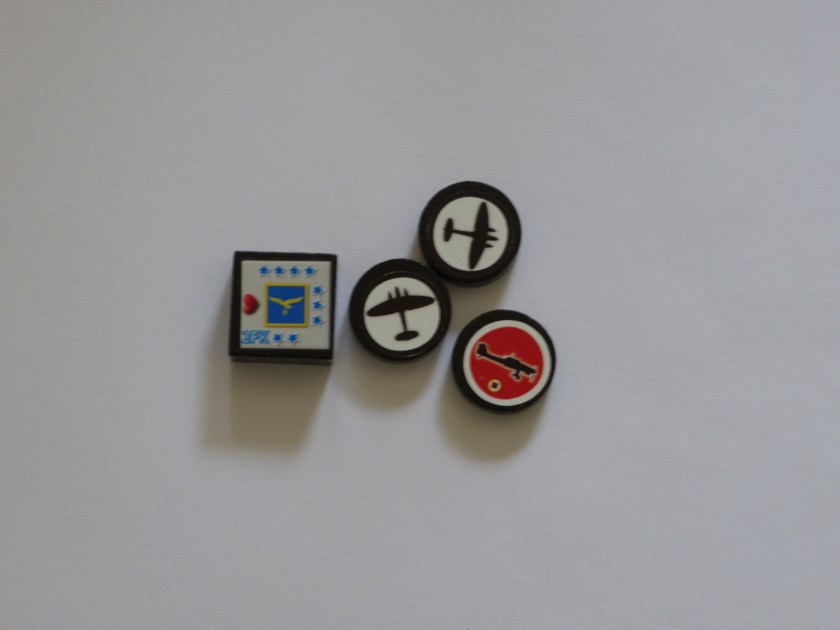
These come in as reinforcements, and given their ground support capacity, the German player ideally needs to draw them sooner rather than later. If you only draw the one first time, DON’T spread their formations among several capable targets, as Soviet Anti-Air might cause the whole lot to abort.
2) Don’t Lose Track!

As the German, if you can get the Fourth Panzer Group up and running on the Leningrad Track, you chop Soviet northern supply and put a victory location within your grasp. Within the game framework, this German effort costs commands rather than blood, and if playing with optional rule 14.2 you may tempt Zhukov off the main map. Always worth considering.
3) Take Control of Yourself!

As the Soviet player your initial lines are likely to be in a complete mess, with units either lacking an HQ or too far away from their HQ to be effective. Playing a Strategic Action will address this by moving units and HQs where they need to be. And remember: Zhukov can command just about anything and anyone.
4) Timing is Everything!
If you can, plan your playing and use of the Initiative Disk so your opponent has to react and therefore has to give it straight back to you.
We like to hear from you. Please feel free to leave your comments below.
About the Author

Paul has been involved in the hobby since the early 1970s. Of largely Belgian ancestry on his father’s side, and English (Yorkshire) on his mother’s, after finishing his education he worked in tourism and student services, and also spent some time in the former West Germany. He met his wife Boo in 1990, and they married a couple of years later.
Paul hails from a long line of former servicemen – one grandfather was a sergeant in the BEF of 1914, whilst two of his great grandfathers were killed serving with the Royal Navy. His own father, who was born in Britain, served with the army in Malaya in the early 1950s.
Related Articles:
Triumph and Tragedy – A Boardgaming Life Review
ARDENNES ’44 A Boardgaming Life Review and After Action Report
Production Blocks: East Front II – A Boardgaming Life Reviev
The Maps of Collapse – Wargaming the End of the Reich
My Forty Years on the Eastern Front: A Boardgaming Life Game Survey
The Last Thousand Hours of the Thousand Years Reich
Blocks in the West- A Boardgaming Life Review by Harvey Mossman

Great overview. I am a big fan of block games and I can’t wait to get this one on the table.
Hello Seth
I wanted to whet players’ appetite for this design with a fun and light read rather than getting too immersed in its mechanisms – which, as I said, are not too far removed from the likes of 1914: Germany At War or Waterloo 200.
One plus from that, as well as the relatively small amount of blocks, is that getting this game prepared and set up takes very little time…even for me.