Helpful Hints for Worthington Games’ Caesar’s Gallic War
By Daniel Berger (Designer)

Guest columnist Daniel Berger, designer of Caesar’s Gallic War for Worthington Games, pens some useful strategy tips for ‘The Boardgaming Life’ readers.
Background
Caesar’s Gallic War is a two-player game that covers Julius Caesar’s conquest of Gaul from 58 to 51 BC. One person plays the side of the Romans, while the other plays the side of the Germans, with both players vying for control of the various Gallic tribes. The game is eight turns long, with each turn representing one year.
The game uses blocks and area movement, with simultaneous card play. Players use cards to collect allies, move units and attack or play events. Each Roman unit represents one legion plus auxiliaries, with the Gallic blocks representing the various tribes throughout Gaul. Certain leaders are represented in the game, including Julius Caesar, Vercingetorix and Ariovistus.
The goal for each player is to control the most tribes at the end of the game. Victory points are also awarded for killing certain units. The Germans can win a sudden death victory if they kill Caesar.
The design contains a mix of ideas from Columbia’s Hammer of the Scots and Richard Berg’s Julius Caesar, and some ideas of my own. It is slightly more complex than Hammer in that each card can be used for any one of several different actions, including the ability to sway tribes through activations or political actions, as well as naval movement (including amphibious invasions for the Romans), revolts, supply and wintering, and special leader abilities.
This is my first game design. It was largely inspired after a round robin tournament of Hammer of the Scots I had just participated in, during which time I happened to be tinkering with Julius Caesar, combined with my love of ancient history. I saw a good opportunity to merge some concepts from both games, as well as a general lack of coverage of that particular campaign in the gaming arena, so I took it.
While I do not have any plans to turn this design into a series, I do have other designs I’m working on.
his strategy tips here on The Boardgaming Life!
You can get more info about Caesar’s Gallic War on its BoardGameGeek page.
Germans
You have an uphill battle in this game. You’re facing legions that are both stronger and faster than you, and Gauls that will need some “convincing” with regards to the long term threat the Romans pose to them. What’s a barbarian to do?
First and foremost, you must not engage in standup battles with multiple Roman legions outside of fortresses. You will probably lose, and probably very badly. Even if you have the odds in your favor the legions, with their “A” initiative rating, can simply retreat. Your goal is to cause attrition to the legions whenever and wherever possible so you can drain the Romans of their supply points. That typically means fighting only in fortress areas where you get a better initiative rating and a bonus.

That being said, it is sometimes better to let a tribe fight to the death if the area is doomed to fall anyway, as you wouldn’t want to let the Romans capture the tribe at full strength.
Single legions, on the other hand, may provide a golden opportunity for you to strike. You must not only have the force required to destroy the legion, but be able to cut off any and all retreat routes. Such opportunities are rare, and must be taken whenever possible, even if it potentially means the loss of a tribe in the process. The 3 VP gained from the legion’s destruction far outweighs the loss of a tribe that can be reacquired later. On top of that, it removes the legion from the board for a turn, weakening the Roman presence in general.
Second, you must move Ariovistus and his Germanic hordes out of Germania at the first available opportunity. Ariovistus has the ability to “persuade” neutral Gauls to his cause without a fight. Use it. Even if it should fail, do not be afraid. Ariovistus is a B3, and the rest of the Germans are B2. With their higher initiative rating (and Ariovistus’ higher battle rating) you should be able to dispatch individual tribes with minimal damage.
Moving out of Germania also prevents the Romans from driving up the Rhine and launching an attack into Germania. If you haven’t conquered the Menapi and/or Treveri you could be pinned in Germania and destroyed. This must be avoided at all costs.
Third, take advantage of your ability to play two Neutral Tribe Activations per turn. The goal of the game is to bring the Gauls over to your side. Bring over as many as you can. Typically you’ll want to select fortified areas that you can potentially reinforce the next round, or an area that provides a potential retreat path, away from the Romans. However, if you select a tribe that cannot be reinforced there is a good chance that the Roman player will respond by overrunning the unfortunate tribe before you ever get to use it, making it a useless play. Try to avoid that.
Fourth, don’t forget to use Political Actions! If you find yourself in a position where you’re strong enough to defend but too weak to attack, and you aren’t sure what to do, use your card as a Political Action. Your target, if possible, should be the name of the tribe on the card so that you can get the -1 bonus. If that’s not possible, then your target should either be a fortified area or an area close to Transalpine Gaul. The latter can force the legions back south to deal with the issue and potentially prevent a forced march the next round. The Allobroges or Helvetii are good targets in this case.
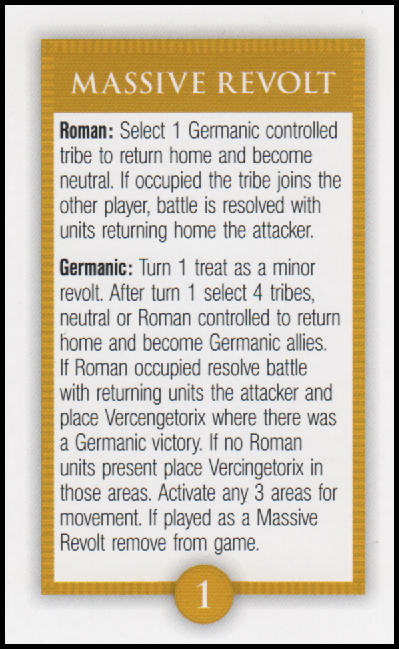
The last thing I want to discuss is the Massive Revolt. Remember, even if you don’t draw this card normally, you will be able to put it into your hand if and when the Romans acquire 13 tribes. The Germanic player should avoid the temptation to play this card too early (in fact, you cannot play it on the first turn). In practice you’ll want to wait until at least 54 BC (turn 5) so that you don’t give the Roman player too much time to re-conquer those tribes.
This will give you 4 tribes automatically (plus Vercingetorix) combined with a 3-op move. This is a prime opportunity to surround and destroy one or two legions. On top of that you can now implement one raid per turn. If you see that the Romans have been damaged and are low on supply points, you should take advantage of the opportunity to knock down Roman supply even more.
Romans
You, too, can use Neutral Tribe Activations and Political Actions to bring the Gauls over to your cause, but your primary means of winning the game is via conquest. You have stronger legions with the best possible initiative, and the ability to force march and invade. The question then becomes where to attack and how much force to apply. Unlike your opponent, you must manage your supply as well.
In the early stages of the game you should play relatively conservatively. You have powerful legions, but only six of them at the start. Do not leave them in a position that could get them cut off and killed. Use your Gallic allies not only to absorb casualties if necessary, but to protect your legions from possible counterattack.
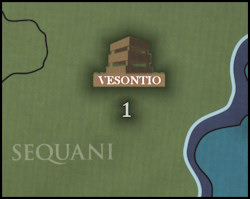
There are typically two routes to take with the Romans and they each have their advantages. The primary route (and probably the most popular) is the Northern route, where you immediately knock out the Helvetii, and drive up into Sequani territory. This has the advantage of eliminating a powerful tribe that’s close to Transalpine Gaul, while the fortress at Sequani (yes, there is one there, make sure you remember that; see official errata.) provides not only future supply points, but also serves as a potential launching point for raids into Germania itself. From there you can take Mandubii territory and push north into Belgica or towards the coast in order eventually to launch an invasion of Britannia.
The other route is the Western Route. This means capturing Cardurci territory, where you can then drive into Santones territory. This gives you an immediate port from which you can then raid the entire coast, including Britannia. It also then lets you use Political Actions against Britannia. In some ways this approach is more flexible, but it does have the disadvantage of not allowing you to mass your forces against large concentrations of Gauls.

Whichever path is chosen, you will want to capture the fortified areas whenever and wherever possible. Controlling these areas not only provides supply points each turn, but also deny the enemy a place to concentrate his forces against your legions. Fort busting can be difficult because of the advantages fortified areas provide. This is where Caesar’s special ability comes into play. I would say, unless you have overwhelming force, you should always use Caesar when assaulting a fortified area. His ability to fire before the defenders is crucial not just to winning, but to reducing the number of enemy dice rolled in subsequent rounds.
Once you’ve conquered a territory, the question at the end of every turn will become whether or not to garrison the area or have the legions return to Transalpine Gaul. Here you’ll have to balance several factors, in addition to keeping in mind that Caesar can only winter every other turn. First, how important is the area strategically? Second, can you afford to garrison a legion there given the supply situation? Lastly, how vulnerable are the garrisons to attack?
This is difficult to answer because it depends, in part, on whether or not the Massive Revolt event has been played. Until that event has been played, every legion you leave in the field is susceptible to being cut off and killed in a single stroke. You will definitely not want to leave Caesar in a vulnerable position, or you’ll lose the game instantly. There are two ways to approach this. One is never to garrison an area with more than 1 legion because it limits the potential for VP’s gained by your opponent. The other is to garrison an area with a minimum of two legions (harvest permitting) in order dissuade your opponent from attacking in the first place, especially in fortified areas. Both approaches have their advantages. Generally speaking, however, I typically garrison the fortified areas both because they provide Supply Points and because they’re difficult for your opponent to assault.
Synopsis
Caesar’s Gallic War presents a smaller, but highly disciplined and organized army in the Romans, matched up against a larger but diverse and disorganized German and Gallic adversary. Each side must play to its strengths. For the Romans, that means leveraging your military prowess to its maximum potential while utilizing a political approach where and when necessary, all while managing your logistics. For the Germans, you must know where and when to fight the Romans, while using your superior political advantage to maximum effect.
