by Russ Lockwood
Designer: Florent Coupeau
Publisher: Vae Victus
We had been wanting to play this French import wargame, Orages a L’Est, for a while, so we finally cracked it open, popped out the counters (well, used a knife to cut out the counters), and set up the Turda 1944 game. Orages a L’Est actually has two games set in 1944, Turda, featuring a joint German-Hungarian counterattack against the Soviets and the Romanians near that town in Transylvania, and Tali-Ihantala in Finland. I picked Turda because it had a flat, featureless map, and, how many times can you say 1944 joint German-Hungarian counterattack?
The pair come in a 2015 standalone wargame from Vae Victis, the French wargame magazine. The rules come in French and English, which is very helpful because most of my French consists of the words Merci and Merde. Don’t confuse the two. We set up the introductory game with the initial German-Hungarian attack against the Soviets. As noted, the map is wide open, with only a couple villages, roads, woods, and minor rivers. A hex equals 2.7 miles. Most units are regiments and battalions, some divisions. One turn is one day.
Cortana, Where Is…?
This First Look is based on exactly one turn of a two-turn game. It took us about two to two-and-a-half hours to do one turn because the rules scatter relevant information throughout. The rules, so far, are complete, but finding the information involves scrounging through the pages.
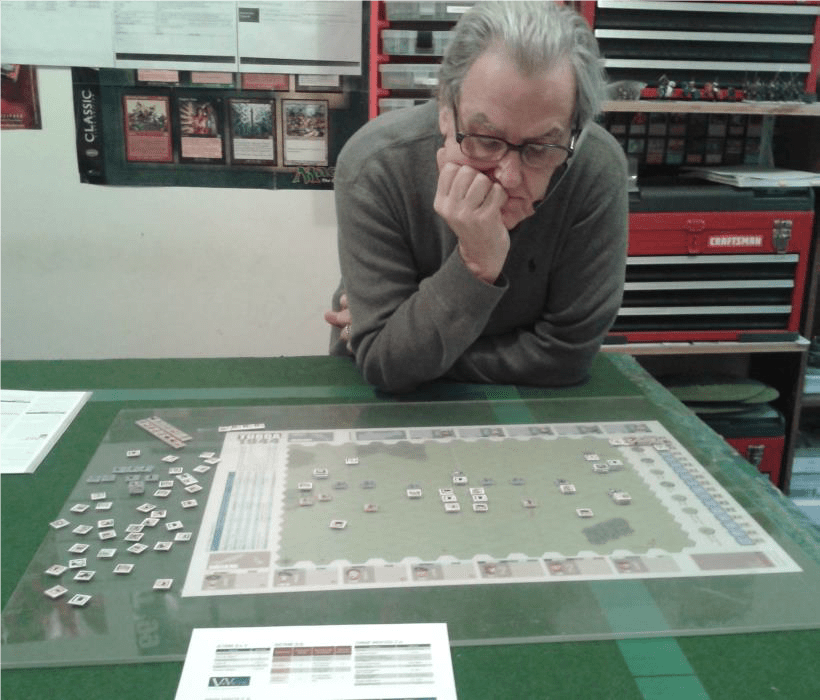
Dennis deliberates at the end of Turn 1.
We reworked the first combat several times — doing, undoing, redoing, and doodoo-ing the simple calculate the odds and roll the die system. Pardon my French, but something must get lost in the translation. Ba-dum-bum.
Standard?
It’s standard IGO-UGO with increasingly standard alternate activation of one HQ at a time. ZOCs stop movement, although you can leave a ZOC for an extra movement point. Infantry MP = 4. Cavalry, Mech, and Tank MP = 6. Stacking is 6 ‘step points’ with a typical infantry unit having 2 or 3. Each infantry and cavalry unit come with 2 Action Points (Mech/Tank with 3 AP). Movement is 1AP. Normal Attack is 1AP while Prepared Attack is 2AP. Digging in is 1AP.
So, you can move more than once without attacking, or move and attack, or start next to an enemy and give ’em a pasting attack. Here’s where the problems start. Can two units in different hexes attack the same defender? One sentence says something to the effect of perform the AP actions per unit. Flip, flip, flip. No, wait. You can include other units in adjacent hexes. But it’s next to another enemy unit. Does it have to attack the other enemy unit? Flip, flip, flip. No, it does not if it is starting next to an enemy unit. What if you move there? Flip, flip, flip. You’re still good. But if you move another unit up, do you do a Normal attack because a unit moved up, or, a Prepared Attack by the unit starting in the enemy ZOC along with the unit that moved up. Flip, flip, flip. Nope. The preferred attack still goes off. Flip, flip, flip. Wait, what’s this reference to a Prepared Attack bonus? Flip, flip, flip. Ah, +2 columns.
I will point out that each time you read “Flip, flip, flip,” we calculated the battle anew. All answers were in the rules, just in disparate places and often not under the appropriate heading (appropriate to me, anyway). In other words, the usual first game confusion applied, if seemingly a little more than usual.
What Makes This Different?
You can activate an already activated HQ a second time, but get a fatigue marker (half combat strength until you get rid of it — 1 AP). That’s a little different to me.
Got tank?
Breakthrough results on CRT nullify ZOCs. For armor units, you can punch through and encircle nearby units. This is not as devastating at the Ardennes ’44 breakthrough rules, but about half the effect.
Support assets (artillery, pioneers, etc.) are assigned at the beginning of the turn to a specific HQ. These assets either add or subtract from the die roll or add or subtract columns to the benefit of its bearer. In the introductory game, the Soviets had one light artillery unit at start — guess right for your own offensive actions or where the enemy will attack. Otherwise, the assets sit around unused. At the end of use, the owner rolls a die to see whether it stays in the game, leaves the game, or re-enters the game in a couple turns. It’s a nice mechanism that makes you think about allocation.
The CRT uses odds (with column shifts and die modifiers for various influences like terrain, support, and so on. It appears that both attackers and defenders retreat in many instances. Flip, flip, flip. Ah, defenders first.
You can trade space for casualties in the CRT, either taking a step loss and staying in the hex or ignoring the step loss and retreating a hex. As the odds grow and die rolls get more extreme, some results include a mandatory step loss and breakthrough advances. Based on a few combats in one turn, it works, but the extra markers start to get unwieldy.

Sample counters. First number is combat strength, second (smaller) is number of steps,
and third is quality.
For example, in a three-step unit, when the first step is lost, you
place a -3 step marker (-2 for Germans) instead of flipping over the unit. Now, you have to drag that extra counter around. When the unit loses a second step, then you take off the -3 (-2) and flip over the unit. Why not make the third step the extra counter? When a unit retreats, it gets a D (disrupted) counter on it (half combat points and comes off at the end of the turn).
How Does It Work?
Once we figured out most of the rules, quite well. The later activations went a whole lot smoother and we started to see how bits and pieces of the system worked.
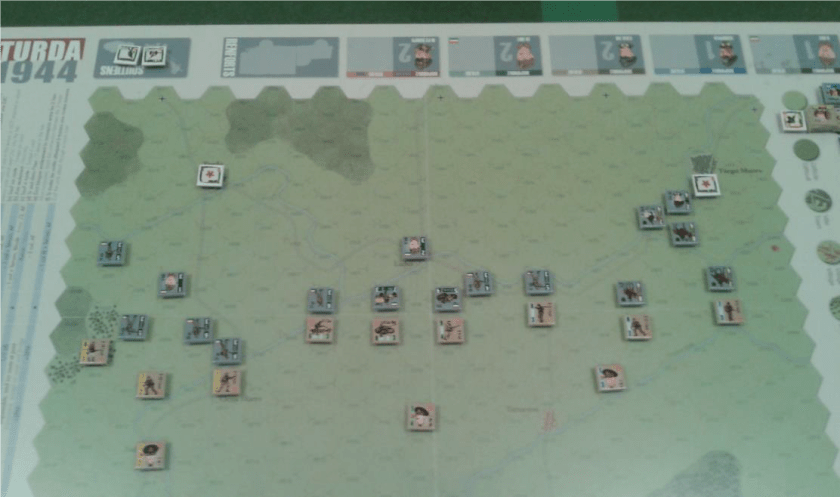
Starting Setup
On turn 1, the Soviets cannot cover the entire map with ZOCs. The Germans can, and so it is relatively easy for the Germans to concentrate and whack something. When you have the edge in counters, it’s a good idea to do a preferred attack when you can — preferred attacks get a two column shift so that 1:1 attacks become 3:1. Likewise, if you need to keep your force intact in the defense, pulling back a hex so that the enemy must move and normal attack is a good idea.
The Soviets tried at attack on the left, zapped the Hungarians for a step and pushed them back a hex. The Hungarians counterattacked in the center and right, popping the Soviets for steps. On the right, I used an activation to pull a unit back behind the minor river. The fatigue detriment helped the SS cavalry really whack it and cross the river (1 VP to the Germans).
The Soviets get a pile of reinforcements on turn 2, but it’s only a two-turn game, and so will be unlikely to intervene much and toss the SS back over the river.
Snipe and Tripe
We flipped marker counters a lot. The marker counters all do double duty, so finding them was a hunt and inspect-type of move. We swear counters with the same face have different backs. I’ll have to check that.
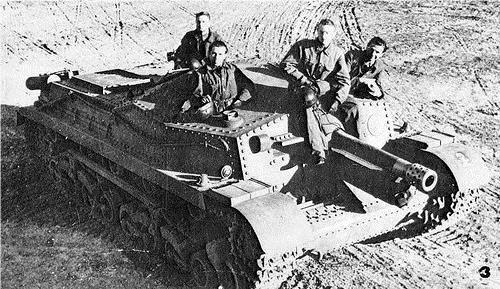
One of the Soviet motorized units has a drawing of a tank on it, but it is not a tank unit. Tank units have stars on them, which help determine armor supremacy (a roll on another table) that may include column shifts and die roll modifiers. This may just be a simple art mistake.
The Hungarian motorized unit has an infantry figure next to a truck. A real tank unit — with two stars — has an image of tank unit on the counter.
Play Again?
We’ll continue the game, or maybe set it up again, or maybe set up a longer scenario. In any case, this has a chance to be a solid system. We just need more game time to figure it out, but it looks promising.
About the Author
 Russ Lockwood has been bouncing around the wargaming world for the last 25 years in one capacity or another. Most know him as creator and CEO of MagWeb.com (on-line archive of 162 military history and related magazines from Coalition Web, Inc. from 1996-2009). He appeared on camera on The History Channel (Modern Marvels), ABC, NBC, Fox, and various cable TV shows. MagWeb was also covered by the NY Times, USA Today, and other newspapers, a variety of trade and consumer magazines, and a multitude of on-line sites. He’s given lectures at various HMGS conventions, Origins War College, and various professional meetings and seminars. Although MagWeb closed in 2009, those white MagWeb rulers still appear on wargaming tabletops across the country.
On the prior professional front, Lockwood was Editorial Director of AT&T’s web division, Senior Editor at Personal Computing Magazine, Assistant Editor at Creative Computing Magazine, Telecommunications Editor for A+ Magazine (Apple), tech writer at AT&T, Staff Writer (Financial) NY Times Information Service, and freelancer for PC Sources, Windows Sources, PC, MacUser, Byte, Restaurant Business, Hotel Business, Computer Buyer’s Guide and Handbook, and other magazines. He also hosted a radio show, ComputerWise, for five years, and was an on-line editor for ZiffNet on Compuserve and Ziffnet on Prodigy.
He is currently a freelance editor and writer covering financial and defense news, with a concentration on the retail industry. If you are really interested, go to Linked In, where he maintains a profile.
On the miniatures front, you may have seen his byline in various hobby publications in the 1990s and 2000s. Lockwood is also the author of: Snappy Nappy: Simple, Subtle & Ultrafast Miniature Rules for the Napoleonic Era, and, Hyperspace Hack: Ultrafast Spaceship Fleet Battles with Miniatures (both published in 2009 and available from http://www.onmilitarymatters.com and http://www.caliverbooks.com). Lockwood is also the editor of the Secrets of Wargame Design series, releasing the fifth volume in 2015.
Related Articles:
My Forty Years on the Eastern Front
Production Blocks: East Front II
How War Works: A BoardgamingLife Review of Playford Games’ Moral Conflict Series
Paul Koenig’s Fortress Europe: A Boardgaming Life Review
War Without Mercy: Everything Old is New Again (Review)
The Maps of Collapse – Wargaming the End of the Reich

Hi,
First, I’m glad to see that you like the game.
You should try the longer scenarii indeed as the introductory scenario is meant mostly to learn the principles of the system.
About the art mistake, is it about the D8 Cav Mot? This is a Romanian division of cavalry. But in 1944, they didn’t have horses anymore (supposed to be replaced by tanks) nor tanks (few were provided by the Germans and most were damaged/on repairs). So no star for this unit despite the image of tanks.
Regards,
Florent
PS: the name of the magazine is Vae Victis :-))